
How to deploy and distribute the workload on a multi-cloud Kubernetes environment
This article will guide you through the best practices to deploy and distribute the workload on a multi-cloud Kubernetes environment on Scaleway's Kosmos.

Scaleway participated in the last Devoxx Poland to host a conference called Introduction to Kubernetes, and a workshop on the best practices to configure a Kubernetes cluster.
This article aims to make the full content of the workshop available for everyone.
We will be using a Kubernetes Kosmos cluster, presented in this introductory article, and deep-diving into specific concepts introduced in this second article.
Technical prerequisites to follow this hands-on workshop
⚠️ Warning
To avoid adding more complexity to this very technical content, we will use root or default users provided by our Cloud providers.
In a production context, it is highly recommended to create specific secured users on your infrastructure's servers.
We will balance between concept explanations and operations or commands.
If this icon (🔥) is present before an image, a command, or a file, you are required to perform an action.
So remember, when 🔥 is on, so are you. Let's get started!
For the purpose of this workshop, we are going to use a Scaleway Kubernetes Kosmos cluster, which allows instances from multiple Cloud providers to be managed by a single Scaleway control plane.
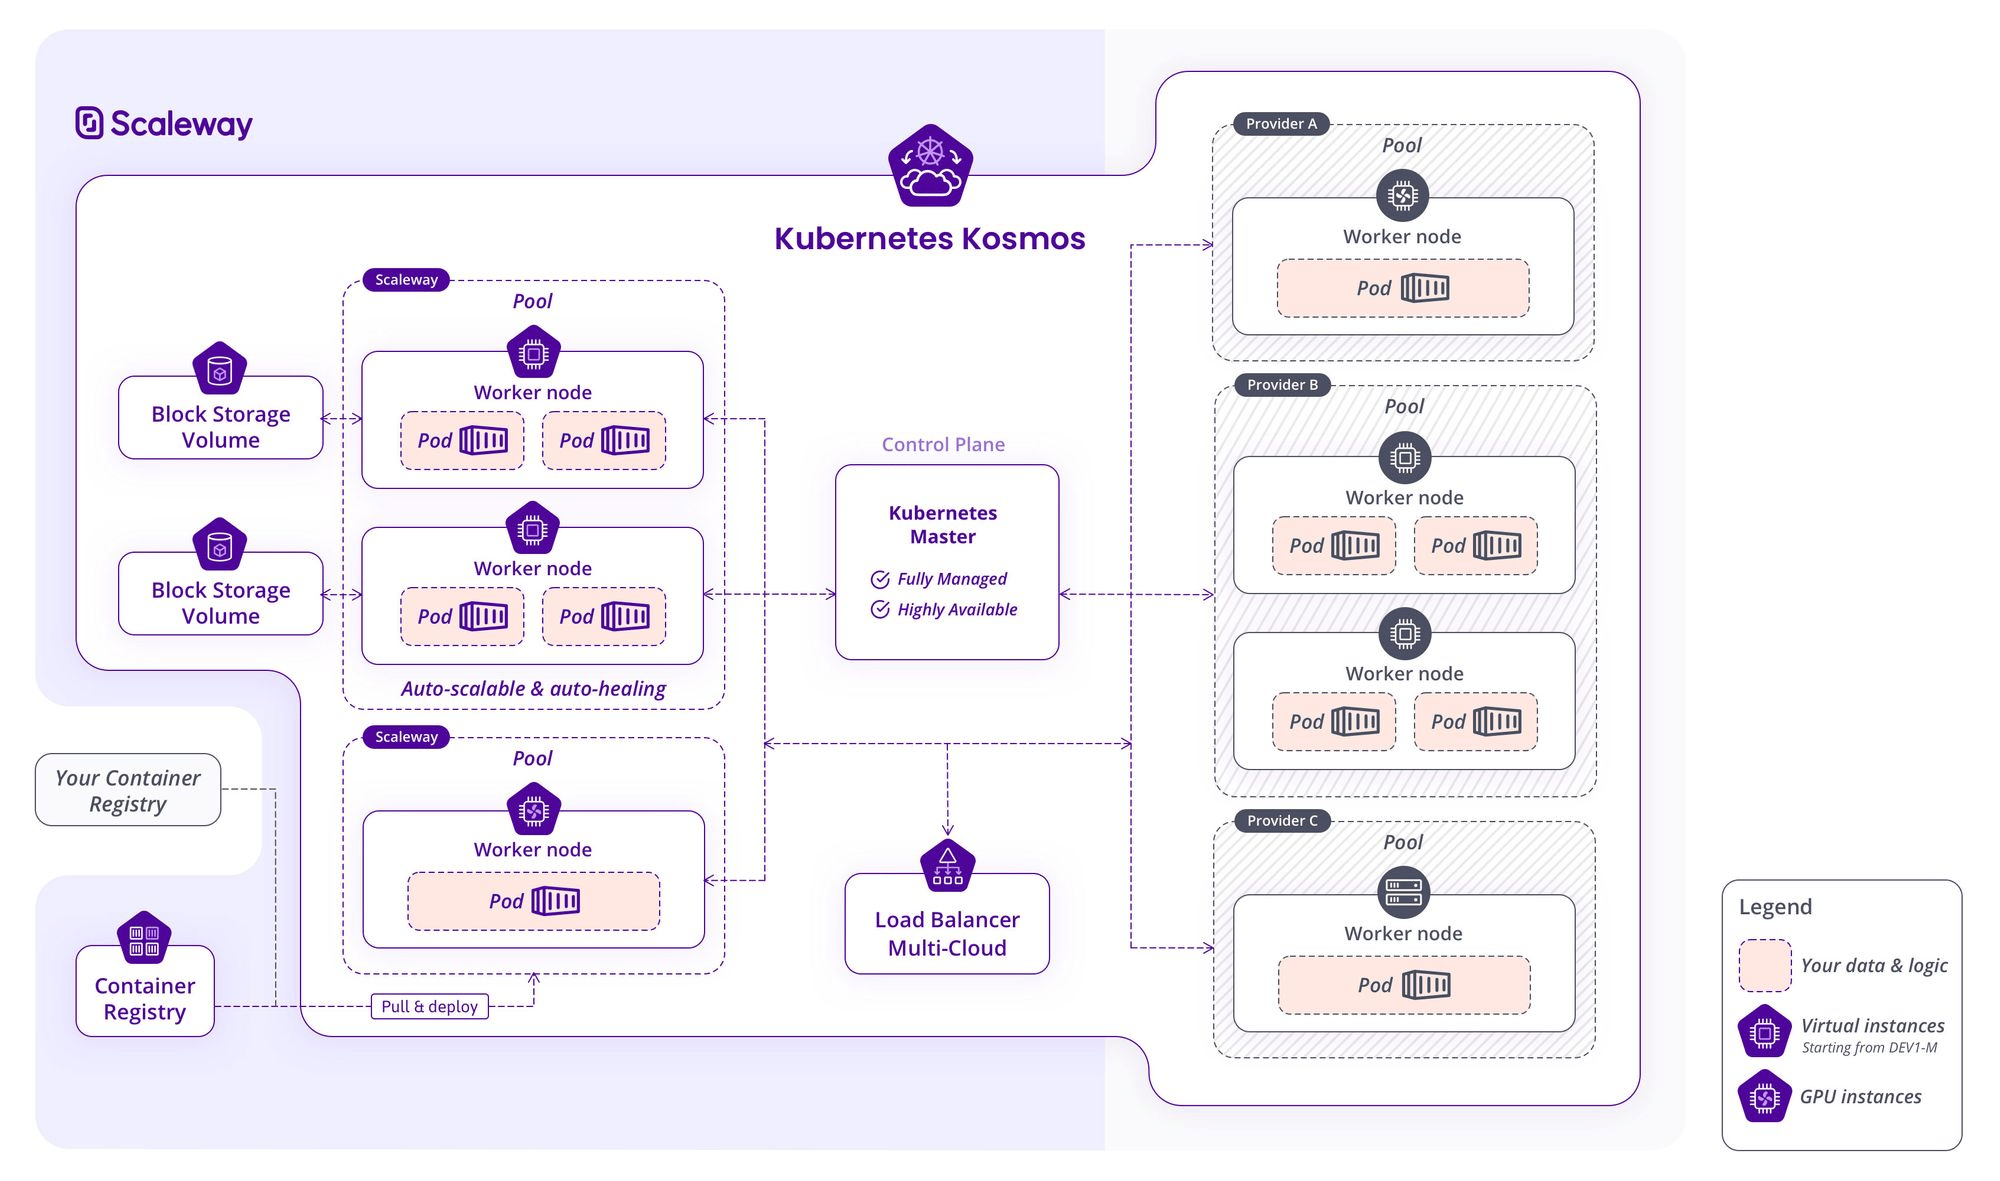
The Kubernetes Kosmos cluster we are going to build and work on will have the following characteristics:
To start with this workshop, we need to log in to our Scaleway account and create a managed Kubernetes cluster.
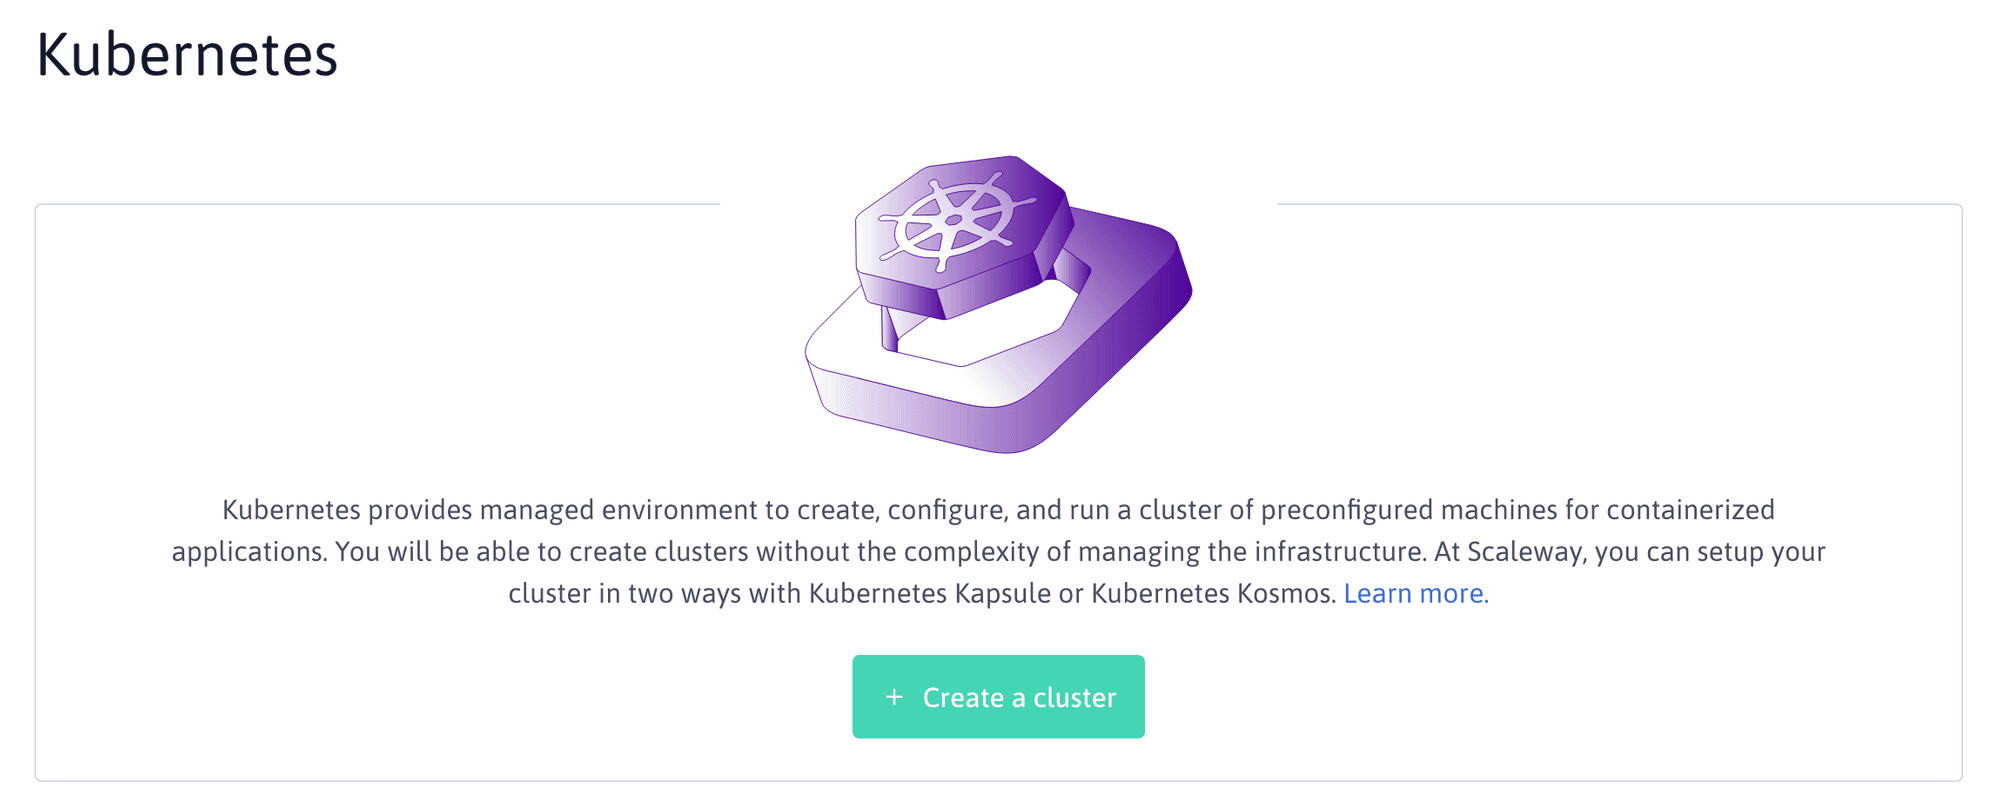
🔥 Select Kubernetes Kosmos as the type of cluster you want to create. You can choose to locate the control plane of your cluster in any supported region: Paris (fr-par), Amsterdam (nl-ams), or Warsaw (pl-waw).
Here we are choosing to locate our control plane in Paris, but any region is compatible. Also, we decide to set up our cluster with the latest version of Kubernetes available at the time of writing: k8s 1.22.
🔥 Click the Create a cluster button, as we will add and configure node pools separately later on.
Our Kubernetes Kosmos control plane is being created. Once available, we are directed to its overview tab.
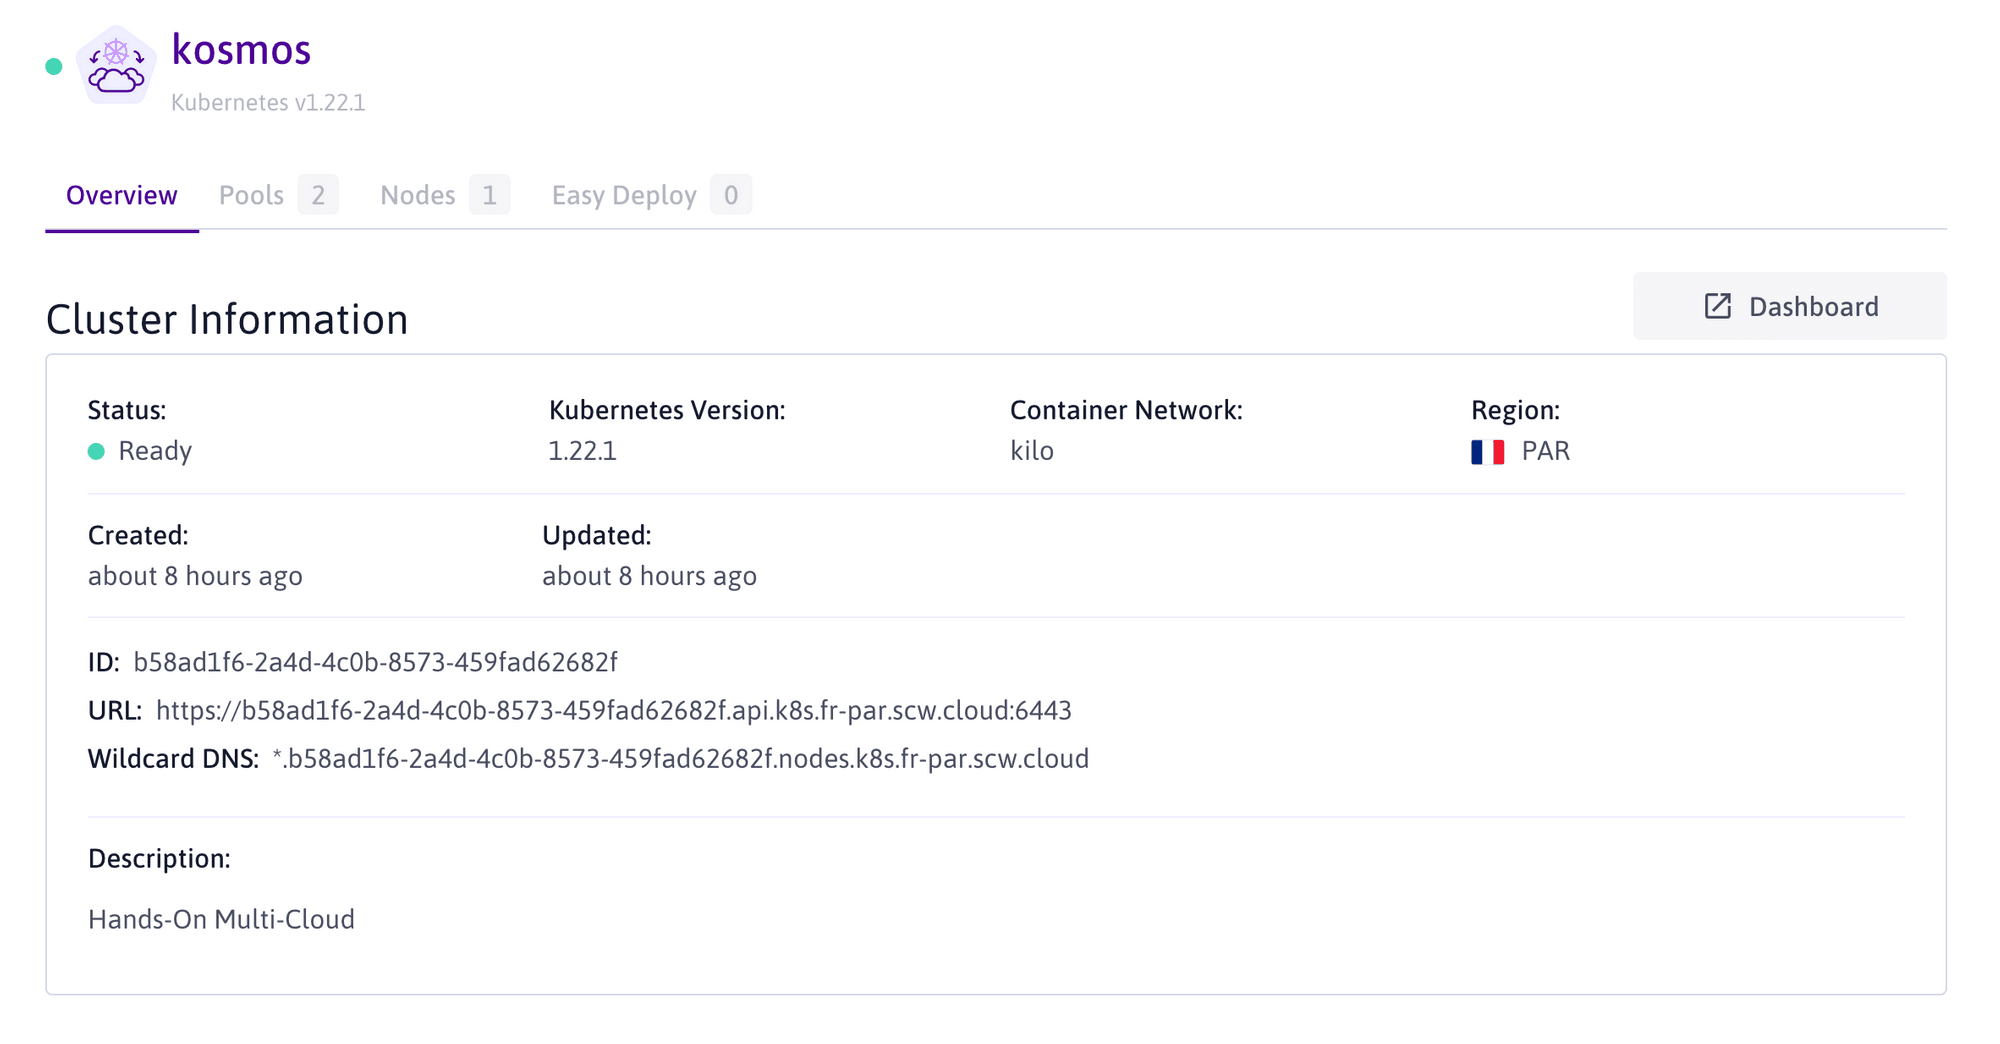
🔥 To be functional, our cluster requires at least one node pool.
So, we need to go on the Pool listing page to add a new pool of nodes to our cluster.

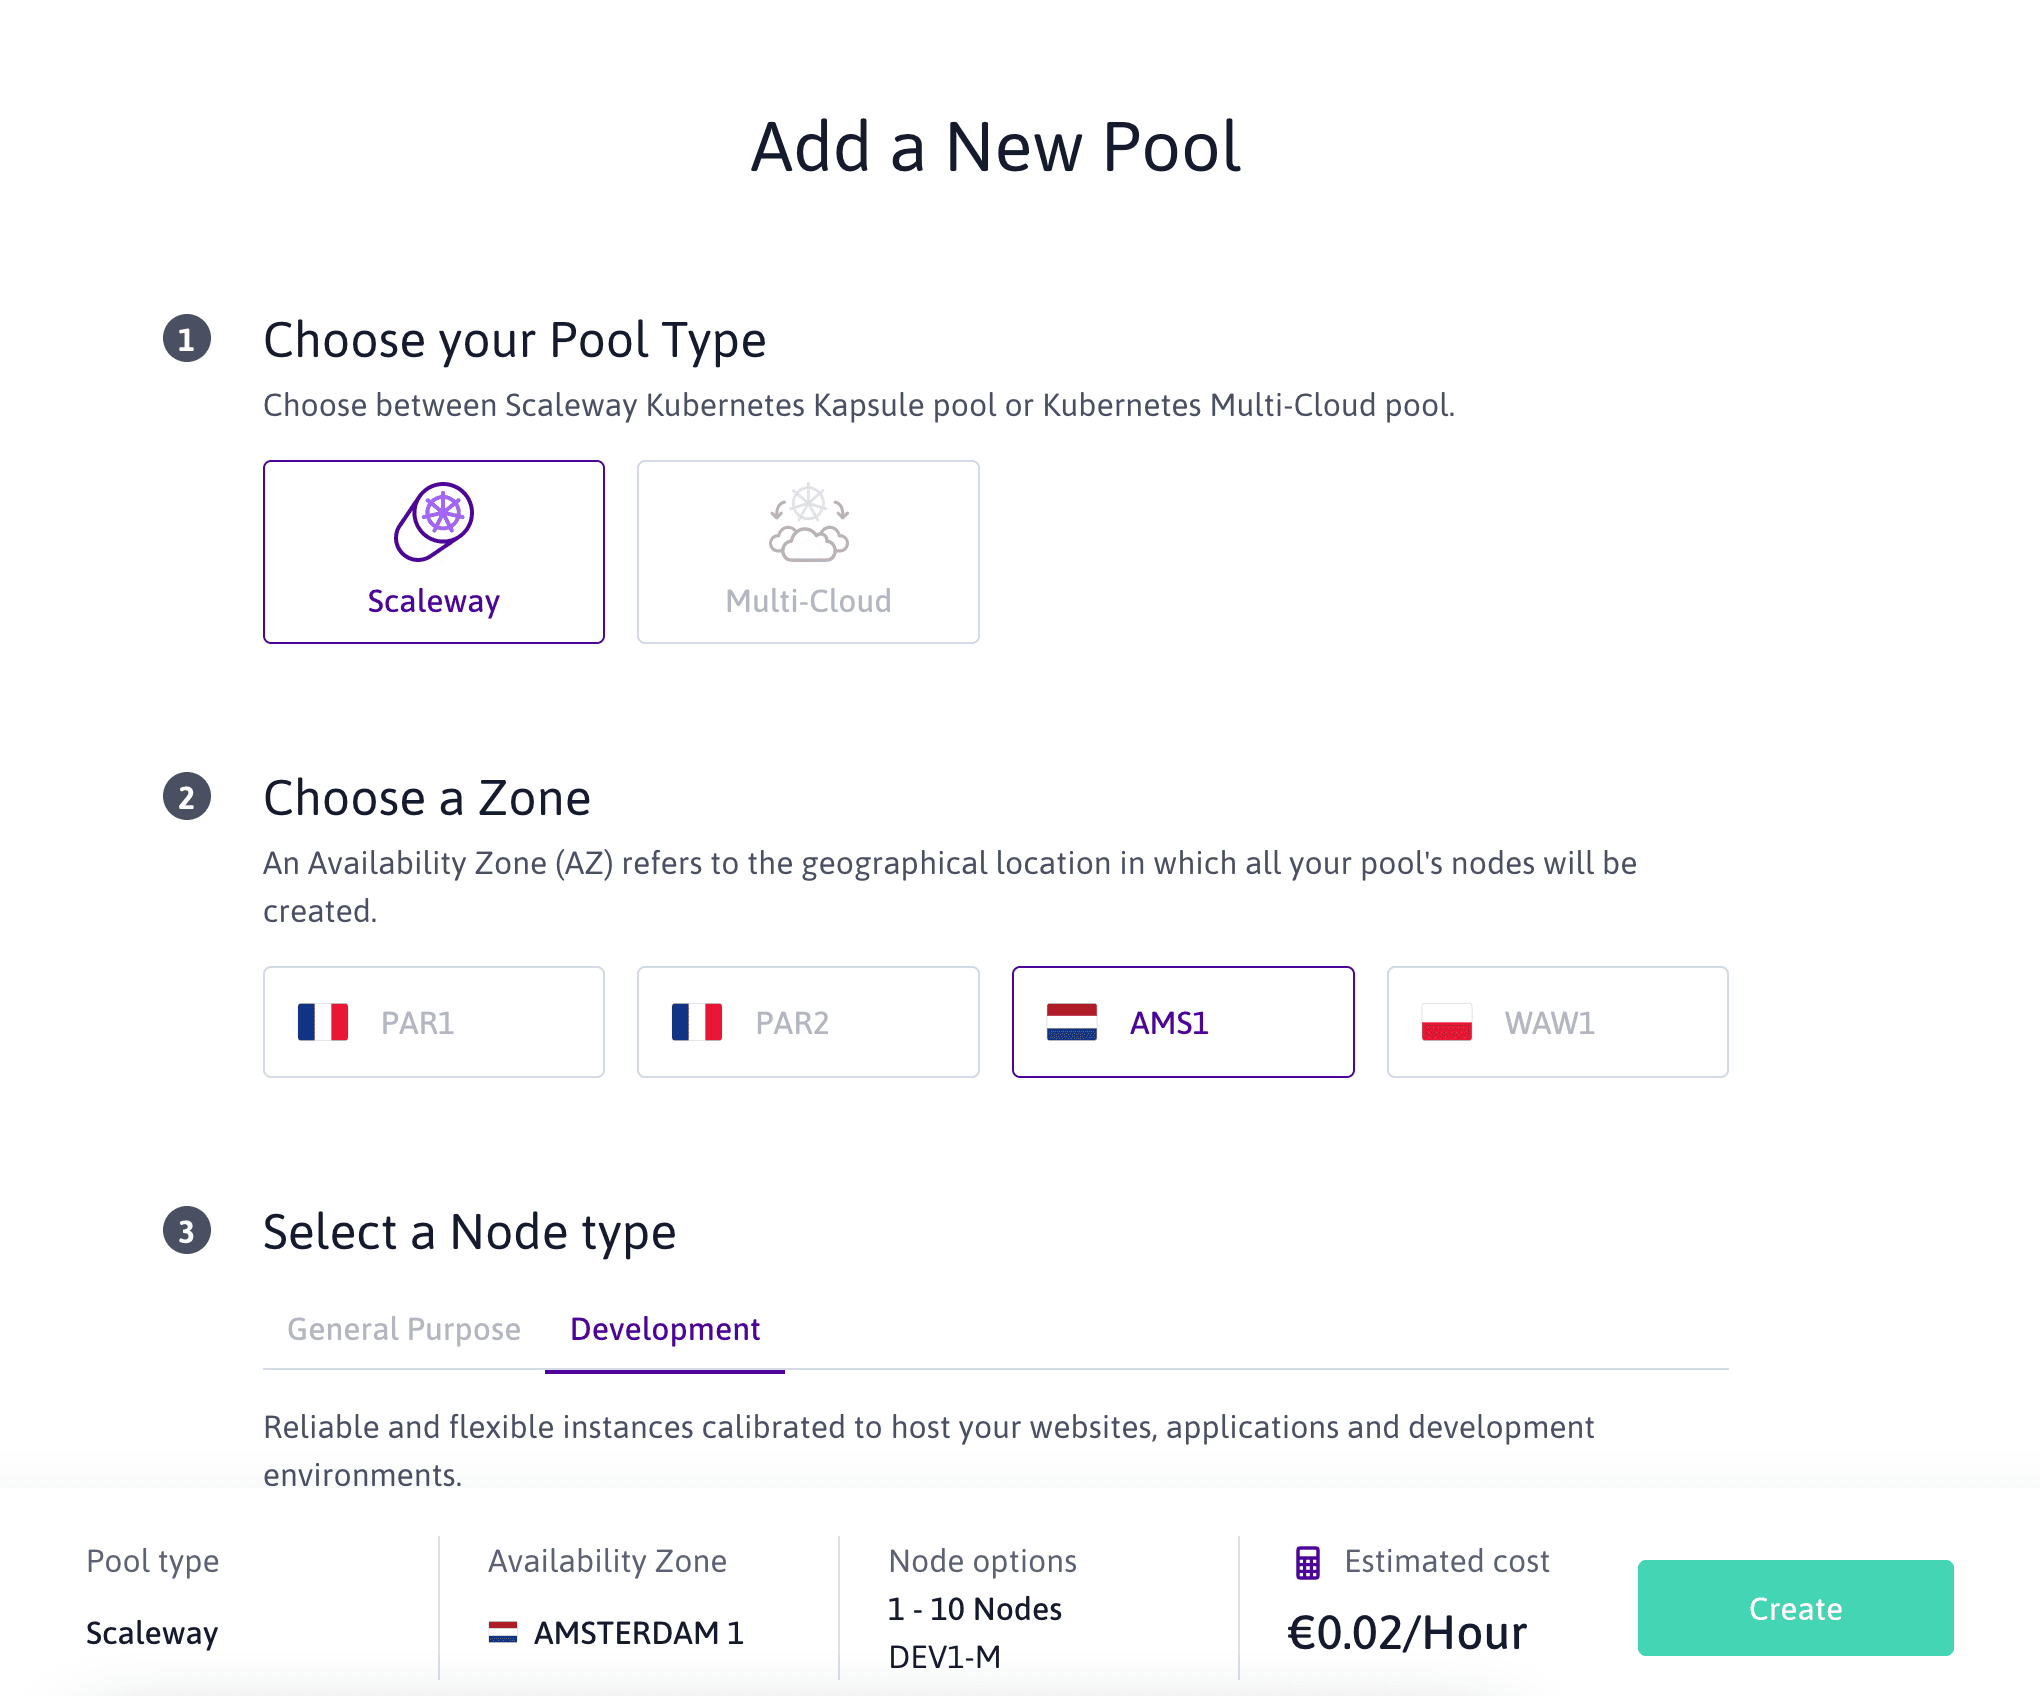
When in a Kubernetes Kosmos cluster, Scaleway pools can be created in any Availability Zone, whatever the region of the control plane.
🔥 Here, even if we previously chose our cluster control plane to be in Paris (fr-par) region, we can still decide to create a managed Scaleway pool in the Amsterdam 1 (nl-ams1) Availability Zone.
Scaleway pools have the advantage of being fully managed by the Kubernetes Kosmos control plane, meaning that the auto-scaling and auto-healing features can be activated. In this workshop, we decided to allow the auto-scaling of our Amsterdam pool to scale from one to ten Scaleway Instances.
Once created, our pool is visible in our listing view, showing its zone and a few of its configuration parameters. We can also see that a node is already available in our Kubernetes cluster.
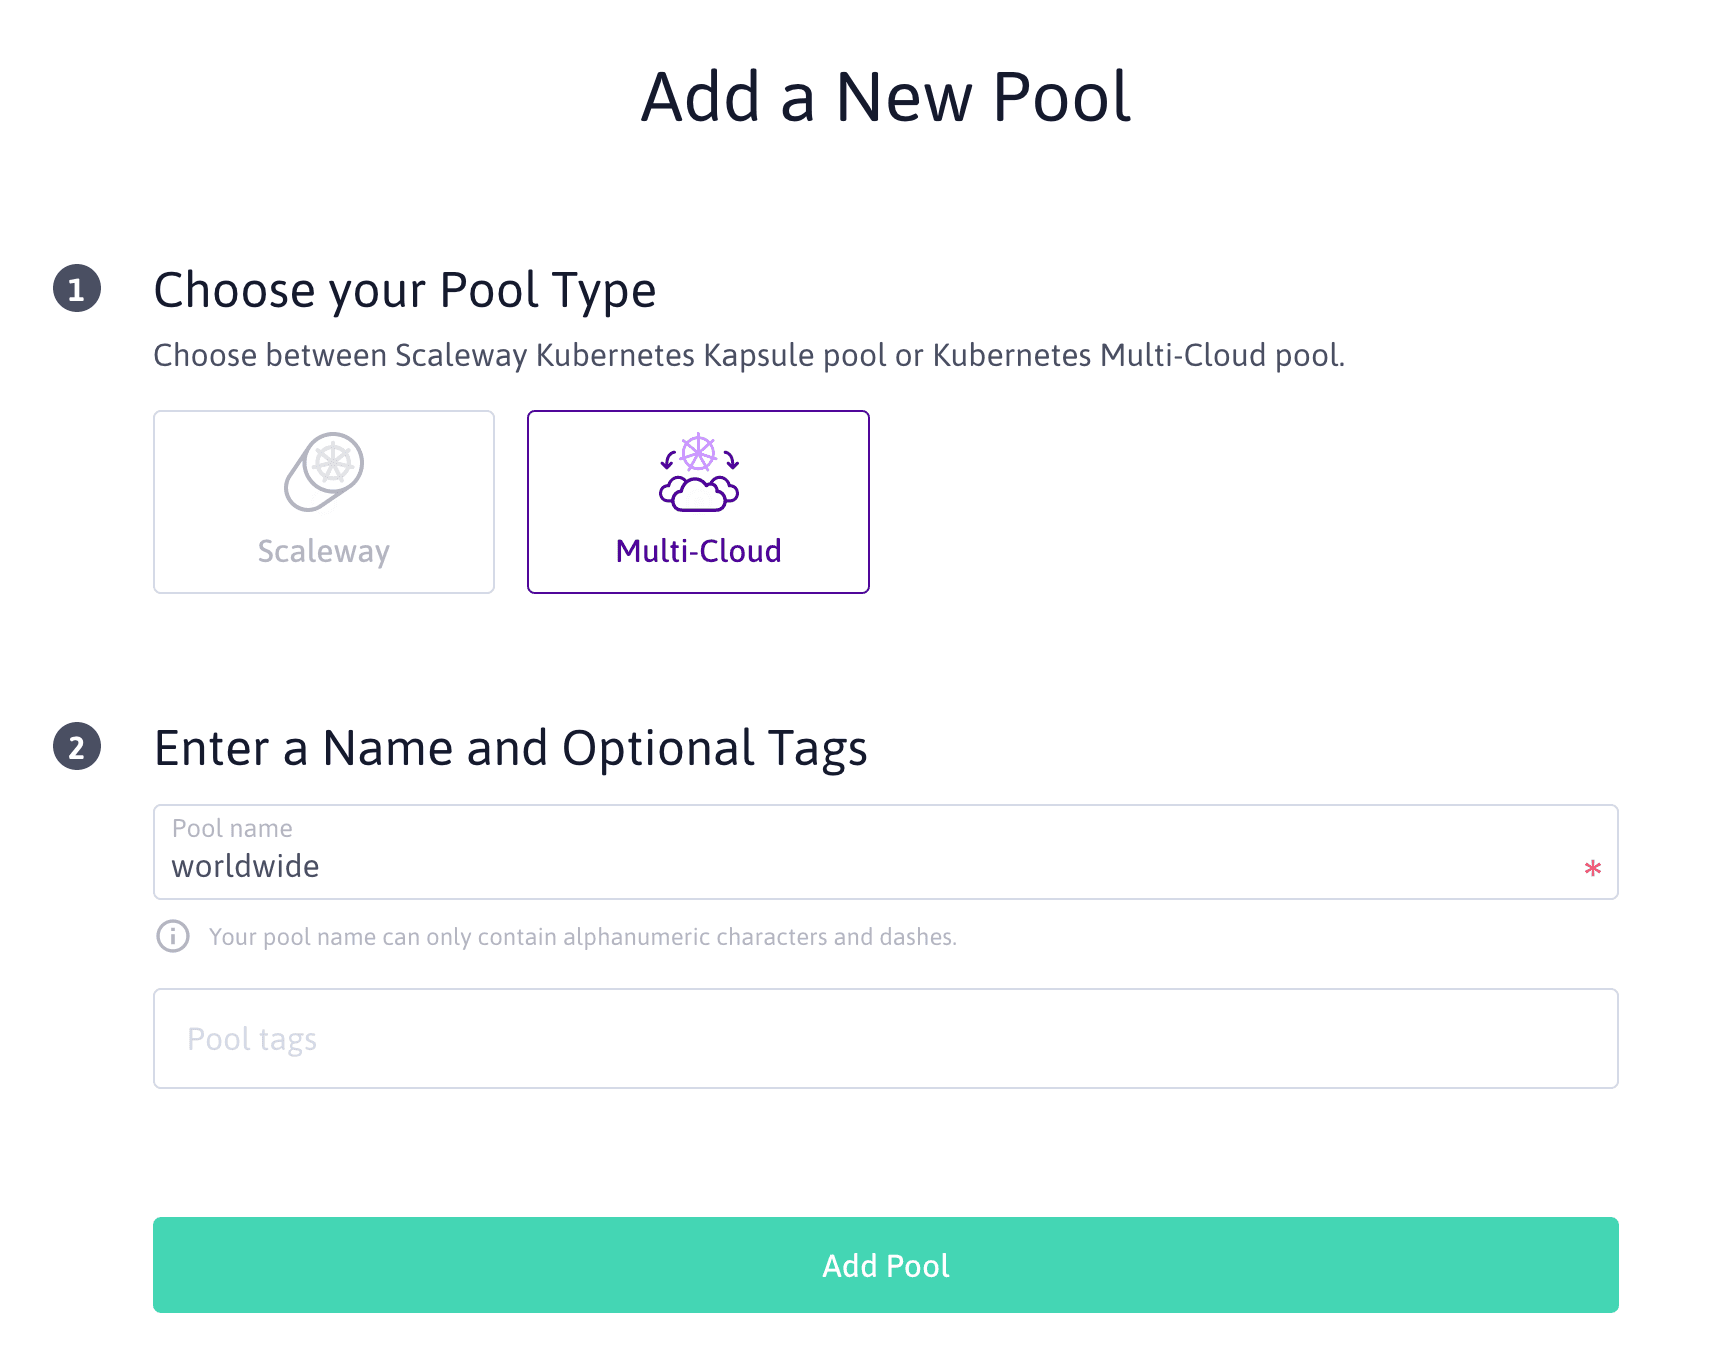
🔥 Now, we need to add a new pool of type "Multi-Cloud". No configuration is needed as it will in any case only allow us to attach unmanaged and external nodes to our Kubernetes cluster.
For more visibility, we set the pool name to "worldwide", as we intend to have instances from all over the world in our cluster.
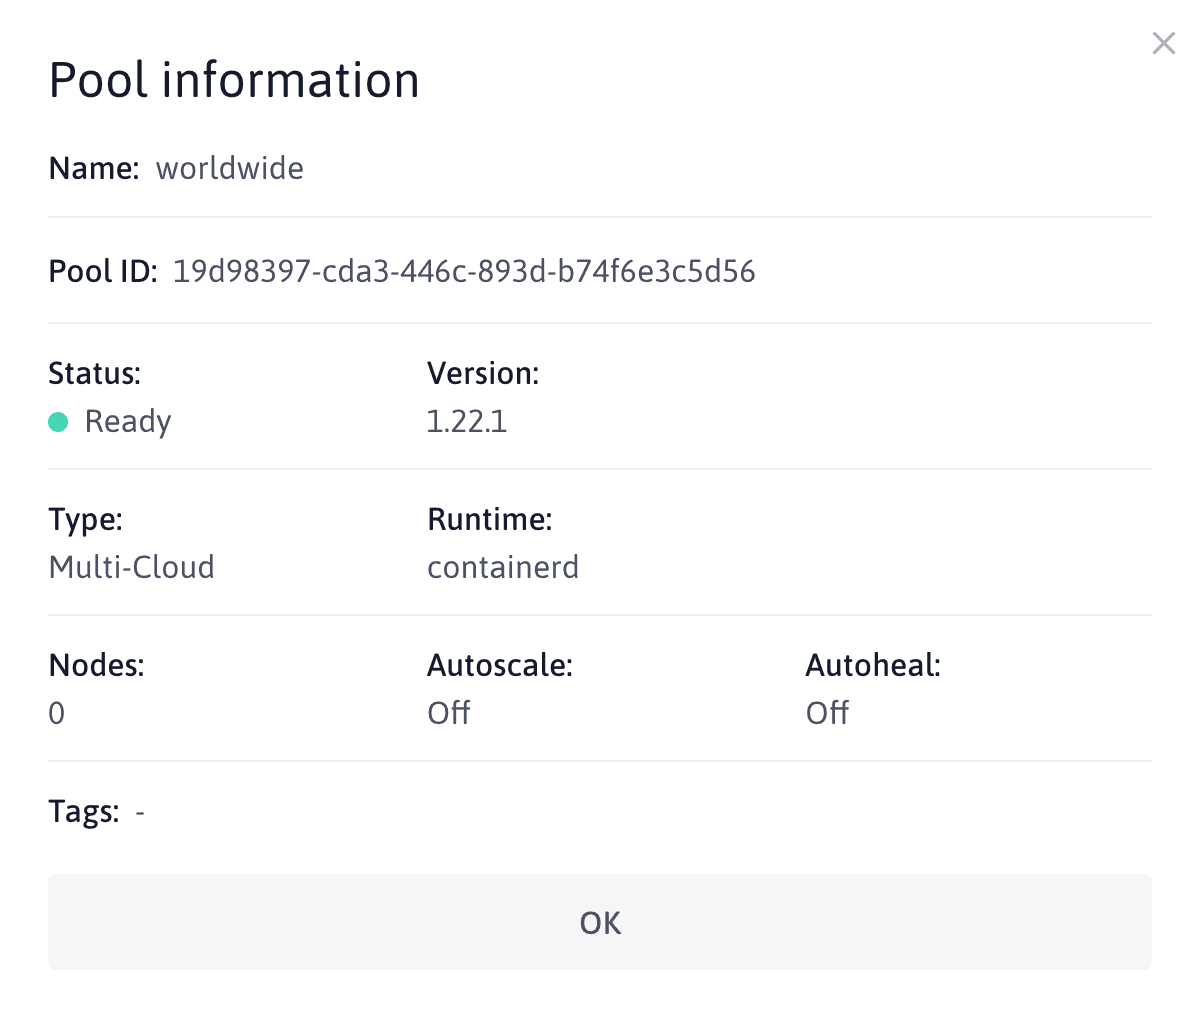
🔥 To attach instances and/or servers to a Kubernetes Kosmos Multi-Cloud pool, we will need the Pool ID, which we can get by clicking More info in the drop-down menu. Copy the ID and save it somewhere safe for later.
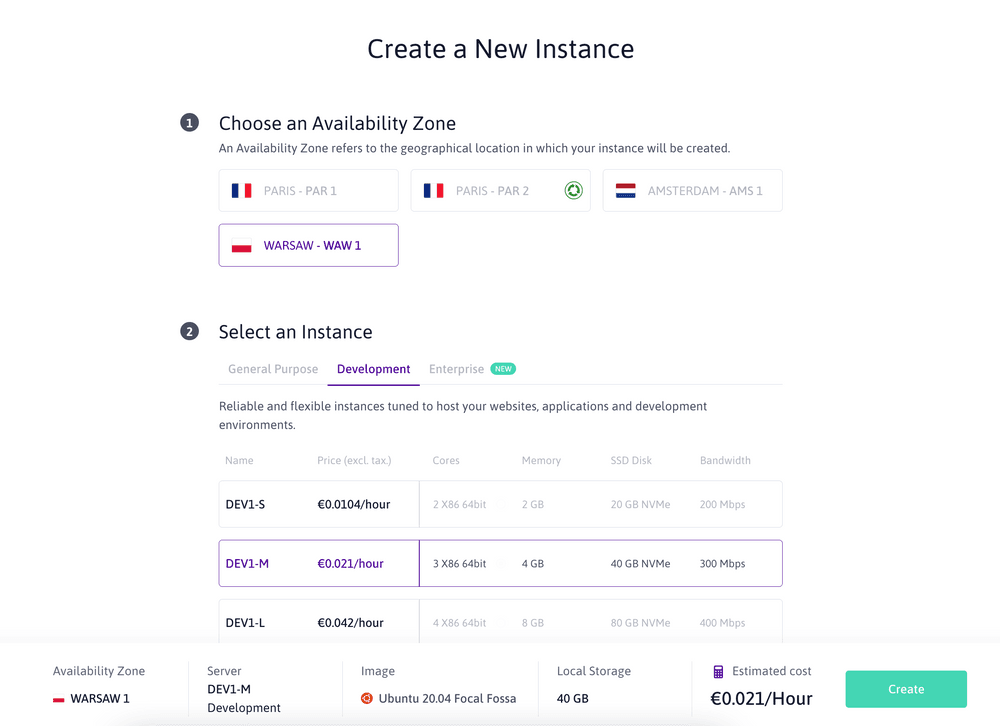
As we intend to create a worldwide Kubernetes cluster, we are going to create an unmanaged Scaleway Instance from the Scaleway Console.

🔥 Let's create the instance in Warsaw 1 Availability Zone.
⚠️ Warning: At the time of writing, the Instance must run Ubuntu 20.04 to function correctly in a Kubernetes Kosmos cluster.
Now that our Warsaw Instance is created, we can connect to it via ssh. The command to use is shown on the Instance Overview page.
Execute the following command to connect to your Instance. Make sure you replace the IP address with the correct one for your server. You can check this in the "Public IP" information field or, copy-paste the complete ssh command directly from the "SSH command" information field.
ssh root@151.115.36.196
To attach our Instance to our "worldwide" Multi-Cloud pool, we need to complete a series of steps.
Remember that for this section, we need to be connected to our unmanaged Scaleway instance in Warsaw. Connection instructions were described in the previous paragraph.
As we will need some parameters to attach our Instance, we are going to set them as environment variables.
export POOL_ID=19d98397-cda3-446c-893d-b74f6e3c5d56
export POOL_REGION=fr-par
export SCW_SECRET_KEY=xxxxxxxx-xxxx-xxxx-xxxx-xxxxxxxxxxxx
To attach an external instance to a Kubernetes Kosmos cluster, we need to download, still on our Warsaw instance, an agent and execute it with the parameter we set previously.
wget https://scwcontainermulticloud.s3.fr-par.scw.cloud/node-agent_linux_amd64 && chmod +x node-agent_linux_amd64
The execution of the script should result in the following output.
{"time":"2023-06-01T12:12:46.996582246Z","level":"INFO","msg":"Starting agent","version":"v1.2.0"}{"time":"2023-06-01T12:12:46.998471768Z","level":"INFO","msg":"external node detected, skipping network configuration"}{"time":"2023-06-01T12:13:03.076235482Z","level":"INFO","msg":"installing kubelet"}{"time":"2023-06-01T12:13:03.076238247Z","level":"INFO","msg":"installing runc"}{"time":"2023-06-01T12:13:03.076296957Z","level":"INFO","msg":"installing kubectl"}{"time":"2023-06-01T12:13:03.07626635Z","level":"INFO","msg":"installing CNI Plugins"}{"time":"2023-06-01T12:13:03.076500779Z","level":"INFO","msg":"installing containerd systemd unit file"}{"time":"2023-06-01T12:13:03.076533219Z","level":"INFO","msg":"installing containerd"}{"time":"2023-06-01T12:13:06.603353184Z","level":"INFO","msg":"successfully started kubelet"}The Kosmos agent will install the required dependencies on your server, and more specifically Kubelet. Once the agent runs, it may need a few minutes to access your Kubernetes Kosmos control plane and add your server as a new node of your cluster.
While waiting for it to attach the Scaleway Warsaw node to our Kubernetes Kosmos cluster, we are going to create an instance on Hetzner Cloud Provider and perform the same actions.
To attach another instance, we need to go back to our local environment and log out from our Scaleway Instance.
exit
🔥 Our first step here is obviously to log into our Hetzner console, or whichever Cloud provider has been chosen. Here we choose to create an Hetzner instance in the Helsinki Availability Zone.
⚠️ Warning: At the time of writing, the Instance must run Ubuntu 20.04 to function correctly in a Kubernetes Kosmos cluster.
Once created, we can see our instance as well as its public IP address.

Execute the following command to connect to your Hetzner instance. Make sure you replace the IP address with the correct one for your server. You can see it in the "IP address" column on the list view.
ssh root@65.21.146.191
As before for our Scaleway Warsaw Instance, we need to attach our Helsinkiinstance to our "worldwide" Multi-Cloud pool.
Let's set the same environment variable as before.
export POOL=19d98397-cda3-446c-893d-b74f6e3c5d56
export REGION=fr-par
export SECRET=xxxxxxxx-xxxx-xxxx-xxxx-xxxxxxxxxxxx
To attach our instance to a Kubernetes Kosmos cluster, we need to perform the same actions as before:
wget https://scwcontainermulticloud.s3.fr-par.scw.cloud/multicloud-init.sh
chmod +x multicloud-init.sh
sudo ./multicloud-init.sh -p $POOL -r $REGION -t $SECRET
The execution of the script should result in the same output as before.
[2021-09-03 11:54:00] apt prerequisites: installing apt dependencies (0) [OK][2021-09-03 11:54:09] containerd: installing containerd (0) [OK][2021-09-03 11:54:09] multicloud node: getting public ip (0) [OK][2021-09-03 11:54:12] kubernetes prerequisites: installing and configuring kubelet (0) [OK][2021-09-03 11:54:13] multicloud node: configuring this a node as a kubernetes node (0) [OK]All our instances are now attached or being attached to our Kubernetes Kosmos cluster. We do not need to perform any more actions on those instances, so we are free to disconnect from them and move on to using our cluster.
exit
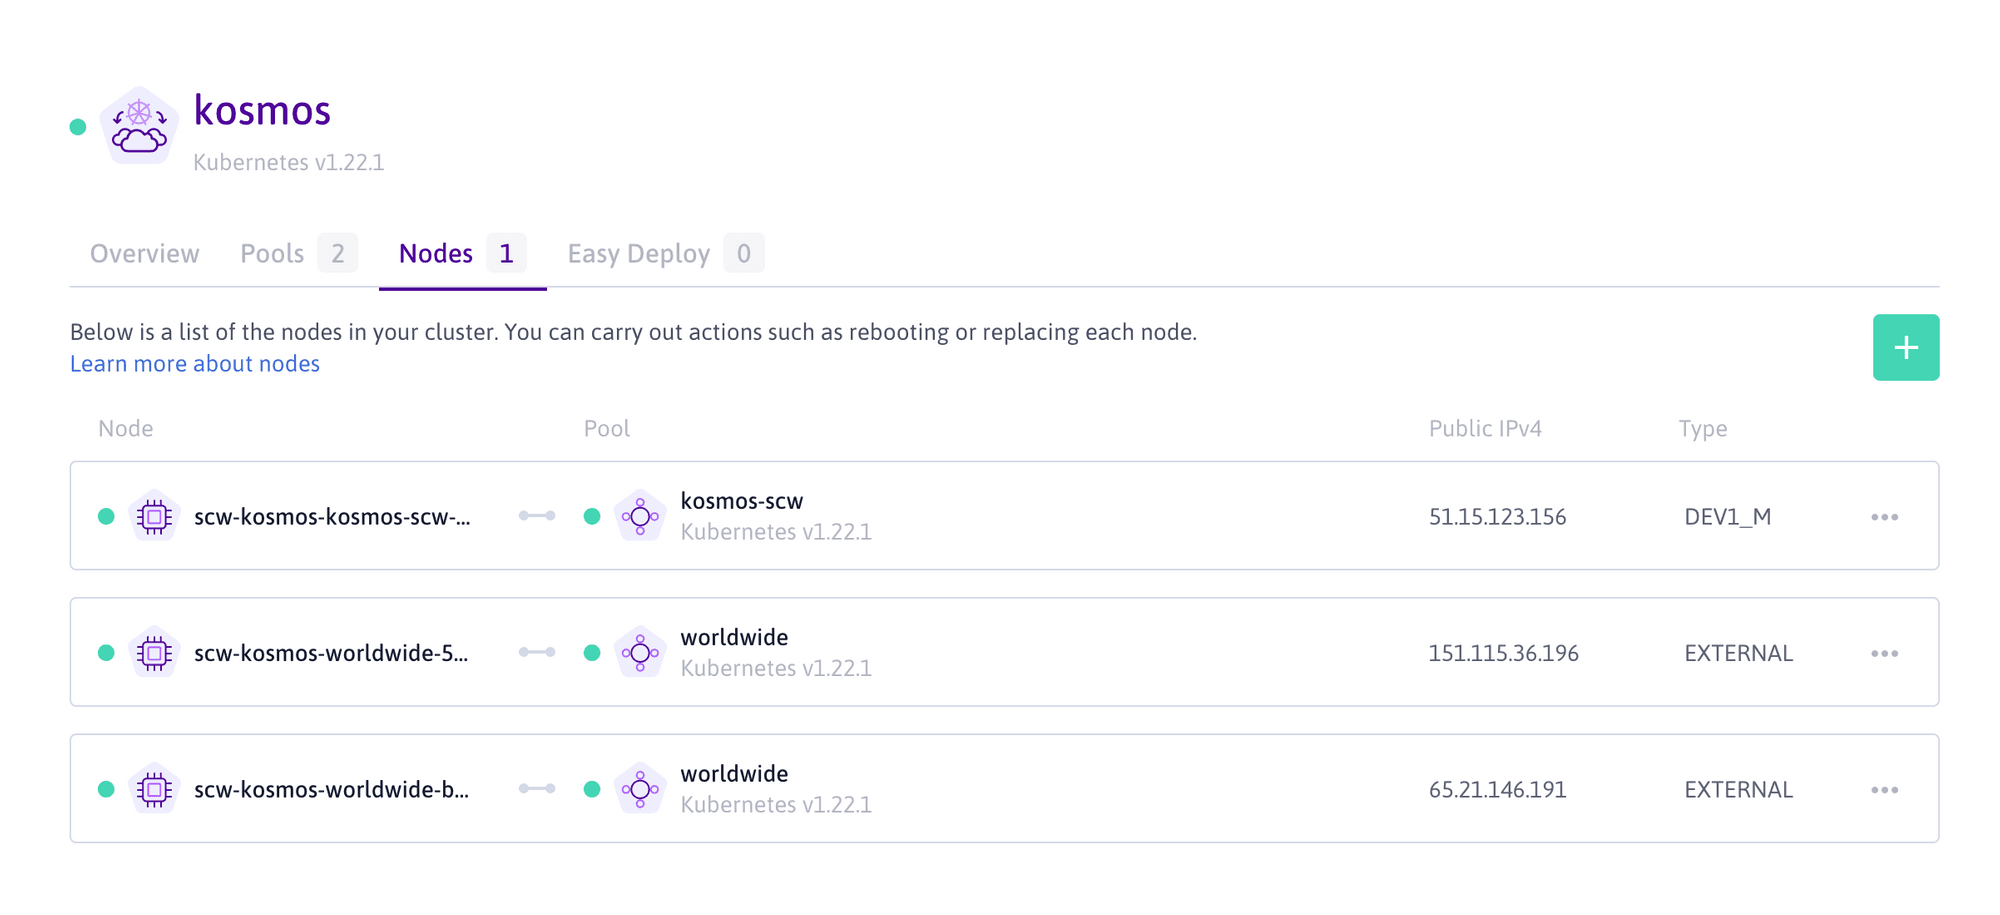
Once all our external instances are connected, we can them listed on our Scaleway Console in the Nodes tab. One node is in our managed pool, and two are in our "worldwide" Multi-Cloud pool.
To connect to our Kubernetes cluster, we need to download the corresponding kubeconfig file to be able to perform kubectl commands.
🔥 We can download it directly from our Kubernetes Kosmos cluster Overview page.

To connect to our cluster, the fastest way is simply to move the kubeconfig file we just downloaded into the .kube/config file. Another possibility would be to use Kubernetes contexts, but it will not be covered during this workshop.
mv Downloads/kubeconfig-kosmos.yaml .kube/config
Once the configuration of our cluster is loaded, we can get the list of our nodes using the kubectl command and see if everything is set up as expected.
The command kubectl get nodes is sufficient to give all the information we need about our nodes at this point, but as it is quite verbose, we choose to use the -o custom-columns option to simplify the output of the command it easier to read. This option will be widely used in all the commands we are going to run.
kubectl get nodes -o custom-columns=NAME:.metadata.name,STATUS:status.conditions[-1].type,VERSION:.status.nodeInfo.kubeletVersion
Output:
NAME STATUS VERSIONscw-kosmos-kosmos-scw-09371579edf54552b0187a95 Ready v1.22.1scw-kosmos-worldwide-5ecdb6d02cf84d63937af45a6 Ready v1.22.1scw-kosmos-worldwide-b2db708b0c474decb7447e0d6 Ready v1.22.1We can see that we managed to connect to our cluster, with our three nodes all in a Ready state, and we can identify the pool they are attached to by their names.

This article will guide you through the best practices to deploy and distribute the workload on a multi-cloud Kubernetes environment on Scaleway's Kosmos.

When working with Kubernetes, a specific Kubernetes component manages the creation, configuration, and lifecycle of Load Balancers within a cluster.

Learn more to implement a multi-cloud strategy on Kubernetes. All Cloud market players agree on the global definition of Multi-Cloud: using multiple public Cloud providers.