Monitoring Instances with LibreNMS on Ubuntu Noble Numbat (24.04)
Learn how to use LibreNMS to monitor Instances on Ubuntu 24.04 (Noble Numbat). LibreNMS is an open-source network monitoring system supporting a wide range of network hardware and operating systems, including Linux and Windows.
The software is based on PHP and MySQL (MariaDB) and is a community-based fork of the last GPL-licensed version of Observium.
Before you start
To complete the actions presented below, you must have:
- A Scaleway account logged into the console
- Owner status or IAM permissions allowing you to perform actions in the intended Organization
- An SSH key
- An Instance running on Ubuntu Noble Numbat (24.04)
- A domain or subdomain pointed to your Instance
Installing LibreNMS
-
Update the apt package cache and upgrade the already installed system packages:
apt update && apt upgrade -y -
Install the required packages.
apt install -y acl curl composer fping git graphviz imagemagick mariadb-client mariadb-server mtr-tiny nginx-full nmap php-cli php-curl php-fpm php-gd php-json php-mbstring php-mysql php-snmp php-xml php-zip python3-memcache python3-mysqldb python3-pip rrdtool snmp snmpd whois -
Create a user for LibreNMS:
useradd -r -M -d /opt/librenms librenms usermod -aG librenms www-data -
Download and configure LibreNMS:
git clone https://github.com/librenms/librenms.git /opt/librenms chown -R librenms:librenms /opt/librenms chmod 770 /opt/librenms setfacl -d -m g::rwx /opt/librenms/rrd /opt/librenms/logs /opt/librenms/bootstrap/cache/ /opt/librenms/storage/ setfacl -R -m g::rwx /opt/librenms/rrd /opt/librenms/logs /opt/librenms/bootstrap/cache/ /opt/librenms/storage/ -
Install PHP dependencies:
sudo -u librenms bash
cd /opt/librenms
./scripts/composer_wrapper.php install --no-dev
exit
Setting up the database
LibreNMS stores the data collected from the monitored systems in a MySQL database. The open-source fork MariaDB is used in the setup, providing the same features as MySQL.
-
Run the MariaDB setup assistant to configure a secure root password for the database server:
mysql_secure_installation -
Connect to the MariaDB shell with the user
rootand the password configured in the previous step:mysql -uroot -p -
Create a database and user for LibreNMS and grant permissions to the database:
CREATE DATABASE librenms CHARACTER SET utf8 COLLATE utf8_unicode_ci;
CREATE USER 'librenms'@'localhost' IDENTIFIED BY '<a_secure_password>';
GRANT ALL PRIVILEGES ON librenms.* TO 'librenms'@'localhost';
FLUSH PRIVILEGES;
exit
Replace
<a_secure_password>with a secure password of your choice. -
Open the file
/etc/mysql/mariadb.conf.d/50-server.cnfin a text editor, for examplenano:nano /etc/mysql/mariadb.conf.d/50-server.cnfAdd the following Lines within the
[mysqld]section:innodb_file_per_table=1 lower_case_table_names=0Save the file by pressing CTRL+O and exit nano by pressing CTRL+X.
-
Restart the MariaDB server:
systemctl restart mysql.service
Setting up Nginx
Nginx is an open-source web server and is being used to serve the web frontend of LibreNMS.
-
Create the file
/etc/nginx/sites-available/librenms.example.comby opening it in a text editor:nano /etc/nginx/sites-available/librenms.example.comAdd the Nginx configuration to the file, save it, and exit nano:
server { listen 80; server_name <librenms.example.com>; root /opt/librenms/html; index index.php; charset utf-8; gzip on; gzip_types text/css application/javascript text/javascript application/x-javascript image/svg+xml text/plain text/xsd text/xsl text/xml image/x-icon; location / { try_files $uri $uri/ /index.php?$query_string; } location /api/v0 { try_files $uri $uri/ /api_v0.php?$query_string; } location ~ \.php { include fastcgi.conf; fastcgi_split_path_info ^(.+\.php)(/.+)$; fastcgi_pass unix:/var/run/php/php7.4-fpm.sock; } location ~ /\.ht { deny all; } } -
Enable the server block by linking it to the sites-enabled directory:
ln -s /etc/nginx/sites-available/librenms.example.com /etc/nginx/sites-enabled/ -
Restart the Nginx web server:
service nginx restart
For security reasons, it is recommended to configure HTTPS by following this tutorial.
Setting up SNMP
Simple Network Management Protocol (SNMP) is a protocol for collecting and organizing information about managed devices on IP networks. Data of SNMP is transported using User Datagram Protocol (UDP). Requests are sent to the agent listening on UDP port 161.
-
Copy the SNMP configuration file in the directory
/etc/snmp:cp /opt/librenms/snmpd.conf.example /etc/snmp/snmpd.conf -
Open the configuration file in a text editor:
nano /etc/snmp/snmpd.confEdit the string
RANDOMSTRINGGOESHEREto an SNMP group name of your choice.Save the file and exit
nano. -
To display distribution information, download the
distroscript and make it executable:curl -o /usr/bin/distro https://raw.githubusercontent.com/librenms/librenms-agent/master/snmp/distro chmod +x /usr/bin/distro -
Restart the SNMP service:
systemctl restart snmpd.service
Setting up the cronjob and logrotate
Cron is a job scheduler available on Linux systems. It can be used to run jobs (i.e. shell scripts) automatically at given points in time to automatize system maintenance. Logrotate is a tool to rotate log files automatically. This means cleaning up log files periodically by removing old contents to ensure the disk space they occupy does not exceed a configured maximum value.
-
Copy the cron configuration file into the directory
/etc/cron.d/to execute actions automatically:cp /opt/librenms/librenms.nonroot.cron /etc/cron.d/librenmsThe file contains the basic cronjobs required by LibreNMS.
-
To prevent the log files of LibreNMS from becoming too large, logrotate can rotate them out from time to time to save space. Enable it by copying the provided configuration file into
/etc/logrotate.d:cp /opt/librenms/misc/librenms.logrotate /etc/logrotate.d/librenms
Running the web installer
-
Open a web browser and go to your LibreNMS Instance:
https://librenms.example.com/install.php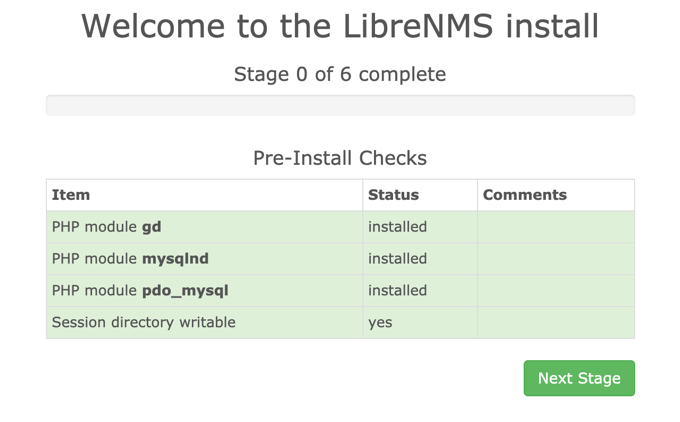
-
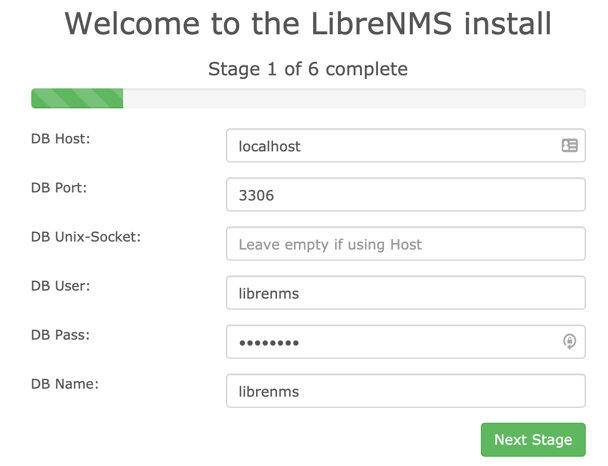
Fill in the database connection parameters and the password set during database creation:
-
Configure a user and password for LibreNMS and complete the setup.2. Fill in the database connection parameters and the password set during database creation:
-
Configure a user and password for LibreNMS and complete the setup.
Adding localhost to LibreNMS
Start by adding the local host as the first device to monitor:
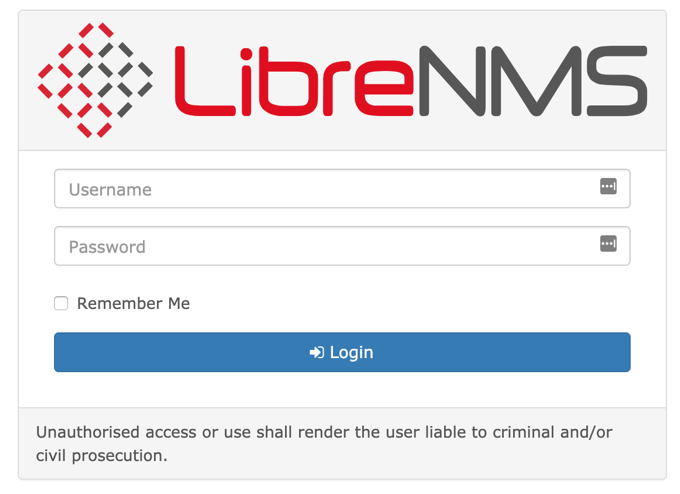
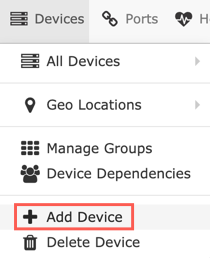
- Once logged in, click Devices, then Add Device in the pop-up menu:
- Enter the hostname localhost, keep SNMP on, leave the values for SNMP version and Port Association Mode as preset. Enter the configured community name in the file
/etc/snmp/snmpd.confas the value for Community. Once all values are set, click Add Device to add the device: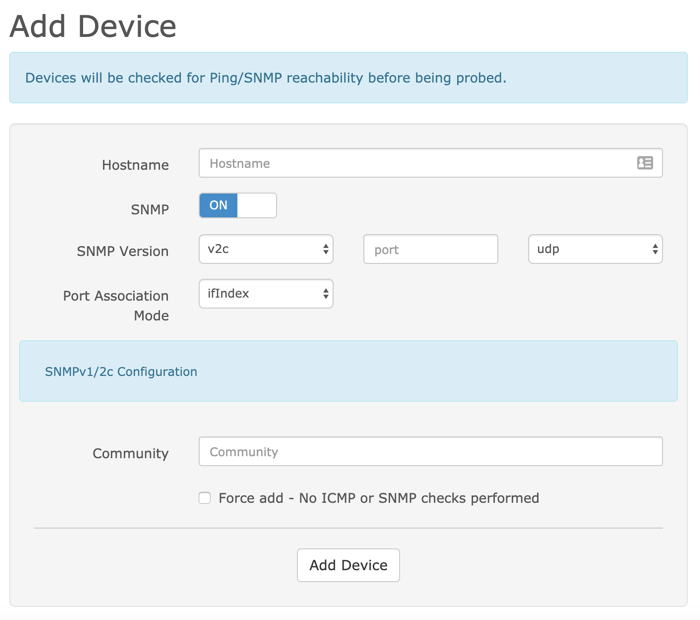
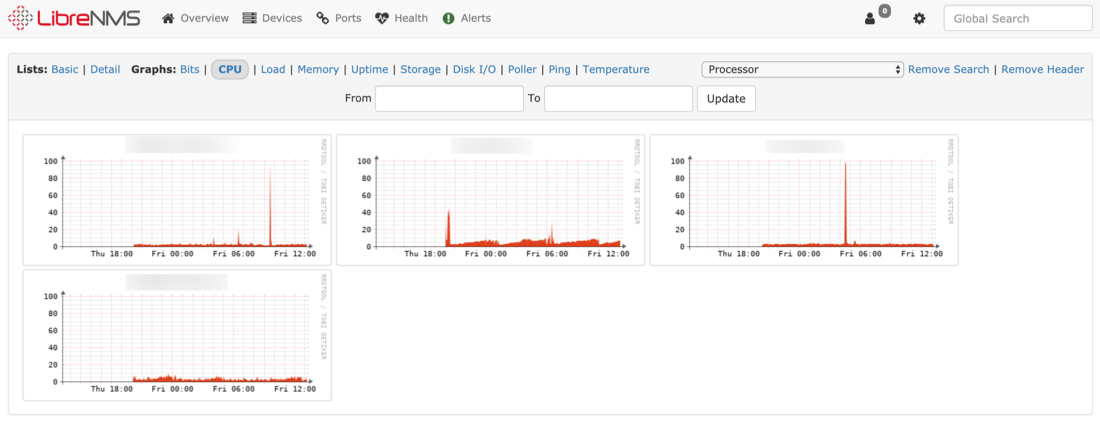
- LibreNMS starts polling the device and different graphs are created, showing the status of the device.
Adding a remote device to LibreNMS
LibreNMS is capable of monitoring many network devices. To monitor a remote cloud Instance or Elastic Metal server, the use of SNMP is widespread. SNMP stands for Simple Network Management Protocol. It is a protocol that was designed for monitoring and management purposes of network-connected devices (servers, switches, printers, routers, etc.). On Ubuntu systems, a daemon called SNMPd is available to listen and reply to SNMP requests.
-
To monitor another cloud Instance or elastic metal server, connect to the machine as root:
ssh root@second_cloud_instance -
Update the
aptrepository inventory:apt update -
To display distribution information, download the
distroscript and make it executable:curl -o /usr/bin/distro https://raw.githubusercontent.com/librenms/librenms-agent/master/snmp/distro chmod +x /usr/bin/distro -
Install
SNMPdvia apt:apt install snmpd -
Open the SNMPd configuration file in a text editor (e.g.
nano):nano /etc/snmp/snmpd.conf -
Delete the content present in the default configuration file and replace it with the example below:
# Change RANDOMSTRINGGOESHERE to your preferred SNMP community string
com2sec readonly  123.123.123.123         RANDOMSTRINGGOESHERE
group MyROGroup v2c        readonly
view all    included  .1                               80
access MyROGroup ""      any       noauth    exact  all    none   none

syslocation "Paris, France"
syscontact Your Name <your@email.address>

#Distro Detection
extend .1.3.6.1.4.1.2021.7890.1 distro /usr/bin/distro
Edit the file to meet your requirements, the meaning of the different lines is explained below:
com2sec readonly 123.123.123.123 RANDOMSTRINGGOESHERE- This line maps a security string to a community name. A security string is an access policy, an IP address limitation (replace123.123.123.123with the IP address of the LibreNMS Instance), and a community name (replaceRANDOMSTRINGGOESHEREwith the community name configured during the installation of LibreNMS).- The line
group MyROGroup v2c readonlymaps a group (MyROGroup) to a security name (v2c readonly). - The line
viewdefines a subset of which information from the MIB is visible when polling the device via SNMP - With the line
access MyROGroup "" any noauth exact all none noneaccess rules are tied to the group set before. In this example it means that the groupMyROGroupcan, in any context (""), access the data over any version of the protocol (any), without authentication (noauth), matching the exact context (exact), allowing access to all view rules (all). No write (none) or modify access (none) is permitted. syslocation “Paris, France”is pretty self-explanatory and specifies the geographical location of the machine.syscontact Your Name <your@email.address>defines the administrative contact for the machine.- The last line is used to communicate the distribution information collected by
distrovia SNMP
Edit the values in the file to your needs before saving it and exiting the editor.
-
Restart the SNMP service:
systemctl restart snmpd.service -
Add the device to LibreNMS by clicking on Devices, then Add Device in the pop-up menu from within the LibreNMS web interface.
-
Enter the hostname of the device, keep SNMP on, leave the values for SNMP version and Port Association Mode as preset. Enter the community name set in the file
/etc/snmp/snmpd.confas value for Community. Once all values are set, click Add Device to add the device. -
LibreNMS starts polling the device and creating different graphs showing the status of the device:
For more information about the configuration options of SNMP, refer to the official documentation. You may also refer to the official LibreNMS documentation.
Visit our Help Center and find the answers to your most frequent questions.
Visit Help Center