Setting up a multi-node Rocket.Chat community using the Private Network feature
In this tutorial, you will learn how the Private Network feature can help you to build a distributed Rocket.Chat application on General Purpose and Development Instances using a Private Network to communicate securely between them:
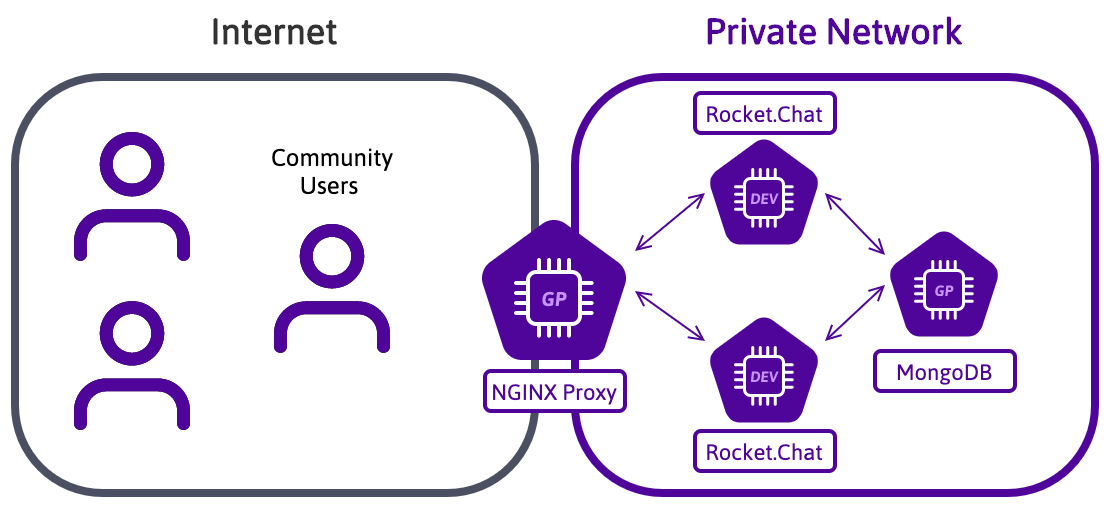
Private Networks are a LAN-like layer 2 Ethernet network. A new network interface with a unique MAC address is configured on each Instance in a Private Network. You can use this interface to communicate in a secure and isolated network, using private IP addresses of your choice.
To reach the goal of this tutorial, you will use four General Purpose Instance running Ubuntu 24.04 Noble Numbat or later:
- 1 POP2-2C-8G Instance as NGINX Proxy frontend, that distributes the load on the Rocket.Chat applications
- 1 POP2-8C-32G Instance as MongoDB® host
- 2 POP2-4C-16G Instances running the Rocket.Chat application
- A Private Network between these Instances
Before you start
To complete the actions presented below, you must have:
- A Scaleway account logged into the console
- Owner status or IAM permissions allowing you to perform actions in the intended Organization
- An SSH key
- Created 4 Instances running on Ubuntu Noble Numbat (24.04 LTS)
Configuring the Private Network
-
Log in to your Scaleway console and enter the CPU & GPU Instances section from the Compute group on the side menu.
-
Click Private Networks to display a list of your Private Networks. Click +Create a Private Network to create a new one.

-
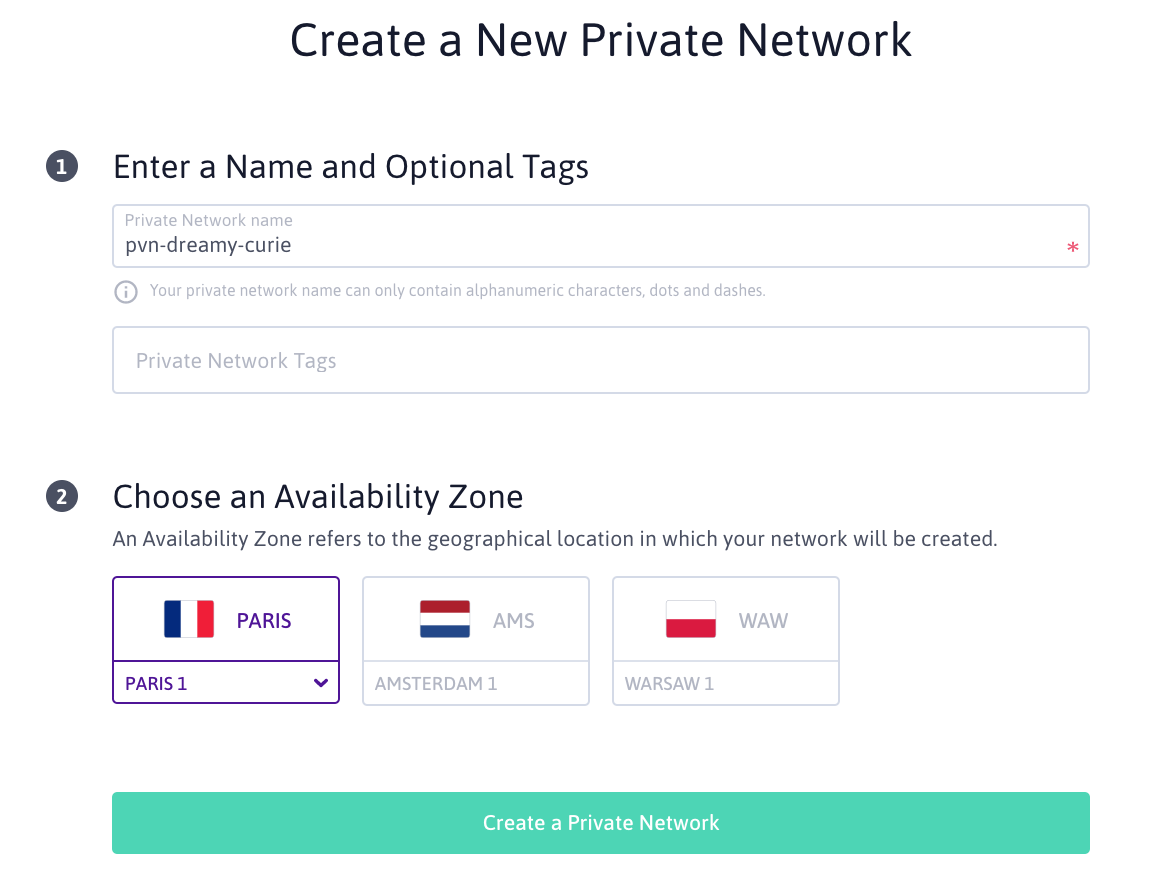
Enter the details of the Private Network. Make sure to create the Private Network in the same geographical region as your Instances:
-
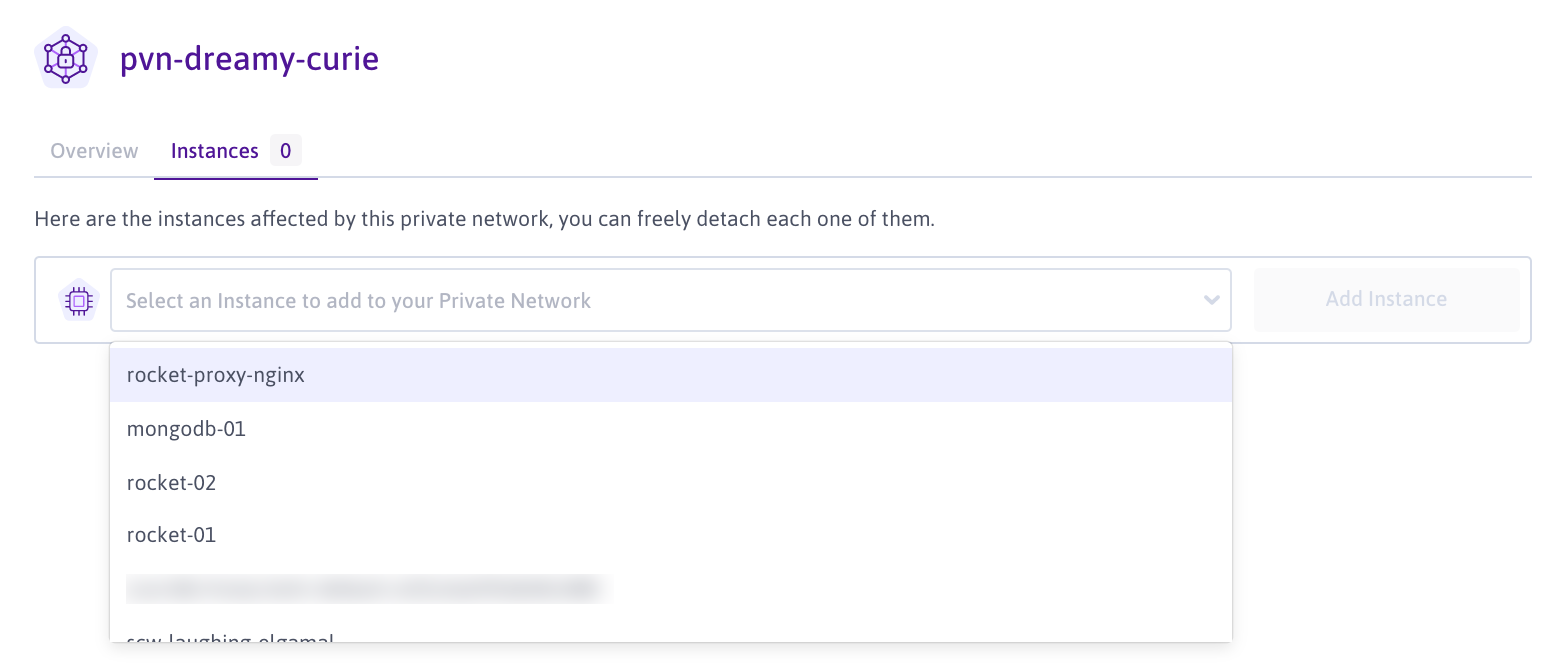
Select the newly created Private Network from your networks list. From the drop-down list, click the CPU & GPU Instances tab to add your Instances:
-
Add all Instances for your Rocket.Chat setup to the Private Network. Once added, they are listed on the network overview page together with their corresponding virtual MAC address:

-
Log into each of your Instances using SSH to configure the Private Network interface. Use the
ip link showcommand to identify the automatically assigned name of the interface:root@virtual-instance:~# ip link show 1: lo: <LOOPBACK,UP,LOWER_UP> mtu 65536 qdisc noqueue state UNKNOWN mode DEFAULT group default qlen 1000 link/loopback 00:00:00:00:00:00 brd 00:00:00:00:00:00 2: ens2: <BROADCAST,MULTICAST,UP,LOWER_UP> mtu 1500 qdisc pfifo_fast state UP mode DEFAULT group default qlen 1000 link/ether de:1c:94:5d:d0:4c brd ff:ff:ff:ff:ff:ff 3: ens4: <BROADCAST,MULTICAST> mtu 1500 qdisc noop state DOWN mode DEFAULT group default qlen 1000 link/ether 02:00:00:00:20:c4 brd ff:ff:ff:ff:ff:ff -
To facilitate the configuration, give a more convenient name (e.g.
priv0) to the Private Network interface. Configure the new interface name as follows:root@virtual-instance:~# ip link set down dev ens4 root@virtual-instance:~# ip link set name priv0 dev ens4 root@virtual-instance:~# ip link set up dev priv0 -
To make these changes persistent at reboot, add the following rule to the
/etc/udev/rules.d/75-persistent-net-generator.rulesfile:SUBSYSTEM=="net", ACTION=="add", DRIVERS=="?*", ATTR{address}=="02:00:00:00:20:c4", NAME="priv0" -
Configure the IP address of the private interface. In our example, we use the following IP's for our Instances:
- NGINX Proxy Instance:
192.168.1.1/24 - MongoDB® Instance:
192.168.1.2/24 - Rocket.Chat Instance 1:
192.168.1.3/24 - Rocket.Chat Instance 2:
192.168.1.4/24
Open the auto-generated configuration file
/etc/netplan/00-installer-config.yamland edit it as follows (Replace192.168.1.X/24with the IP address of each instance):network: version: 2 renderer: networkd ethernets: priv0: addresses: [192.168.1.X/24] - NGINX Proxy Instance:
-
Apply the new netplan configuration by running the following command:
root@virtual-instance:~# netplan apply -
Repeat these steps on each of the Instances used in this tutorial.
Installing MongoDB
-
Log into your MongoDB Instance using SSH.
ssh root@<mogodb-instance-ip> -
Update the APT repositories and upgrade the software already installed on the version to the latest version available in Ubuntu's official repositories:
apt update && apt upgrade -y -
Install the required prerequisites and the MongoDB® GPG key to your system:
apt-get install gnupg curl curl -fsSL https://www.mongodb.org/static/pgp/server-8.0.asc | sudo gpg -o /usr/share/keyrings/mongodb-server-8.0.gpg --dearmor -
Add the MongoDB repository to your system. In this tutorial, we use MongoDB® 8.0:
echo "deb [ arch=amd64,arm64 signed-by=/usr/share/keyrings/mongodb-server-8.0.gpg ] https://repo.mongodb.org/apt/ubuntu noble/mongodb-org/8.0 multiverse" | sudo tee /etc/apt/sources.list.d/mongodb-org-8.0.list -
Update the apt package cache to make the newly added repository available for the
aptpackage manager:apt-get update -
Install MongoDB® using the
aptpackage manager:apt-get install mongodb-org -y -
Open the
/etc/mongod.conffile in a text editor and edit it as follows to configure the storage engine to use (storage:section), bind the application to the private IP address (net:section) and configure a ReplicaSet (replicationsection). Leave other sections as they are.[...] # Where and how to store data. storage: dbPath: /var/lib/mongodb journal: enabled: true engine: wiredTiger # mmapv1: # wiredTiger: [...] # network interfaces net: port: 27017 bindIp: 127.0.0.1,192.168.1.2 [...] # replica set replication: replSetName: "rs01" [...] -
Enable and start the MongoDB® service:
systemctl enable mongod.service && systemctl start mongod.service -
Initialize the ReplicaSet on the MongoDB® using the following command:
mongosh --eval "printjson(rs.initiate())"An output like the following example displays:
{
  "info2" : "no configuration specified. Using a default configuration for the set",
  "me" : "192.168.1.2:27017",
  "ok" : 1,
  "$clusterTime" : {
    "clusterTime" : Timestamp(1603283232, 1),
    "signature" : {
      "hash" : BinData(0,"AAAAAAAAAAAAAAAAAAAAAAAAAAA="),
      "keyId" : NumberLong(0)
    }
  },
  "operationTime" : Timestamp(1603283232, 1)
}
Installing Rocket.Chat
-
Log into your Rocket.Chat instance using SSH.
ssh root@<rocketchat-instance-ip> -
Update the
aptrepositories and upgrade the software already installed on the version to the latest version available in Ubuntu's official repositories:apt update && apt upgrade -y -
Install Node.js by running the following command:
apt install -y curl && curl -sL https://deb.nodesource.com/setup_14.x | bash - -
Install other prerequisites for running Rocket.Chat:
apt install build-essential nodejs graphicsmagick -
Use
npmto installinherits,n, and the node version required by Rocket.Chat:npm install -g inherits n && sudo n 14.18.3 -
Download and unpack the latest release of the Rocket.Chat software:
curl -L https://releases.rocket.chat/latest/download -o /tmp/rocket.chat.tgz tar -xzf /tmp/rocket.chat.tgz -C /tmp -
Install Rocket.Chat:
cd /tmp/bundle/programs/server && npm install -
Move the application to its final destination (we use
/opt/Rocket.Chatin this tutorial, but you are free to choose another directory).mv /tmp/bundle /opt/Rocket.Chat -
Add a user for the Rocket.Chat application:
sudo useradd -M rocketchat && sudo usermod -L rocketchat -
Set the permissions on the Rocket.Chat folder:
sudo chown -R rocketchat:rocketchat /opt/Rocket.Chat -
Create a Rocket.Chat service:
cat << EOF |sudo tee -a /lib/systemd/system/rocketchat.service [Unit] Description=Rocket.Chat server After=network.target remote-fs.target nss-lookup.target nginx.target mongod.target [Service] ExecStart=/usr/local/bin/node /opt/Rocket.Chat/main.js StandardOutput=syslog StandardError=syslog SyslogIdentifier=rocketchat User=rocketchat Environment=MONGO_URL=mongodb://192.168.1.2:27017/rocketchat?replicaSet=rs01 MONGO_OPLOG_URL=mongodb://192.168.1.2:27017/local?replicaSet=rs01 ROOT_URL=https://rocketchat.example.com/ PORT=3001 BIND_IP=192.168.1.X [Install] WantedBy=multi-user.target EOF -
Enable and start the Rocket.Chat service with the following command:
systemctl enable rocketchat.service && systemctl start rocketchat.service
Configuring the NGINX reverse proxy
-
Log into your NGINX reverse proxy Instance using SSH.
ssh root@<proxy-instance-ip> -
Update the APT repositories and upgrade the software already installed on the version to the latest version available in Ubuntu's official repositories:
apt update && apt upgrade -y -
Install the NGINX reverse proxy:
apt install nginx -y -
Create an NGINX configuration file called
/etc/nginx/sites-available/rocketchat.example.com(replacerocketchat.example.comwith the DNS hostname of your instance) and copy the following content into it:# Upstreams (Your two Rocket.Chat Instances inside the Private Network) upstream backend { server 192.168.1.3:3001; server 192.168.1.4:3001; } # Proxy Server server { listen 80; server_name rocketchat.example.com; # You can increase the limit if you need to. client_max_body_size 200M; error_log /var/log/nginx/rocketchat.access.log; location / { proxy_pass http://backend/; proxy_http_version 1.1; proxy_set_header Upgrade $http_upgrade; proxy_set_header Connection "upgrade"; proxy_set_header Host $http_host; proxy_set_header X-Real-IP $remote_addr; proxy_set_header X-Forward-For $proxy_add_x_forwarded_for; proxy_set_header X-Forward-Proto http; proxy_set_header X-Nginx-Proxy true; proxy_redirect off; } } -
Create a symbolic link to activate the proxy in NGINX:
ln -s /etc/nginx/sites-available/rocketchat.example.com /etc/nginx/sites-enabled/rocketchat.example.com -
Test the configuration file for syntax errors by running
nginx -t:root@proxy-instance:~# nginx -t nginx: the configuration file /etc/nginx/nginx.conf syntax is ok nginx: configuration file /etc/nginx/nginx.conf test is successful -
Reload NGINX to activate the new configuration:
service nginx reload -
Install Certbot
root@proxy-instance:~# apt install certbot python3-certbot-nginx -
Run
certbot --nginxto generate a new Let's Encrypt TLS certificate and reconfigure NGINX automatically:root@proxy-instance:~# certbot --nginx Saving debug log to /var/log/letsencrypt/letsencrypt.log Plugins selected: Authenticator nginx, Installer nginx Enter email address (used for urgent renewal and security notices) (Enter 'c' to cancel): my@email.org <-- Enter your e-mail address - - - - - - - - - - - - - - - - - - - - - - - - - - - - - - - - - - - - - - - - Please read the Terms of Service at https://letsencrypt.org/documents/LE-SA-v1.2-November-15-2017.pdf. You must agree in order to register with the ACME server at https://acme-v02.api.letsencrypt.org/directory - - - - - - - - - - - - - - - - - - - - - - - - - - - - - - - - - - - - - - - - (A)gree/(C)ancel: a <-- Press "a" to agree to the terms of Service of Let's Encrypt - - - - - - - - - - - - - - - - - - - - - - - - - - - - - - - - - - - - - - - - Would you be willing to share your email address with the Electronic Frontier Foundation, a founding partner of the Let's Encrypt project and the non-profit organization that develops Certbot? We'd like to send you email about our work encrypting the web, EFF news, campaigns, and ways to support digital freedom. - - - - - - - - - - - - - - - - - - - - - - - - - - - - - - - - - - - - - - - - (Y)es/(N)o: n <-- press "y" if you want to share your email address with the EFF. Which names would you like to activate HTTPS for? - - - - - - - - - - - - - - - - - - - - - - - - - - - - - - - - - - - - - - - - 1: rocketchat.example.com - - - - - - - - - - - - - - - - - - - - - - - - - - - - - - - - - - - - - - - - Select the appropriate numbers separated by commas and/or spaces, or leave input blank to select all options shown (Enter 'c' to cancel): 1 <-- Press "1" to request the certificate for the configured domain name Obtaining a new certificate Performing the following challenges: http-01 challenge for rocketchat.example.com Waiting for verification... Cleaning up challenges Deploying Certificate to VirtualHost /etc/nginx/sites-enabled/rocketchat.example.com Please choose whether or not to redirect HTTP traffic to HTTPS, removing HTTP access. - - - - - - - - - - - - - - - - - - - - - - - - - - - - - - - - - - - - - - - - 1: No redirect - Make no further changes to the webserver configuration. 2: Redirect - Make all requests redirect to secure HTTPS access. Choose this for new sites, or if you're confident your site works on HTTPS. You can undo this change by editing your web server's configuration. - - - - - - - - - - - - - - - - - - - - - - - - - - - - - - - - - - - - - - - - Select the appropriate number [1-2] then [enter] (press 'c' to cancel): 2 <-- press "2" to automatically redirect all traffic to a secured connection or "1" to disable automatic redirection Redirecting all traffic on port 80 to ssl in /etc/nginx/sites-enabled/rocketchat.example.com - - - - - - - - - - - - - - - - - - - - - - - - - - - - - - - - - - - - - - - - Congratulations! You have successfully enabled https://rocketchat.example.com You should test your configuration at: https://www.ssllabs.com/ssltest/analyze.html?d=rocketchat.example.com - - - - - - - - - - - - - - - - - - - - - - - - - - - - - - - - - - - - - - - - IMPORTANT NOTES: - Congratulations! Your certificate and chain have been saved at: /etc/letsencrypt/live/rocketchat.bene.tf/fullchain.pem Your key file has been saved at: /etc/letsencrypt/live/rocketchat.bene.tf/privkey.pem Your cert will expire on 2021-01-19. To obtain a new or tweaked version of this certificate in the future, simply run certbot again with the "certonly" option. To non-interactively renew *all* of your certificates, run "certbot renew" - Your account credentials have been saved in your Certbot configuration directory at /etc/letsencrypt. You should make a secure backup of this folder now. This configuration directory will also contain certificates and private keys obtained by Certbot so making regular backups of this folder is ideal. - If you like Certbot, please consider supporting our work by: Donating to ISRG / Let's Encrypt: https://letsencrypt.org/donate Donating to EFF: https://eff.org/donate-leYour Rocket.Chat instance is ready now.
Setting up Rocket.Chat
- Point your web browser to your configured DNS hostname (i.e.,
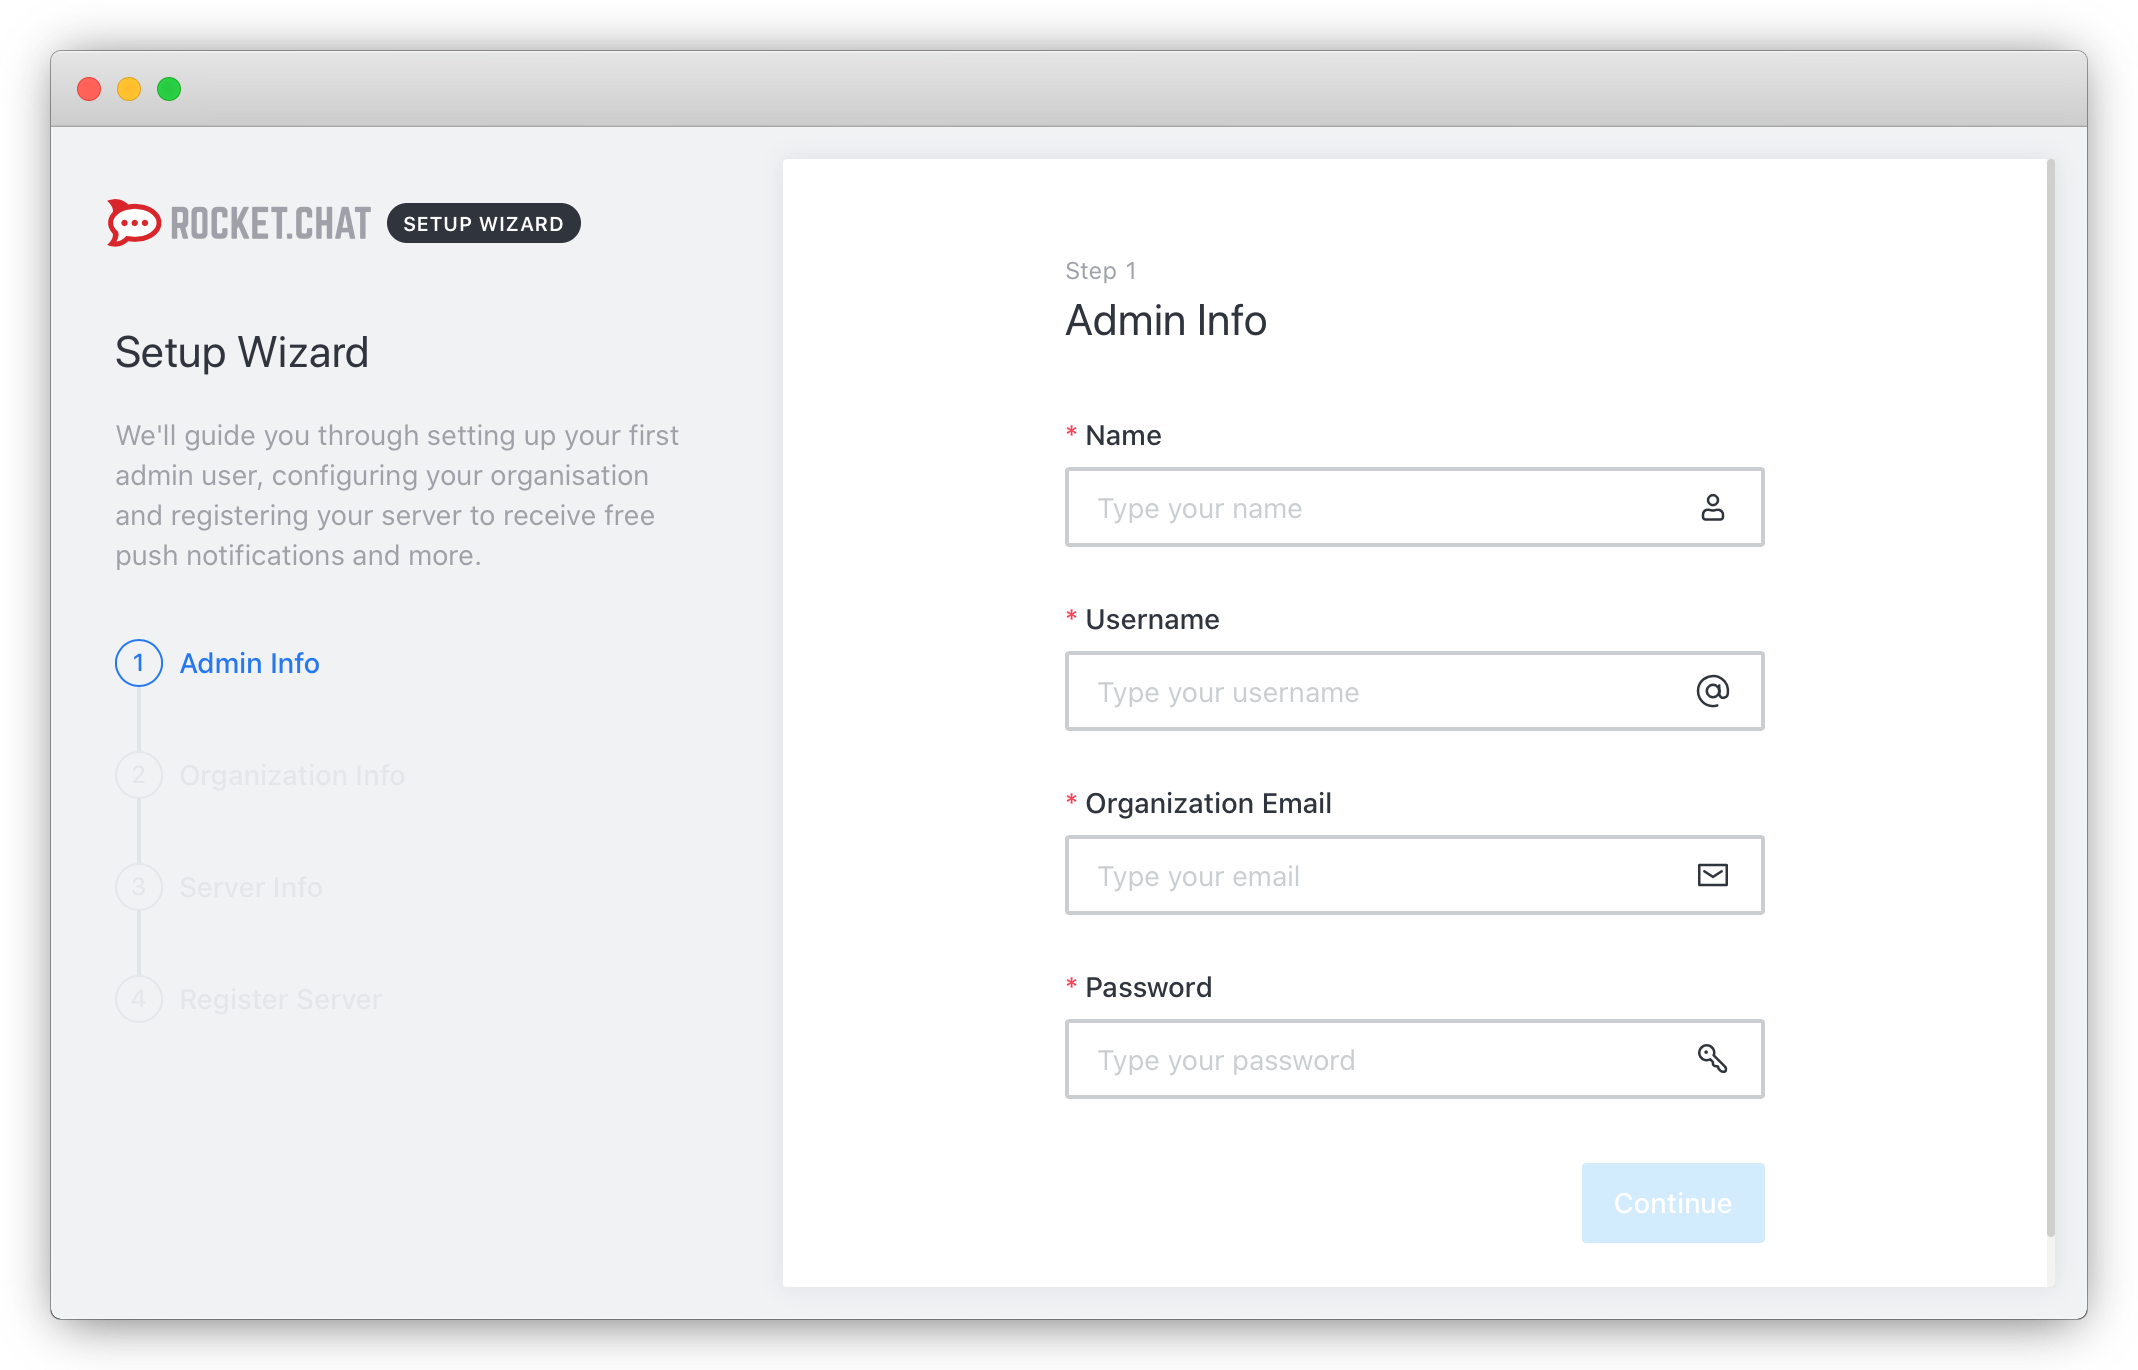
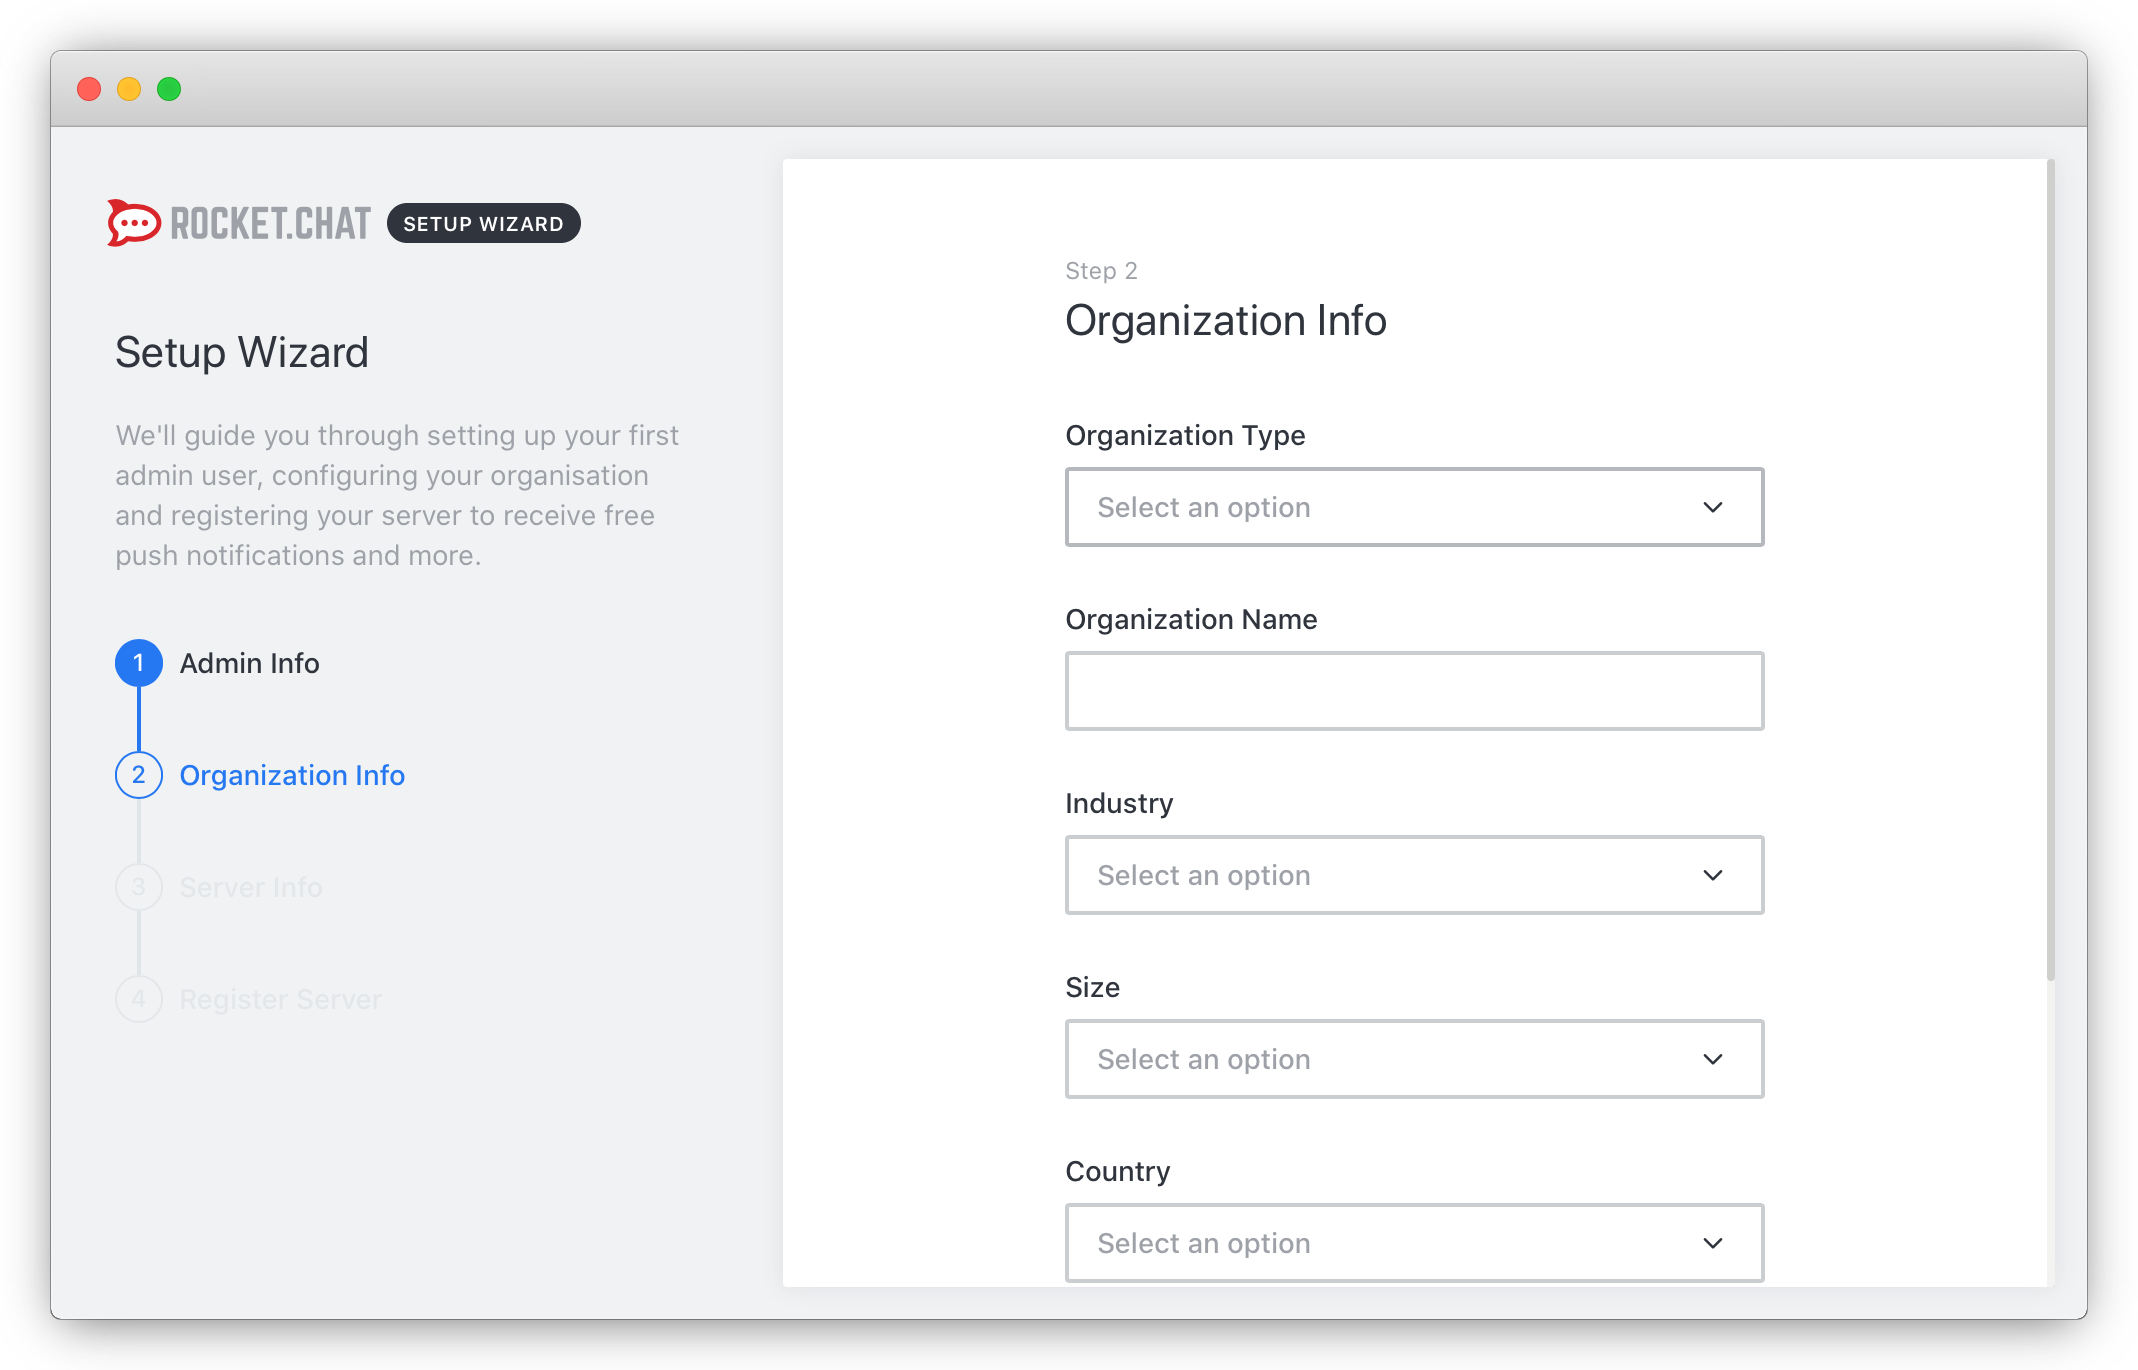
https://rocketchat.example.com). - The Rocket.Chat setup wizard displays. Enter your information for the admin account and click Continue to go to the next step:
- Provide the required information about your organization and click Continue to proceed with the configuration:
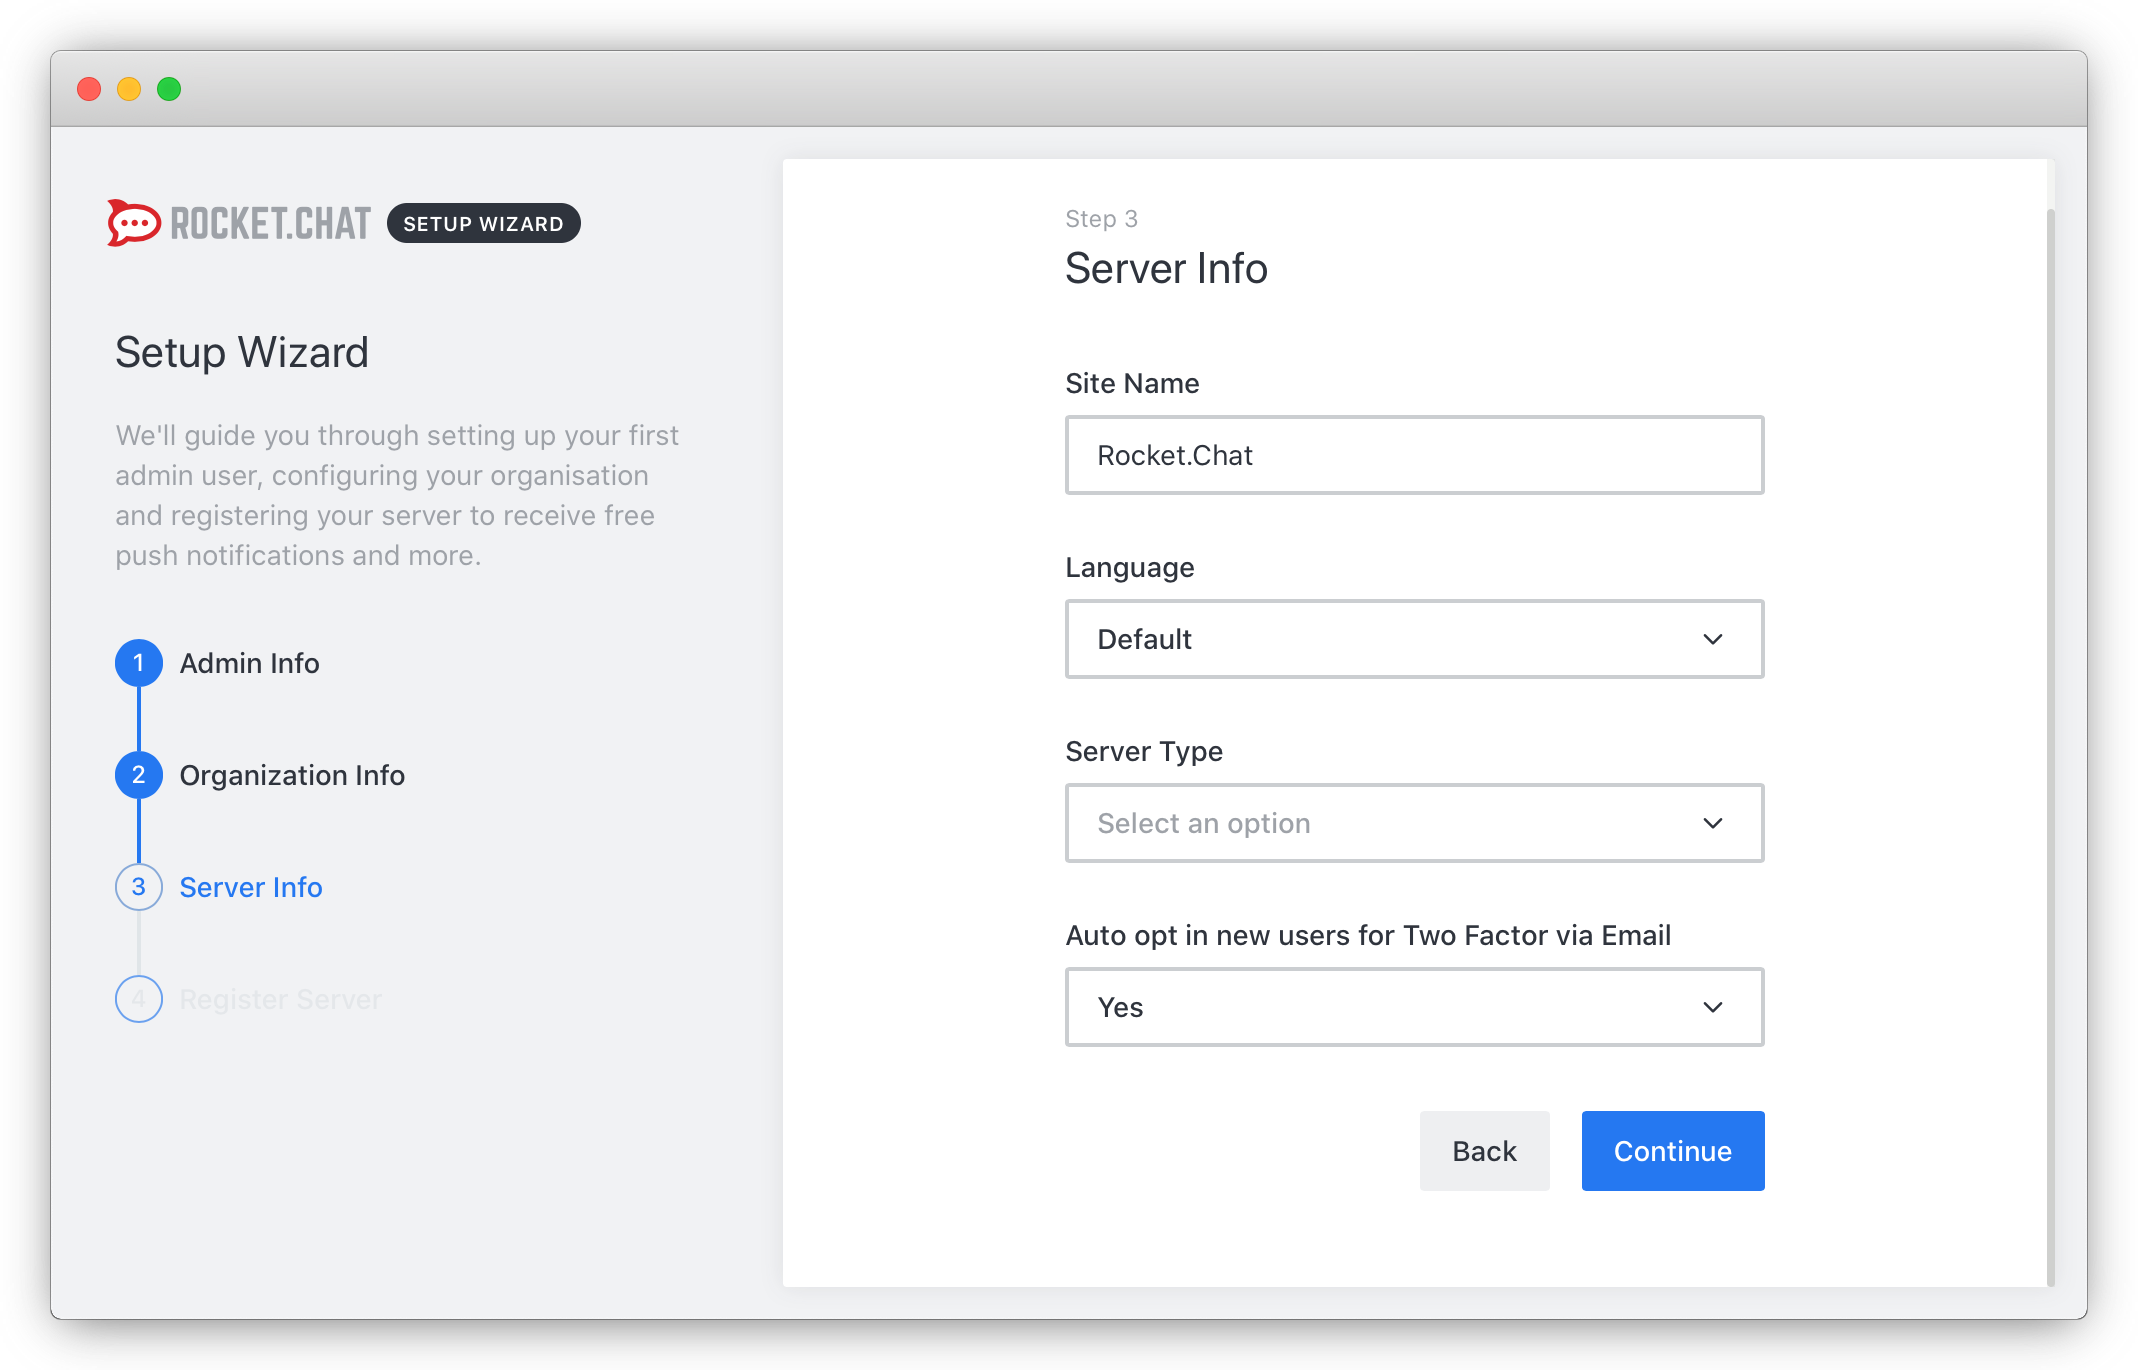
- Enter the details for your Rocket.Chat installation and confirm by clicking on Continue:
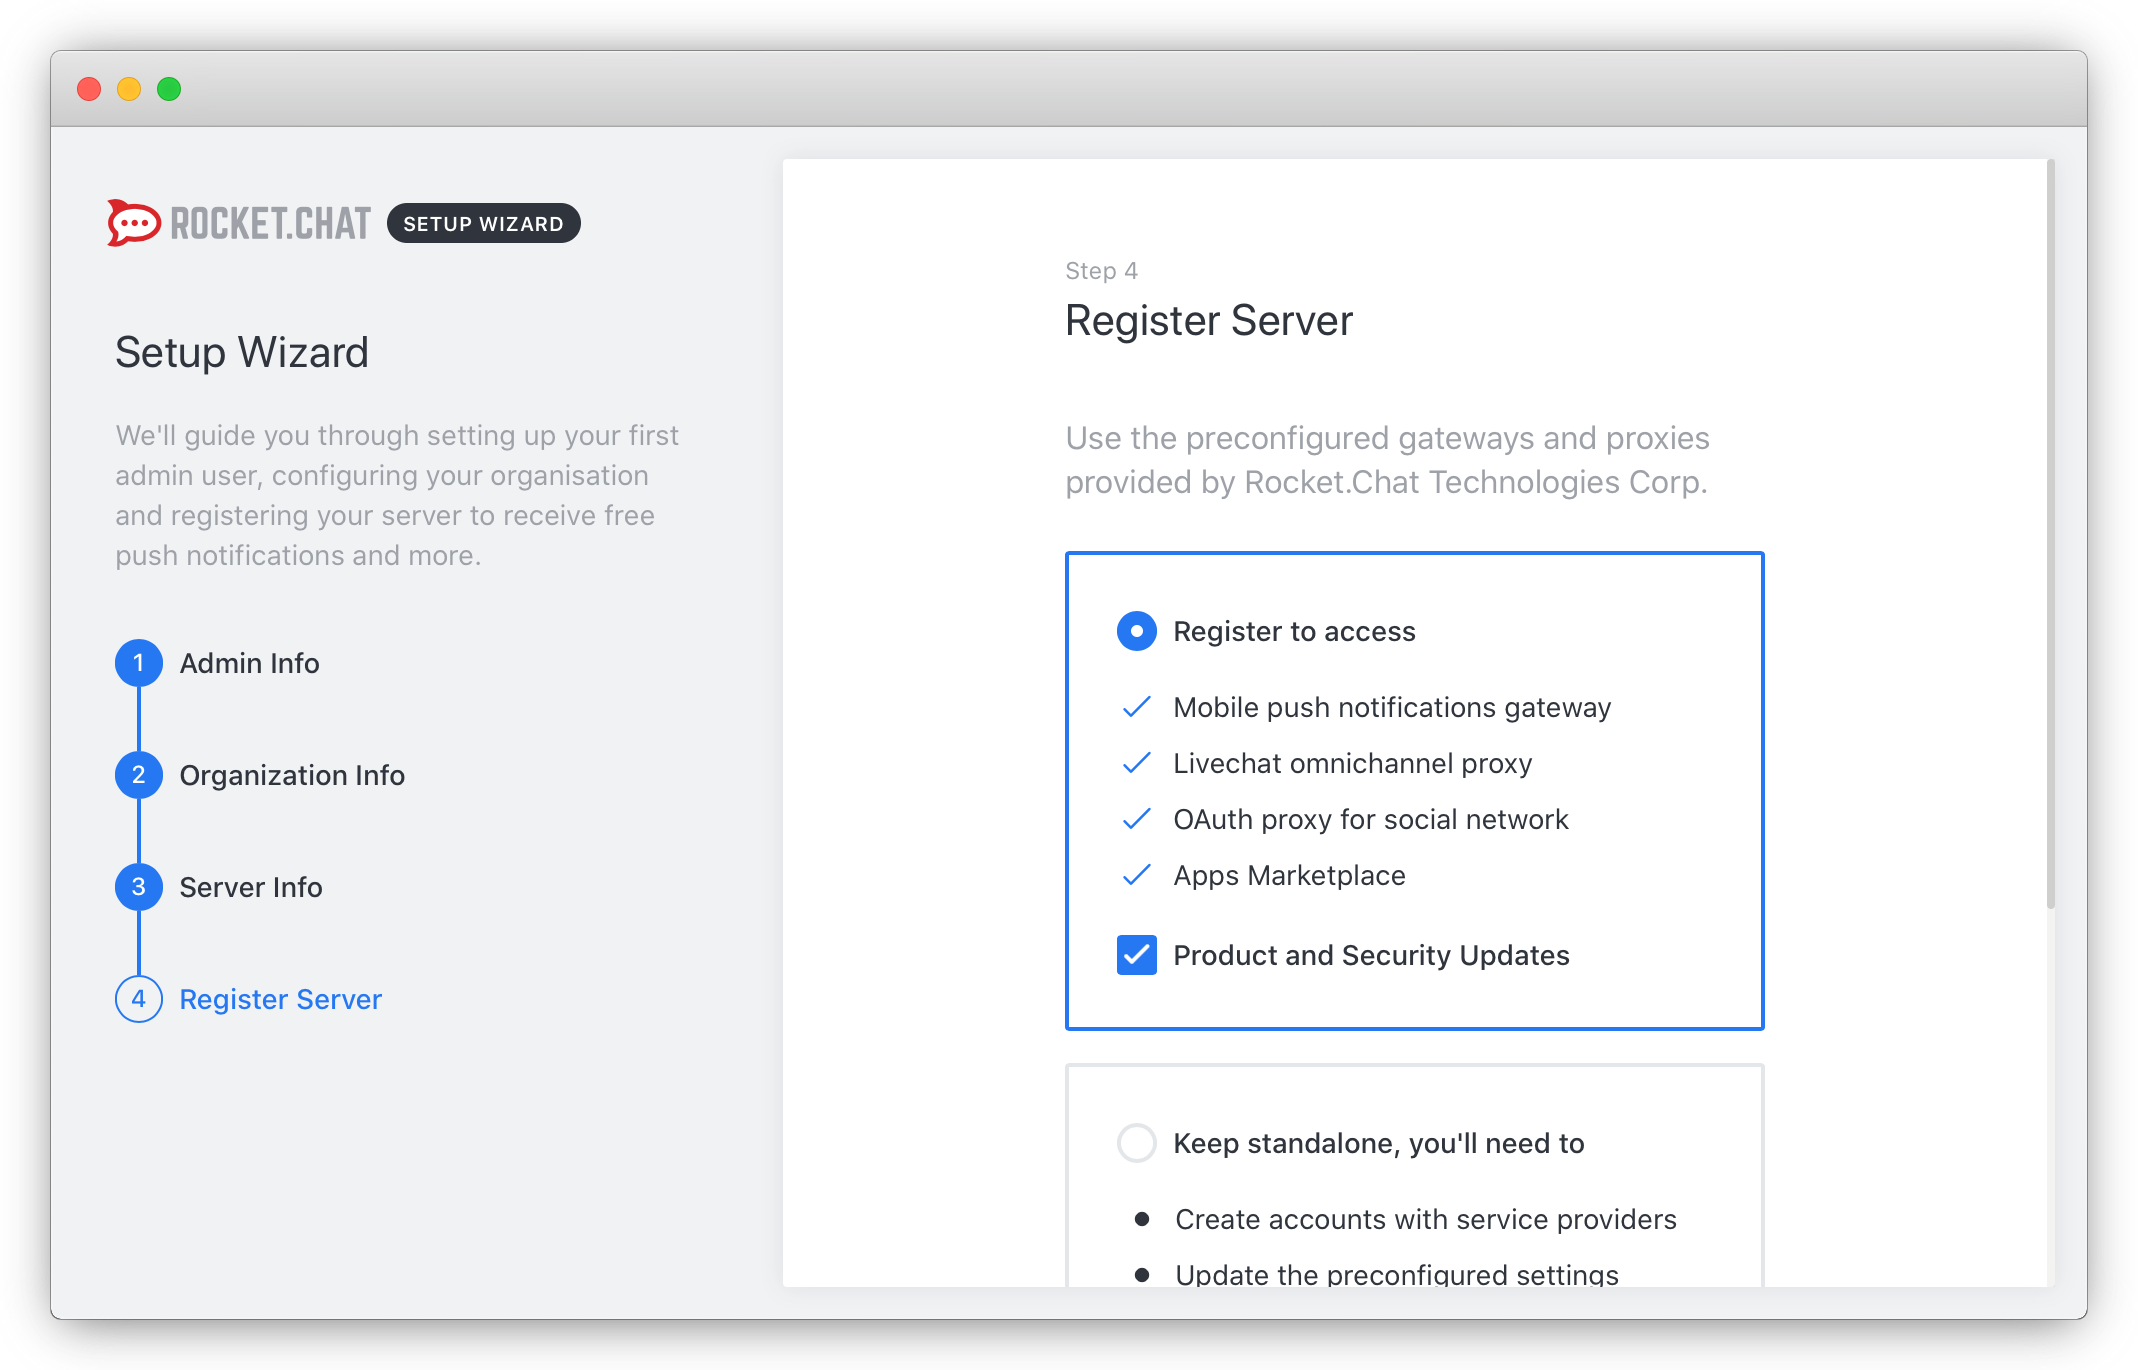
- You can either register your server with Rocket.Chat to have access to additional services or keep it as a standalone solution:
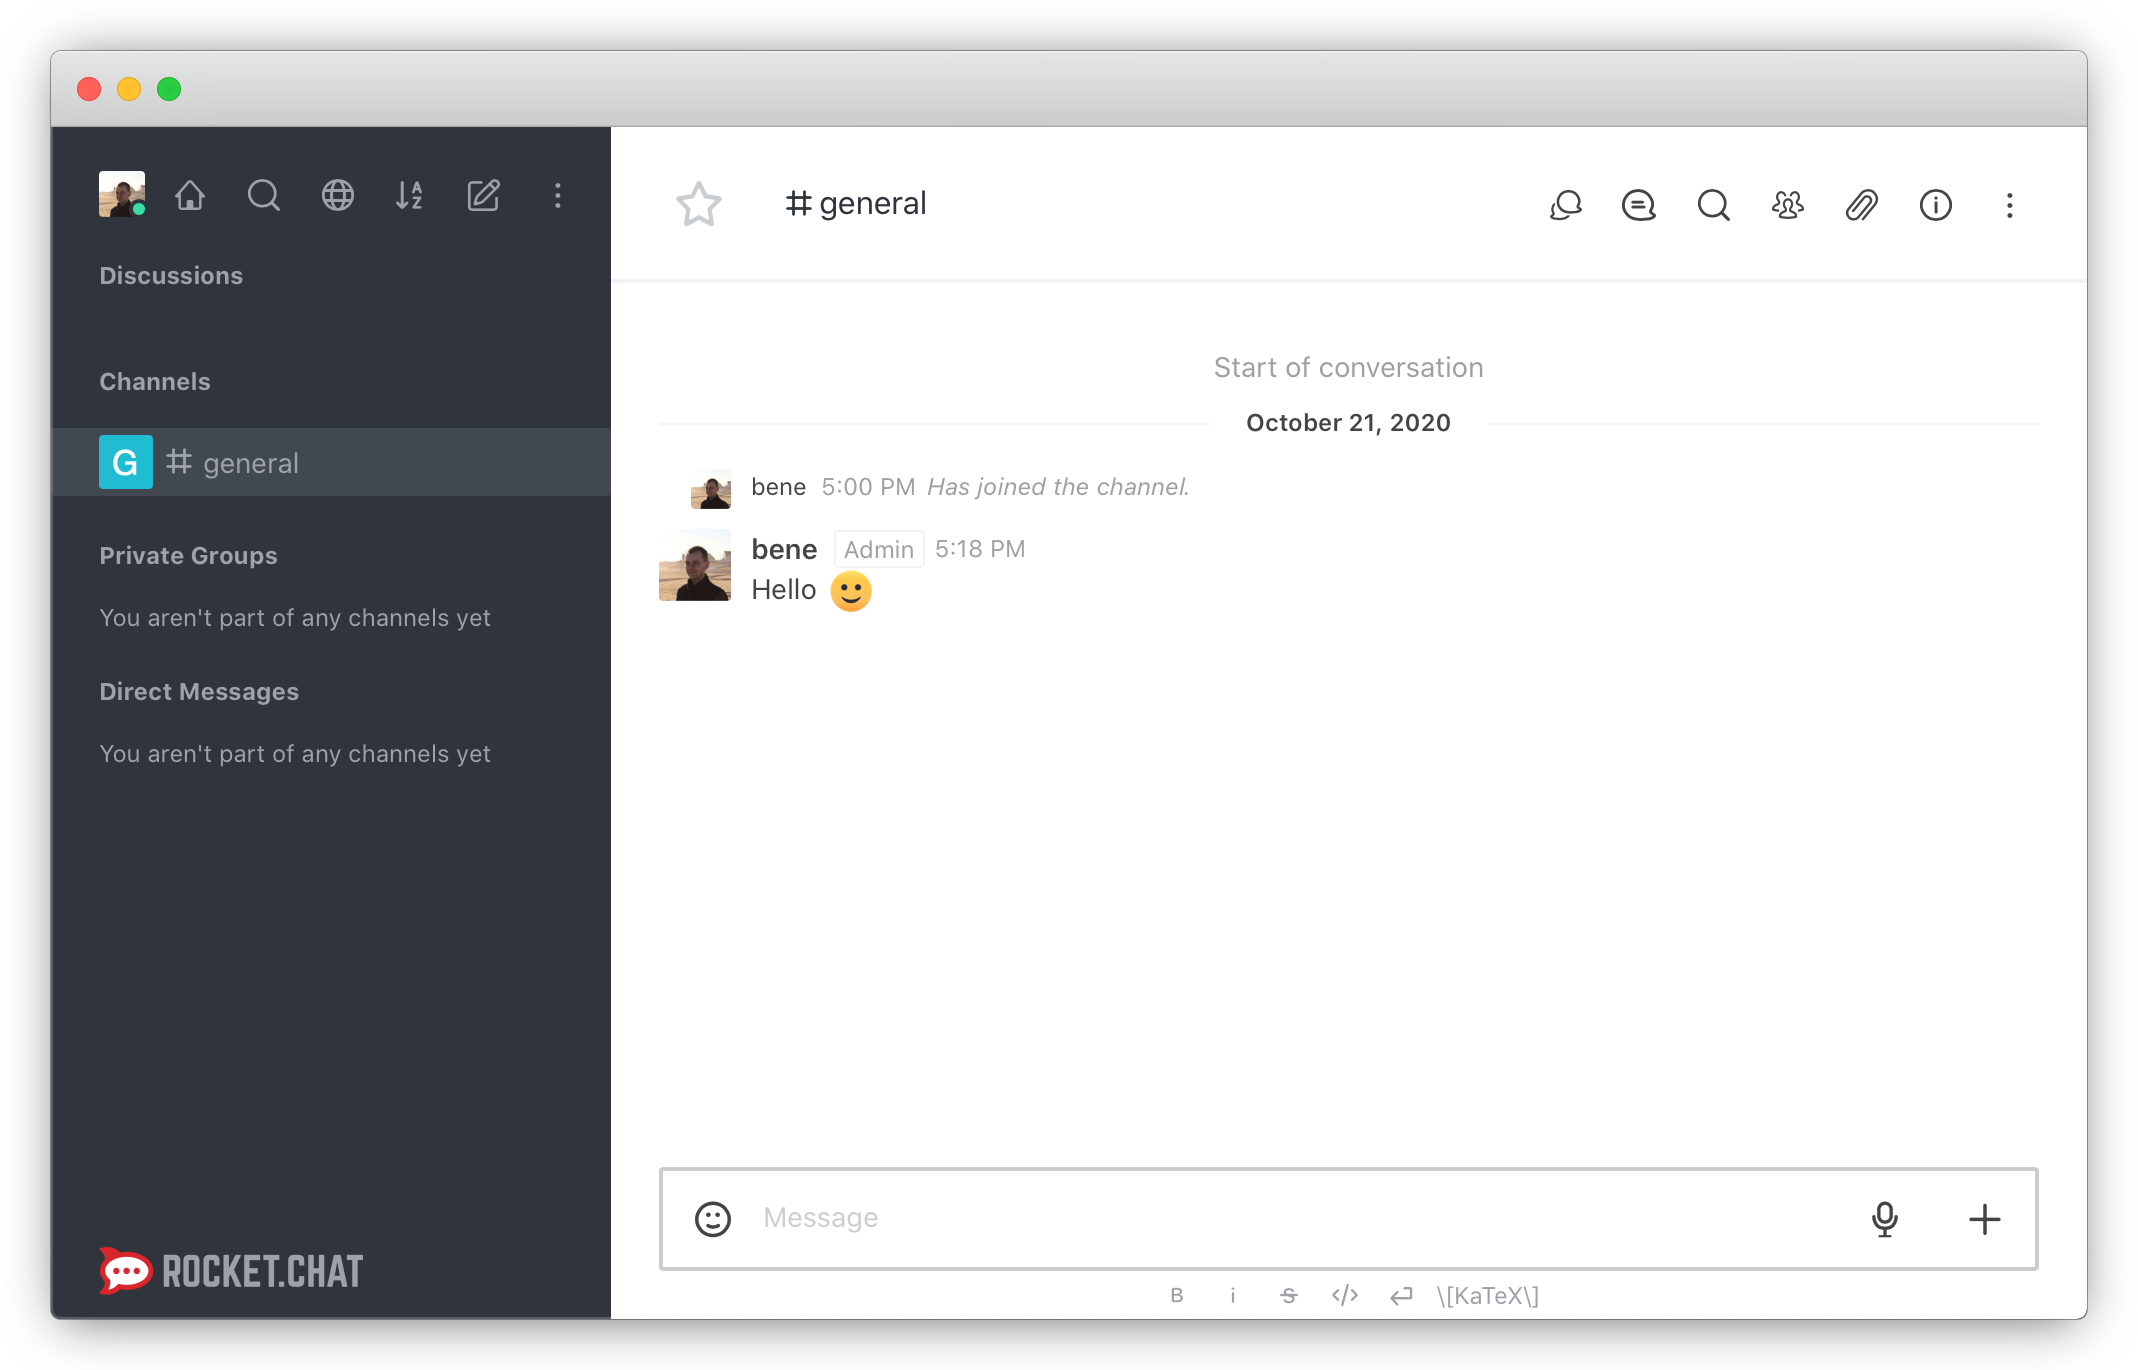
- Once you complete all steps, you are automatically logged into your Rocket.Chat application. You can start chatting now and invite other users to your community:
- Check the number of running Instances from the Rocket.Chat administration interface.
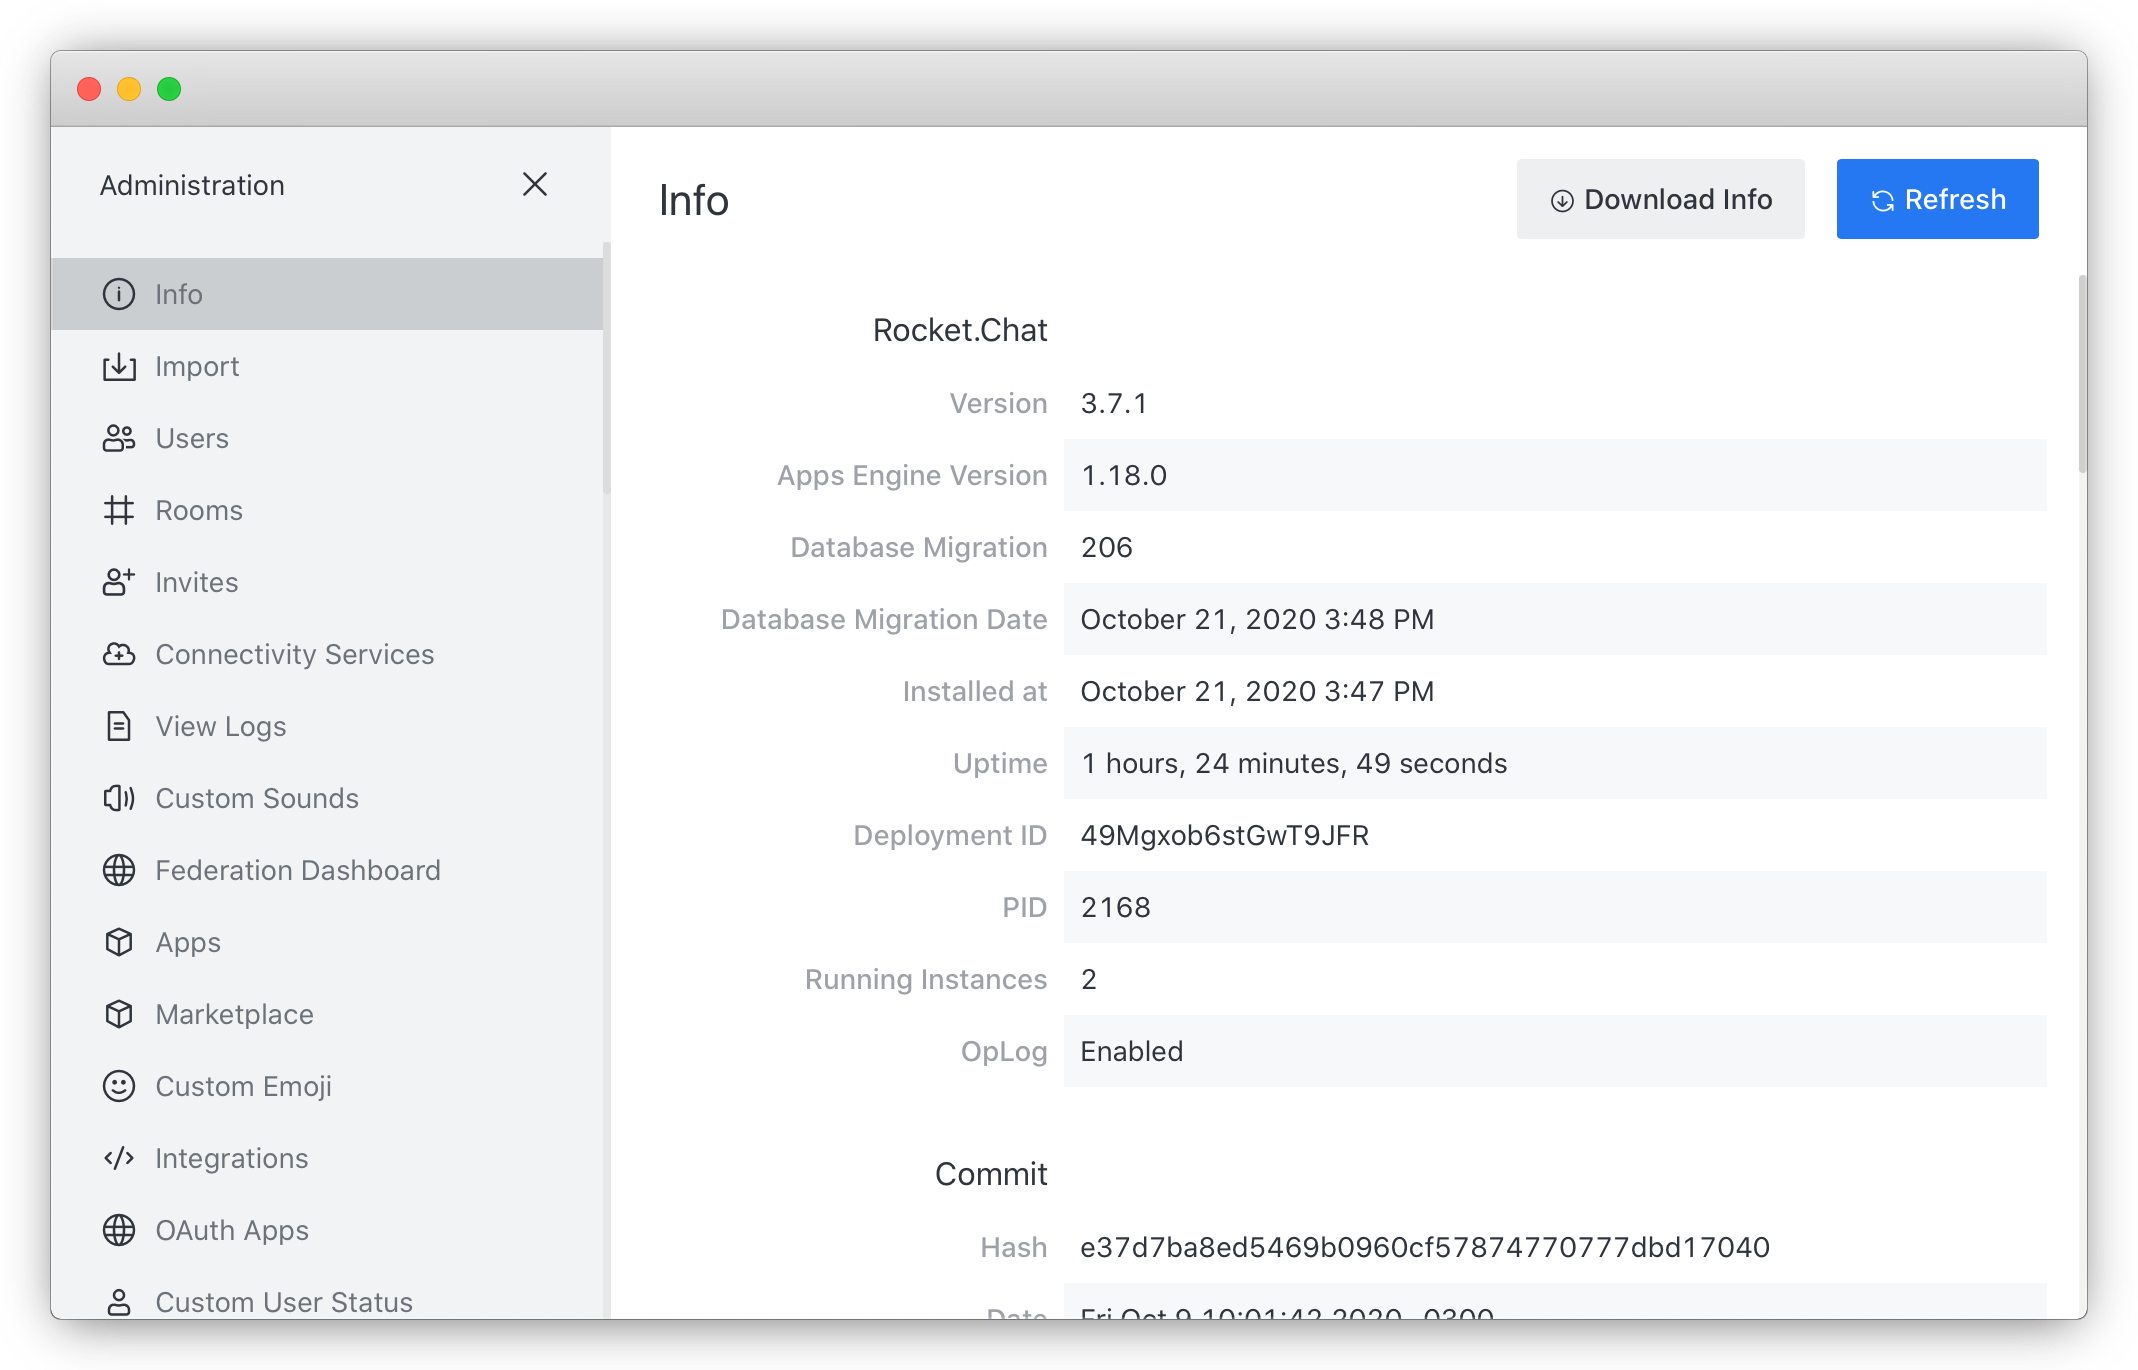
Once everything is set up and working, you can remove the public flexible IP addresses from both Rocket.Chat Instances, as well as from the MongoDB® instance. They will be able to communicate securely using the Private Network.
Conclusion
You have now configured a Rocket.Chat application based on several Instances and communicating internally using the Private Networks feature. The connection between these Instances is isolated from the internet and the internal network and only the Instances added to the Private Network can communicate with each other. For more advanced configuration options of Rocket.Chat, refer to the official documentation. More information about the Private Networks feature is available in our feature documentation. Do you have any remaining questions or suggestions? We welcome your feedback on Slack: Scaleway Community. Join us in the #private-network chan.
Visit our Help Center and find the answers to your most frequent questions.
Visit Help Center