Setting up a RTMP streaming server on a Scaleway Instance
The Internet's fascination with live video streaming continues to soar, with platforms such as Twitch and YouTube providing easy access to engage with live and recorded content.
However, while these platforms offer basic free options, users often encounter interruptions in the form of advertisements unless they opt for a paid subscription.
For individuals craving absolute control over their content, open-source solutions offer a compelling alternative. By configuring a personal live-streaming server, users can gain complete autonomy over their broadcasts. Using the open-source RTMP protocol on self-hosted streaming servers, users gain autonomy to manage their content free from external constraints and interruptions.
Before you start
To complete the actions presented below, you must have:
- A Scaleway account logged into the console
- Owner status or IAM permissions allowing you to perform actions in the intended Organization
- An SSH key
- An Instance running on Ubuntu Bionic Beaver (18.04)
Setting up the server
-
Log into the Instance via SSH.
-
Update the apt sources lists and upgrade the software already installed on the Instance:
apt update && apt upgrade -y -
All required packages for the basic server configuration are available via APT. Install
nginxand the required packages:apt install build-essential libpcre3 libpcre3-dev libssl-dev nginx libnginx-mod-rtmp ffmpeg -y -
Open the Nginx configuration file
/etc/nginx/nginx.confin a text editor:nano /etc/nginx/nginx.confAnd add the following lines at the end of the configuration file:
rtmp {
        server {
                listen 1935;
                chunk_size 4096;
                notify_method get;

                application live {
                            on_publish http://localhost/auth;
                            live on;
                            #Set this to "record off" if you don't want to save a copy of your broadcasts
                            record all;
                            # The directory in which the recordings will be stored
                            record_path /var/www/html/recordings;
                            record_unique on;
                }
        }
}
This sets up the live streaming server as well as the recording of the streams. These will be stored in the directory
/var/www/html/recordingsof the Instance. -
Create the directory for recordings and make it writeable to the web server software:
mkdir -p /var/www/html/recordings chown -R www-data:www-data /var/www/html/recordings/ -
Open the file
/etc/nginx/sites-enabled/defaultin a text editor:nano /etc/nginx/sites-enabled/default -
Add a
locationblock to the server configuration under theserver_nameblock, and replacea_secret_passwordwith a password of your choice, which authenticates against the server for broadcasting streams:location /auth { if ($arg_pwd = 'a_secret_password') { return 200; } return 401; } -
Restart the Nginx web server:
systemctl restart nginx.service
Configuring the OBS client
To broadcast a stream from a local computer to the streaming server, a broadcast system is required. Download OBS Studio, an open-source broadcasting solution, which is available for Linux, macOS, and Windows.
-
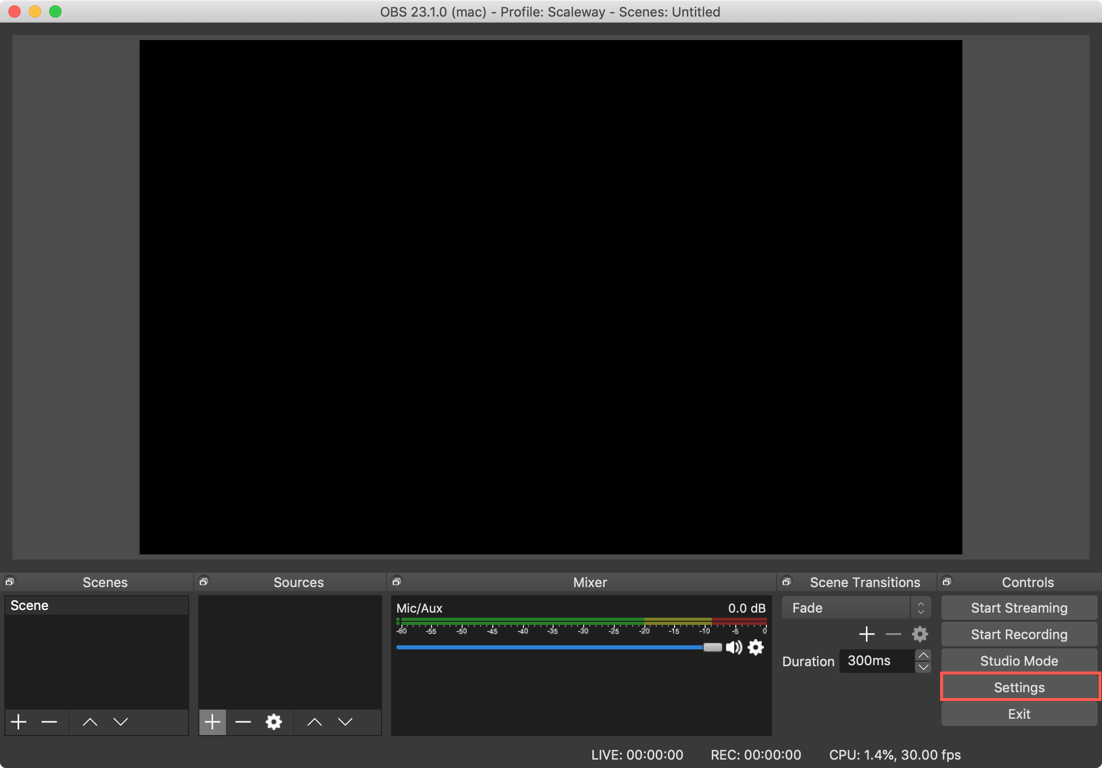
In the Controls section of the Interface, click Settings to enter the OBS configuration interface:

-
Enter the Stream tab and enter the Information about your streaming Instance:
Server:
- Service: Custom
- Server:
rtmp://<instance_ip>/live - Stream Key: your_stream?pwd=a_secret_password (replace your_stream with a custom name of your stream and a_secret_password with the password you have set in the Nginx configuration)

Save the configuration and set up your scene within OBS Studio.
-
When ready, start broadcasting to your Instance by clicking on Start Streaming in the Controls section of OBS.
Connecting to the stream
The stream can be viewed in your favorite media player, for example, VLC media player.
-
Start VLC and click Open Media.
-
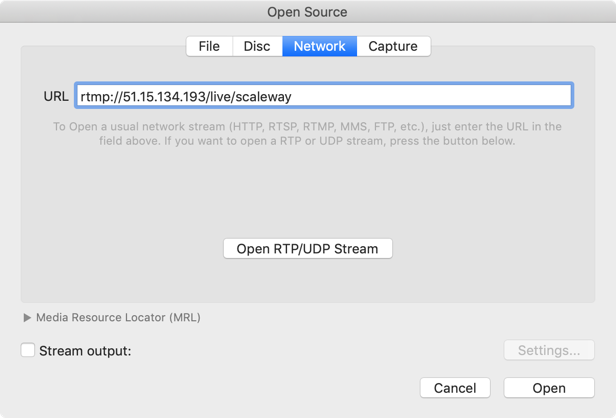
Click the Network tab and enter the URL of your Stream:
- URL:
rtmp://<instance_ip>/live/<your_stream>

- URL:
-
Click Open, and your stream will be visible in the media player.
Setting up multi-streaming
It is also possible to rebroadcast a stream to platforms like YouTube, Facebook, or Twitch to stream on multiple platforms at the same time.
-
Open the Nginx configuration file
/etc/nginx/nginx.confin a text editor:nano /etc/nginx/nginx.conf -
Edit the file as required for the different streaming services that you want to use:
rtmp { server { listen 1935; chunk_size 4096; notify_method get; application live { on_publish http://localhost/auth; live on; record all; record_path /var/www/html/recordings; record_unique on; # Define the applications to which the stream will be pushed, comment them out to disable the ones not needed: push rtmp://localhost/twitch; push rtmp://localhost/facebook; } # Twitch Stream Application application twitch { live on; record off; # Only allow localhost to publish allow publish 127.0.0.1; deny publish all; # Push URL with the Twitch stream key push rtmp://live-cdg.twitch.tv/app/<twitch_stream_key>; } # Facebook Stream Application application facebook { live on; record off; #Only allow localhost to publish allow publish 127.0.0.1; deny publish all; # Push URL with the Facebook stream key push rtmps://live-api-s.facebook.com:443/rtmp/<facebook_stream_key>; } } } -
Restart Nginx to activate the new configuration:
systemctl restart nginx.service -
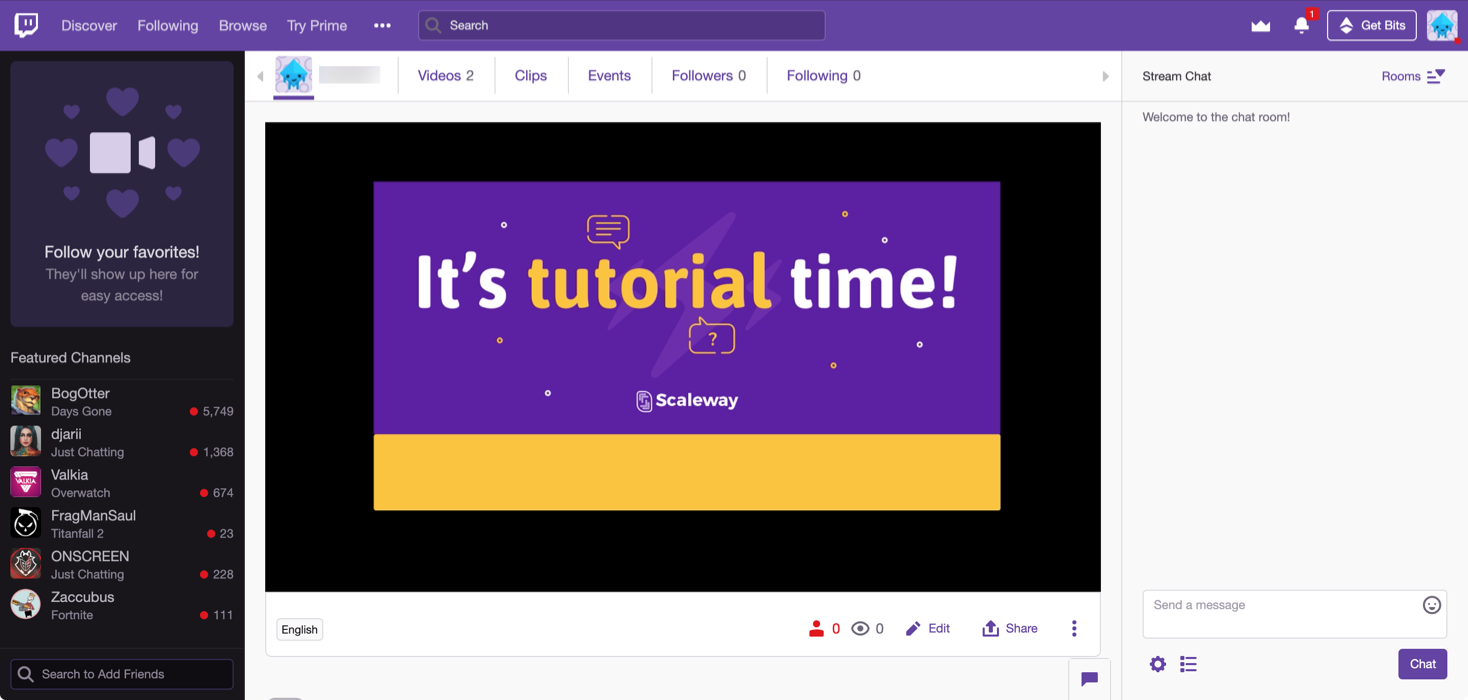
Start broadcasting from OBS. You can now either view your stream via a media player like VLC, and also from broadcasting platforms like Twitch:

Visit our Help Center and find the answers to your most frequent questions.
Visit Help Center