Setting up a Kubernetes Cluster using Rancher on Ubuntu with Docker
Rancher is an open-source container management platform providing a graphical interface that makes container management easier.
The Rancher UI makes it easy to manage secrets, roles, and permissions. It allows you to scale nodes and Pods and set up load balancers without requiring a command-line tool or editing hard-to-read YAML files.
Before you start
To complete the actions presented below, you must have:
- A Scaleway account logged into the console
- Owner status or IAM permissions allowing you to perform actions in the intended Organization
- An SSH key
- Configured a domain name (i.e.
rancher.example.com) pointing to the first Instance
Spinning up the required Instances
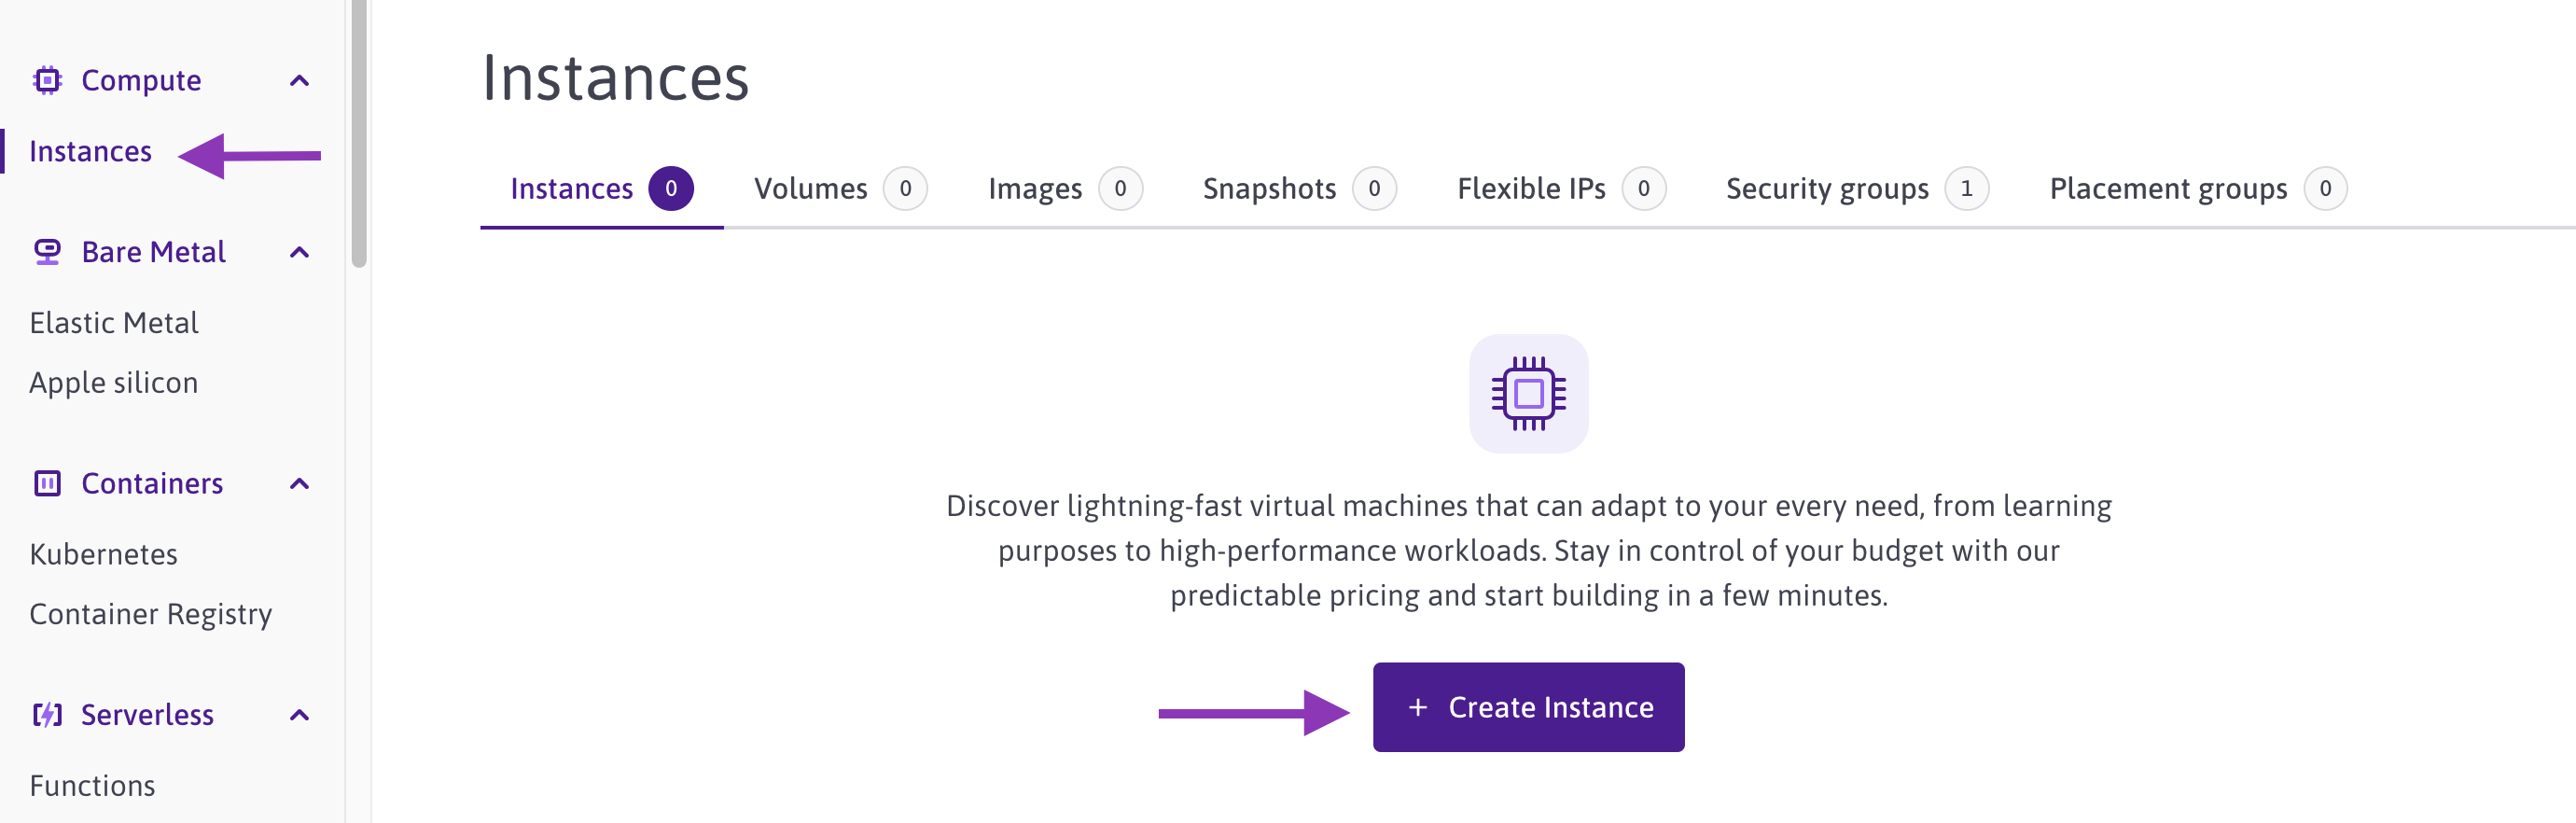
- Click CPU & GPU Instances in the Compute section of the side menu. The Instances page displays.
- Click Create Instance. The Instance creation wizard displays.
- To deploy Instances with Docker preinstalled, click + Create Instance:
- Click the InstantApps tab, and choose the Docker image:
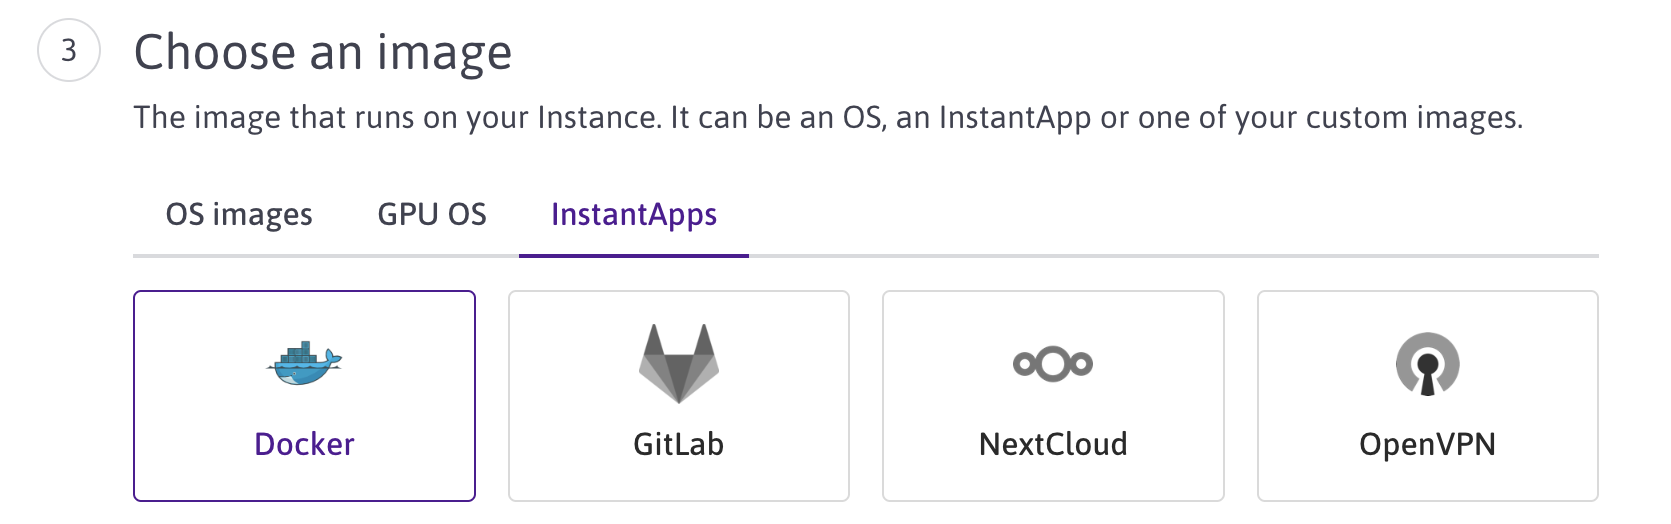
- Choose a region, type, and name for your Instance (i.e.,
rancher1), then click Create Instance. - Repeat these steps two more times to spin up a total of three Instances running Docker.
Installing Rancher
- Log into the first Instance (
rancher1) via SSH. - Run the following command to fetch the Docker image
rancher/rancherand run it in a container. This setup ensures that the Rancher container will restart automatically in case of failure. Make sure to replacerancher.example.comwith your actual domain name pointing to the first Instance to enable automatic Let's Encrypt SSL certificate generation:This command installs Rancher in a Docker container and automatically configures SSL using Let's Encrypt for secure communication.docker run -d --restart=unless-stopped -p 80:80 -p 443:443 -v /host/rancher:/var/lib/rancher rancher/rancher --acme-domain rancher.example.com
Configuring Rancher
- Once Rancher is installed, open a web browser and navigate to your Rancher domain (e.g.,
https://rancher.example.com). You will see the Rancher setup page: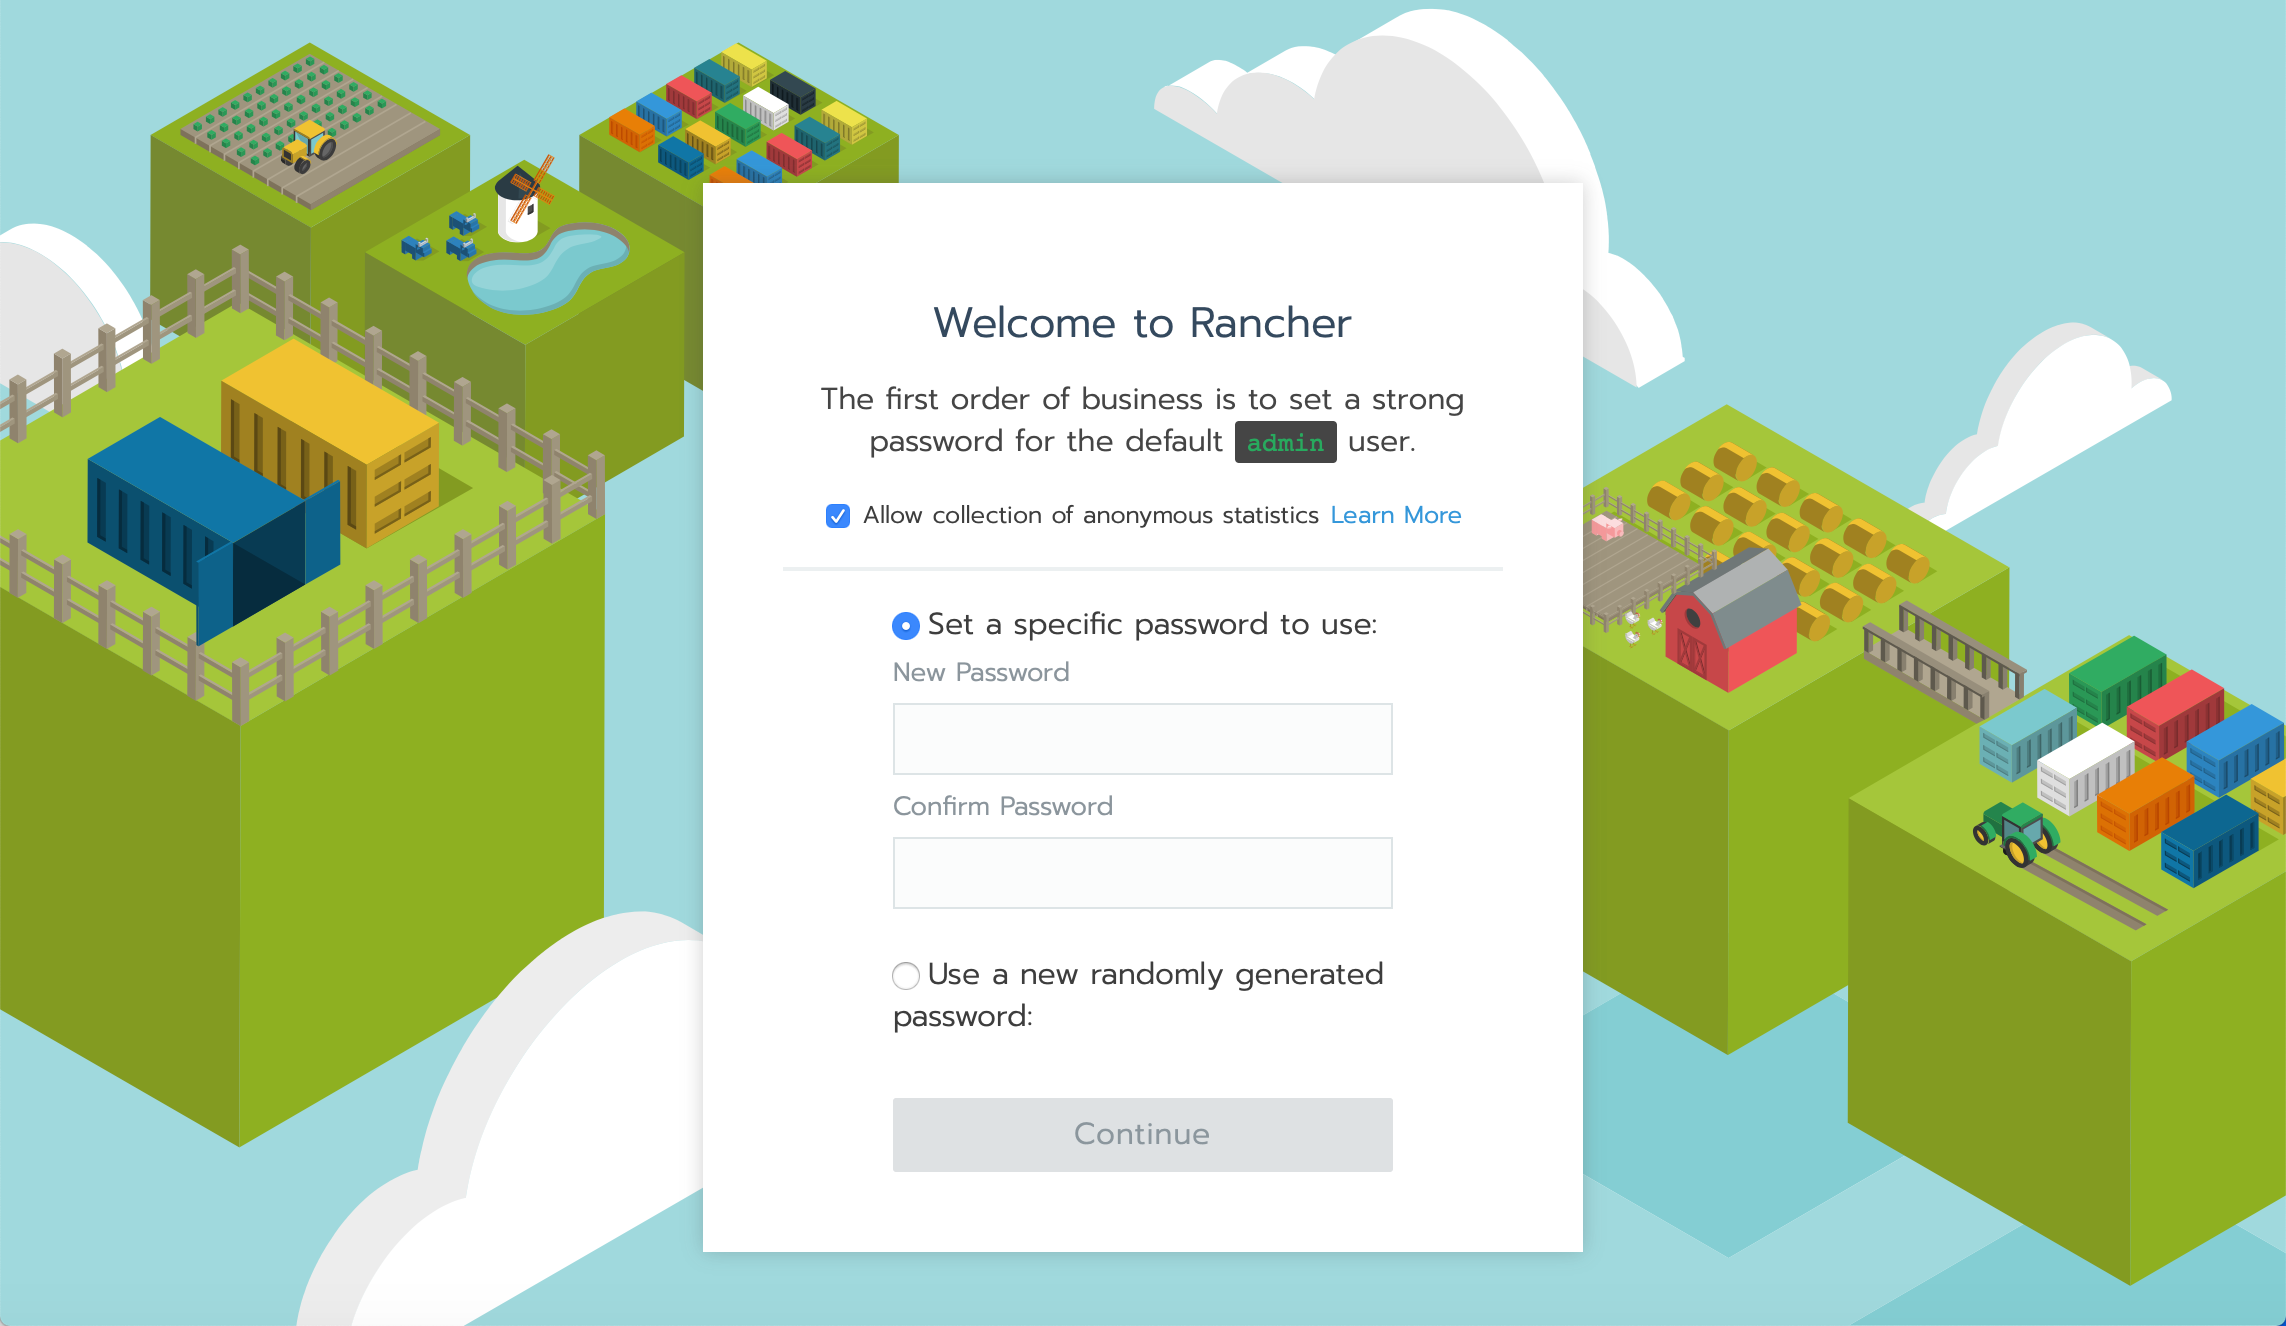
- Enter a password and its confirmation, and click Continue to proceed with the installation.
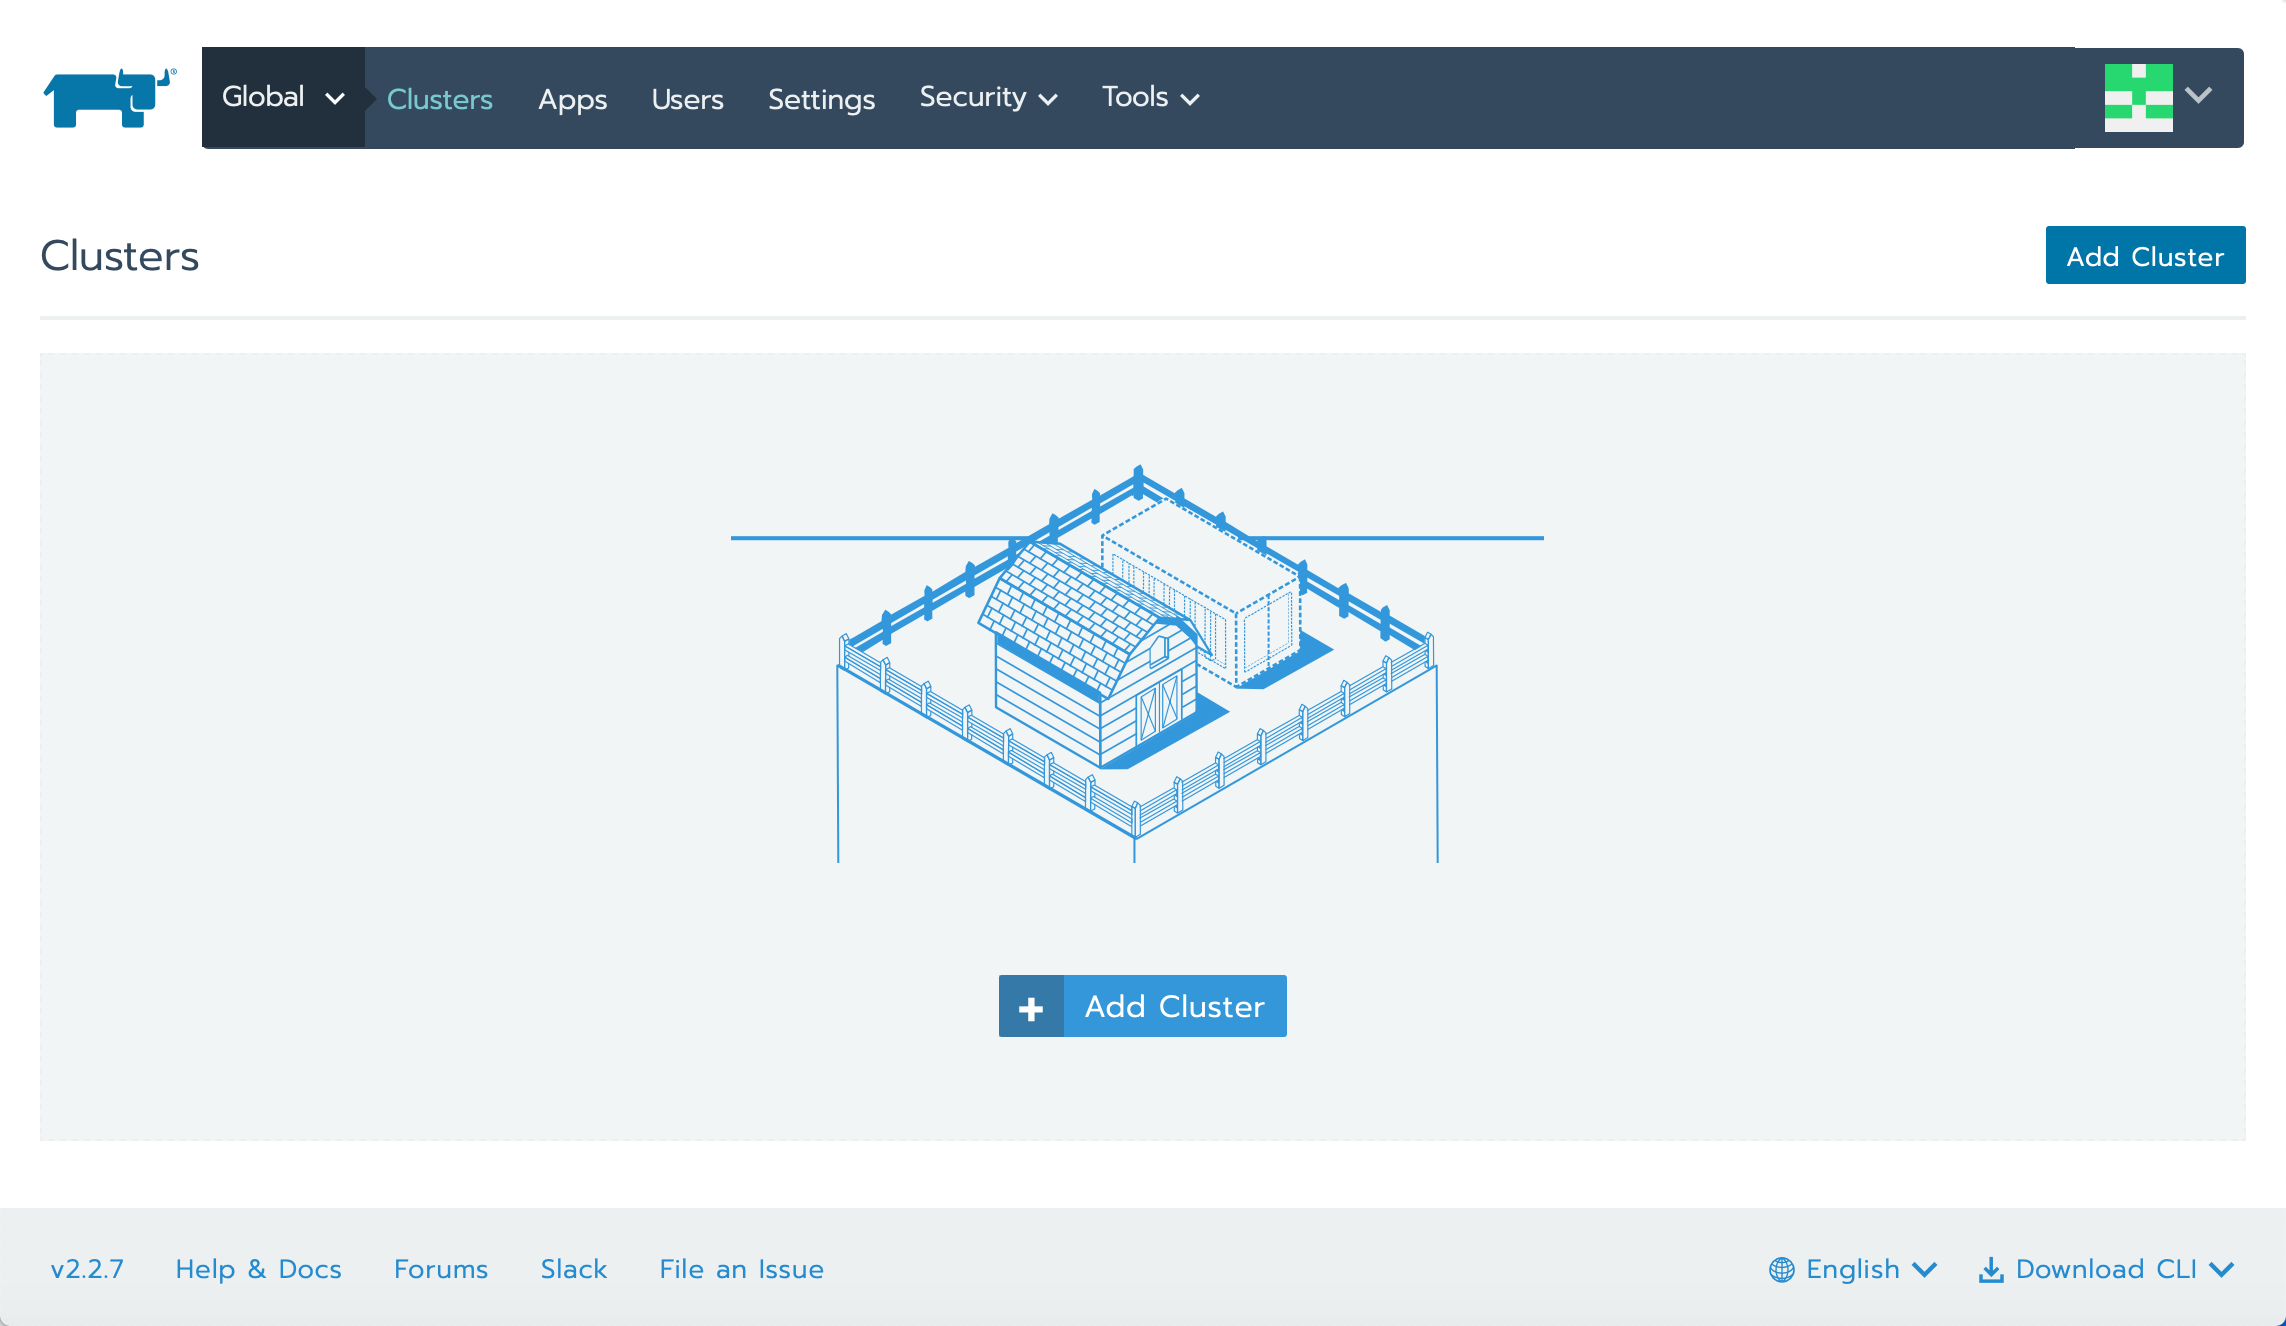
- The empty Rancher dashboard will display:
Creating a cluster
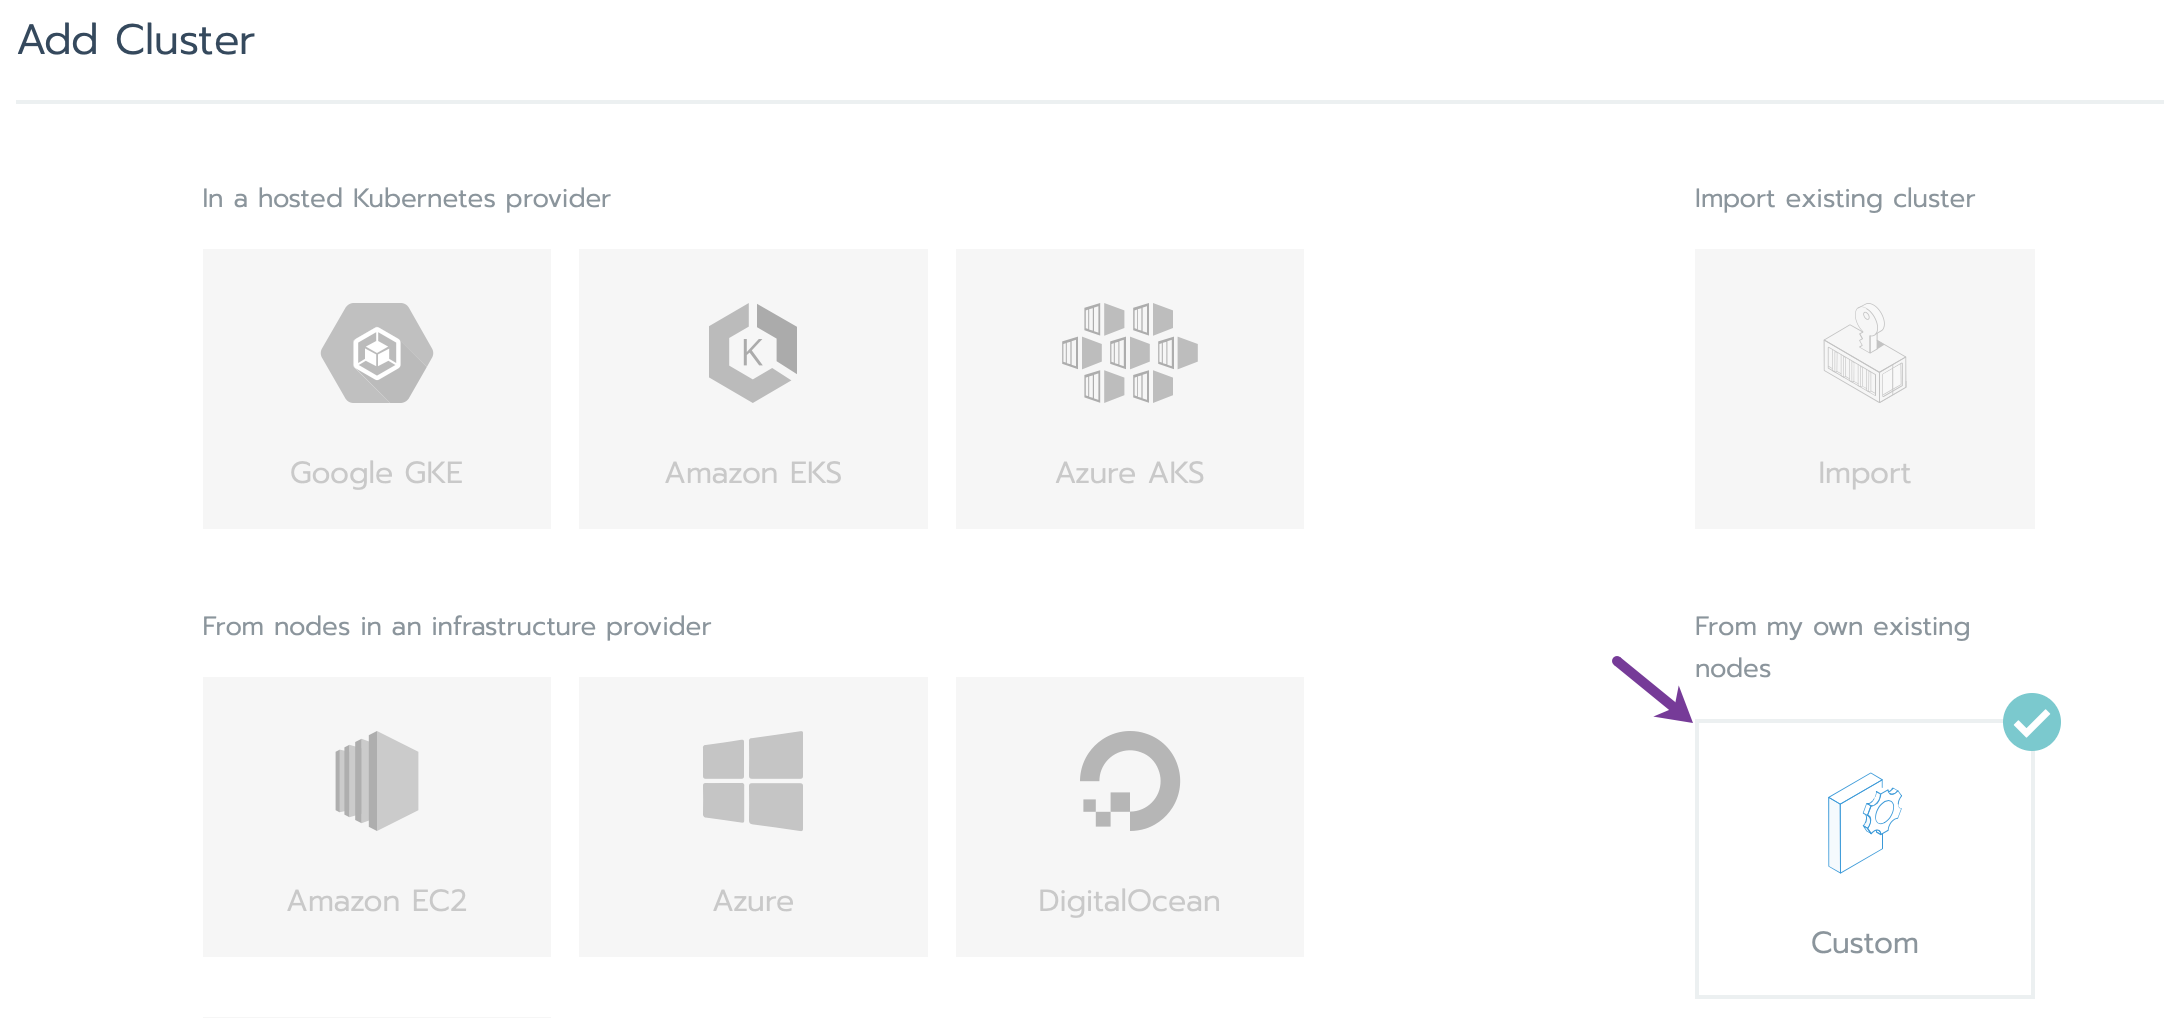
- In the Rancher UI, click Add Cluster to start configuring your new Kubernetes cluster.
- The cluster creation page will appear. Click Custom to deploy the cluster on the already launched Scaleway Instances:
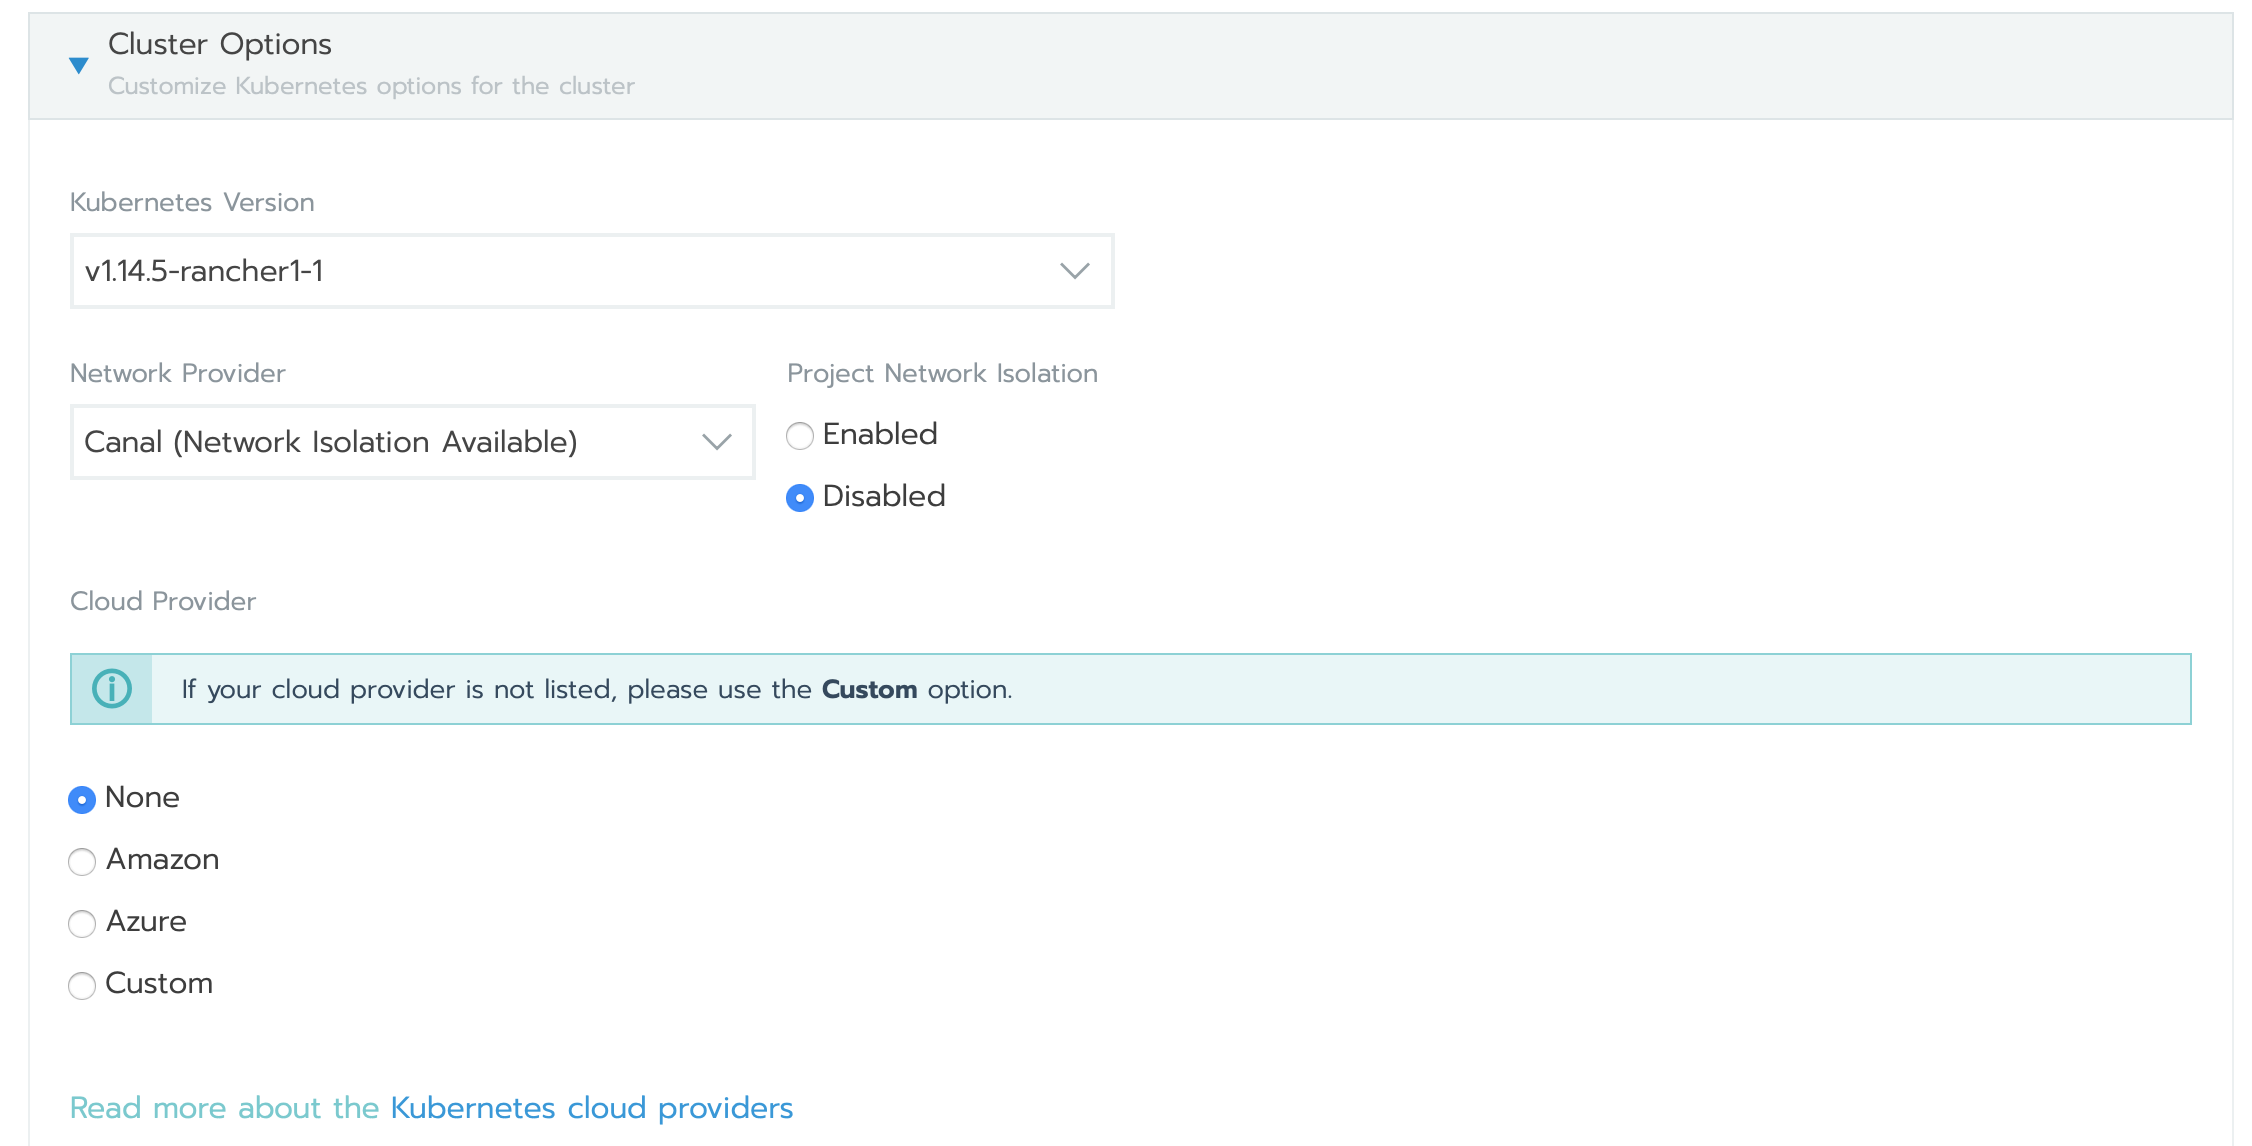
- Name the cluster, choose the desired Kubernetes version, and select None for the cloud provider (since this is a custom setup).
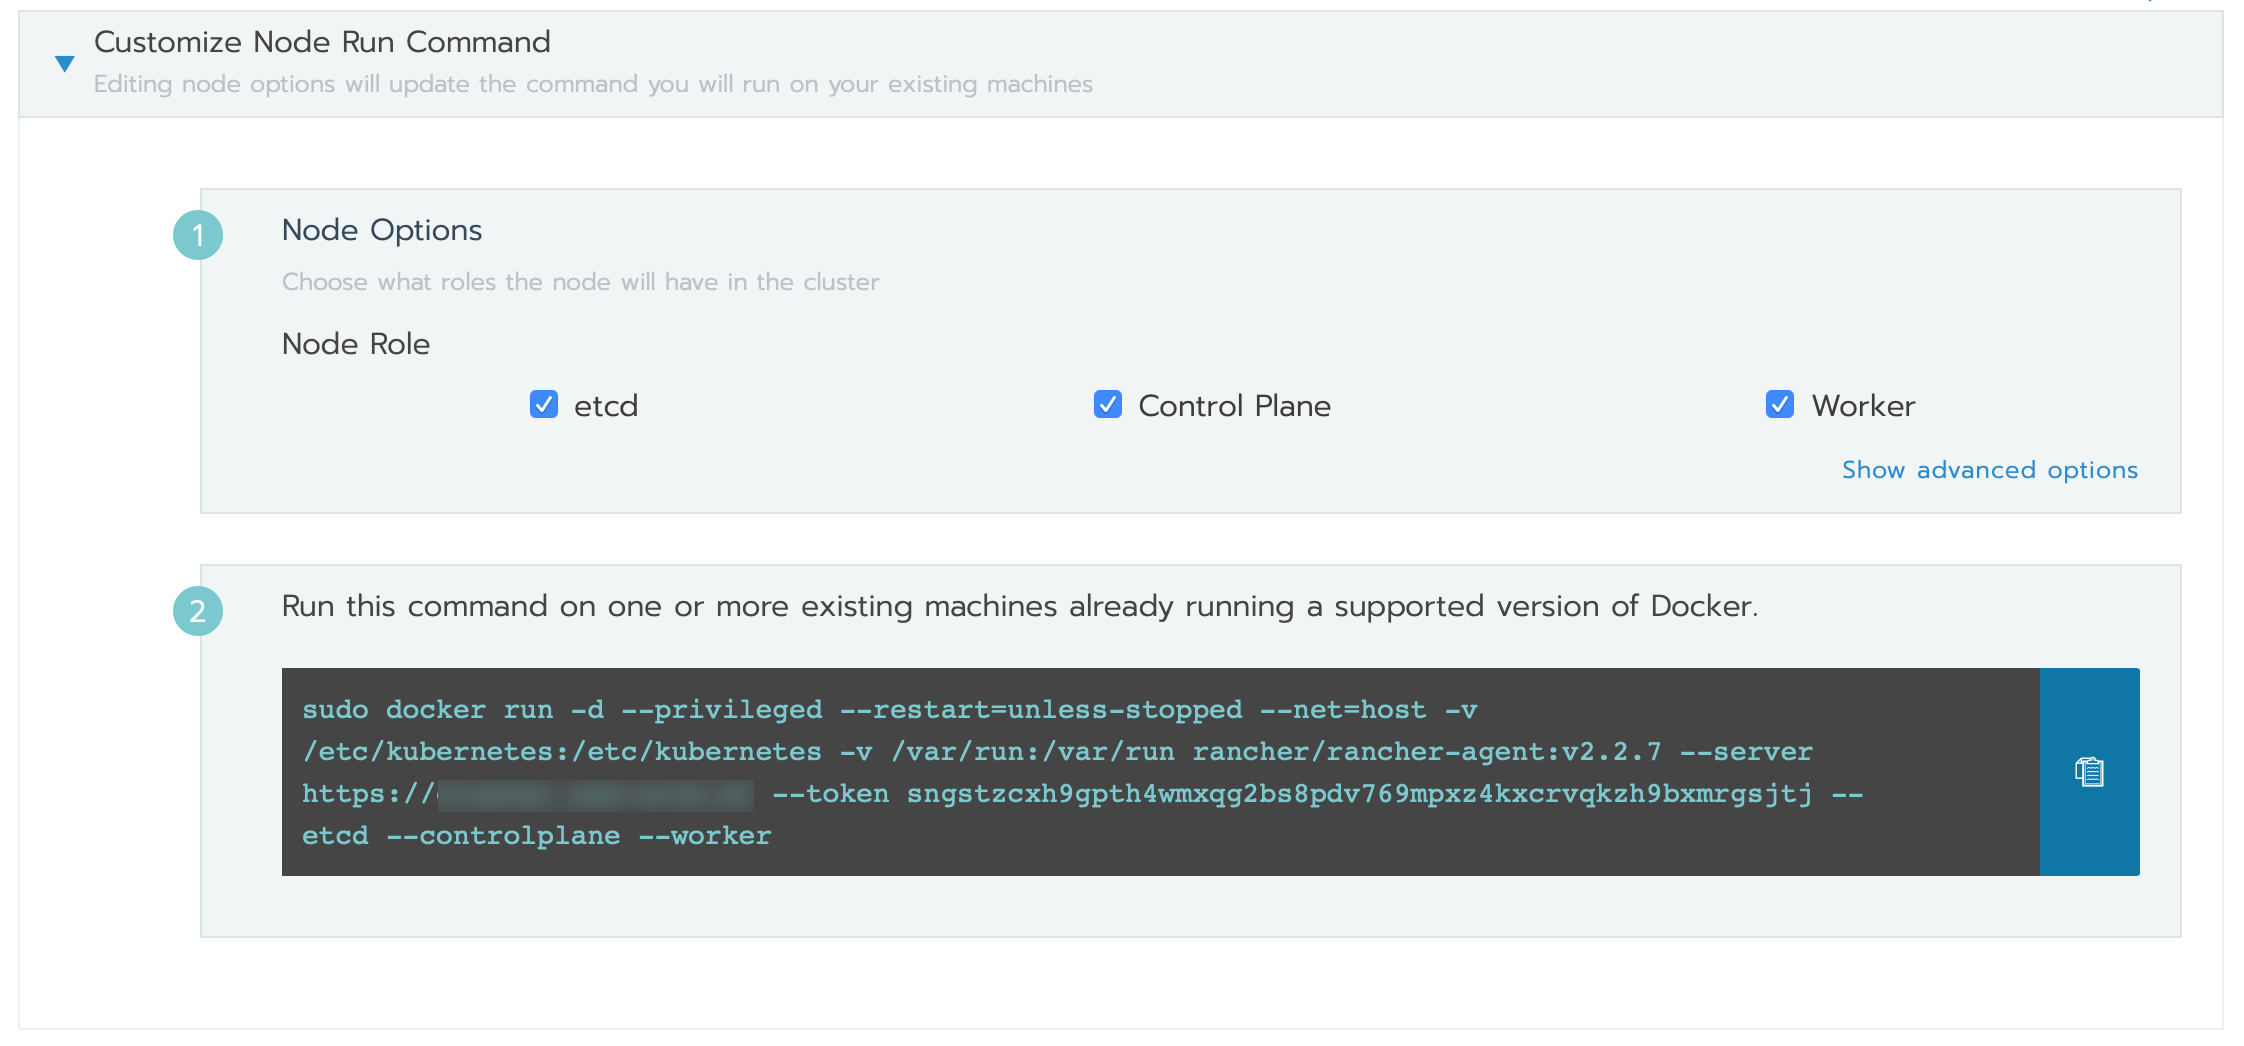
- Assign roles for each Instance in the cluster:
- Control plane: Manages the state and configuration of the cluster.
- etcd: Stores the state of the entire cluster (recommended to run 3 Instances for redundancy).
- Worker: Runs your containers/Pods and handles the workload. Once the roles are assigned, run the command shown on the page to install the necessary software on each Instance.
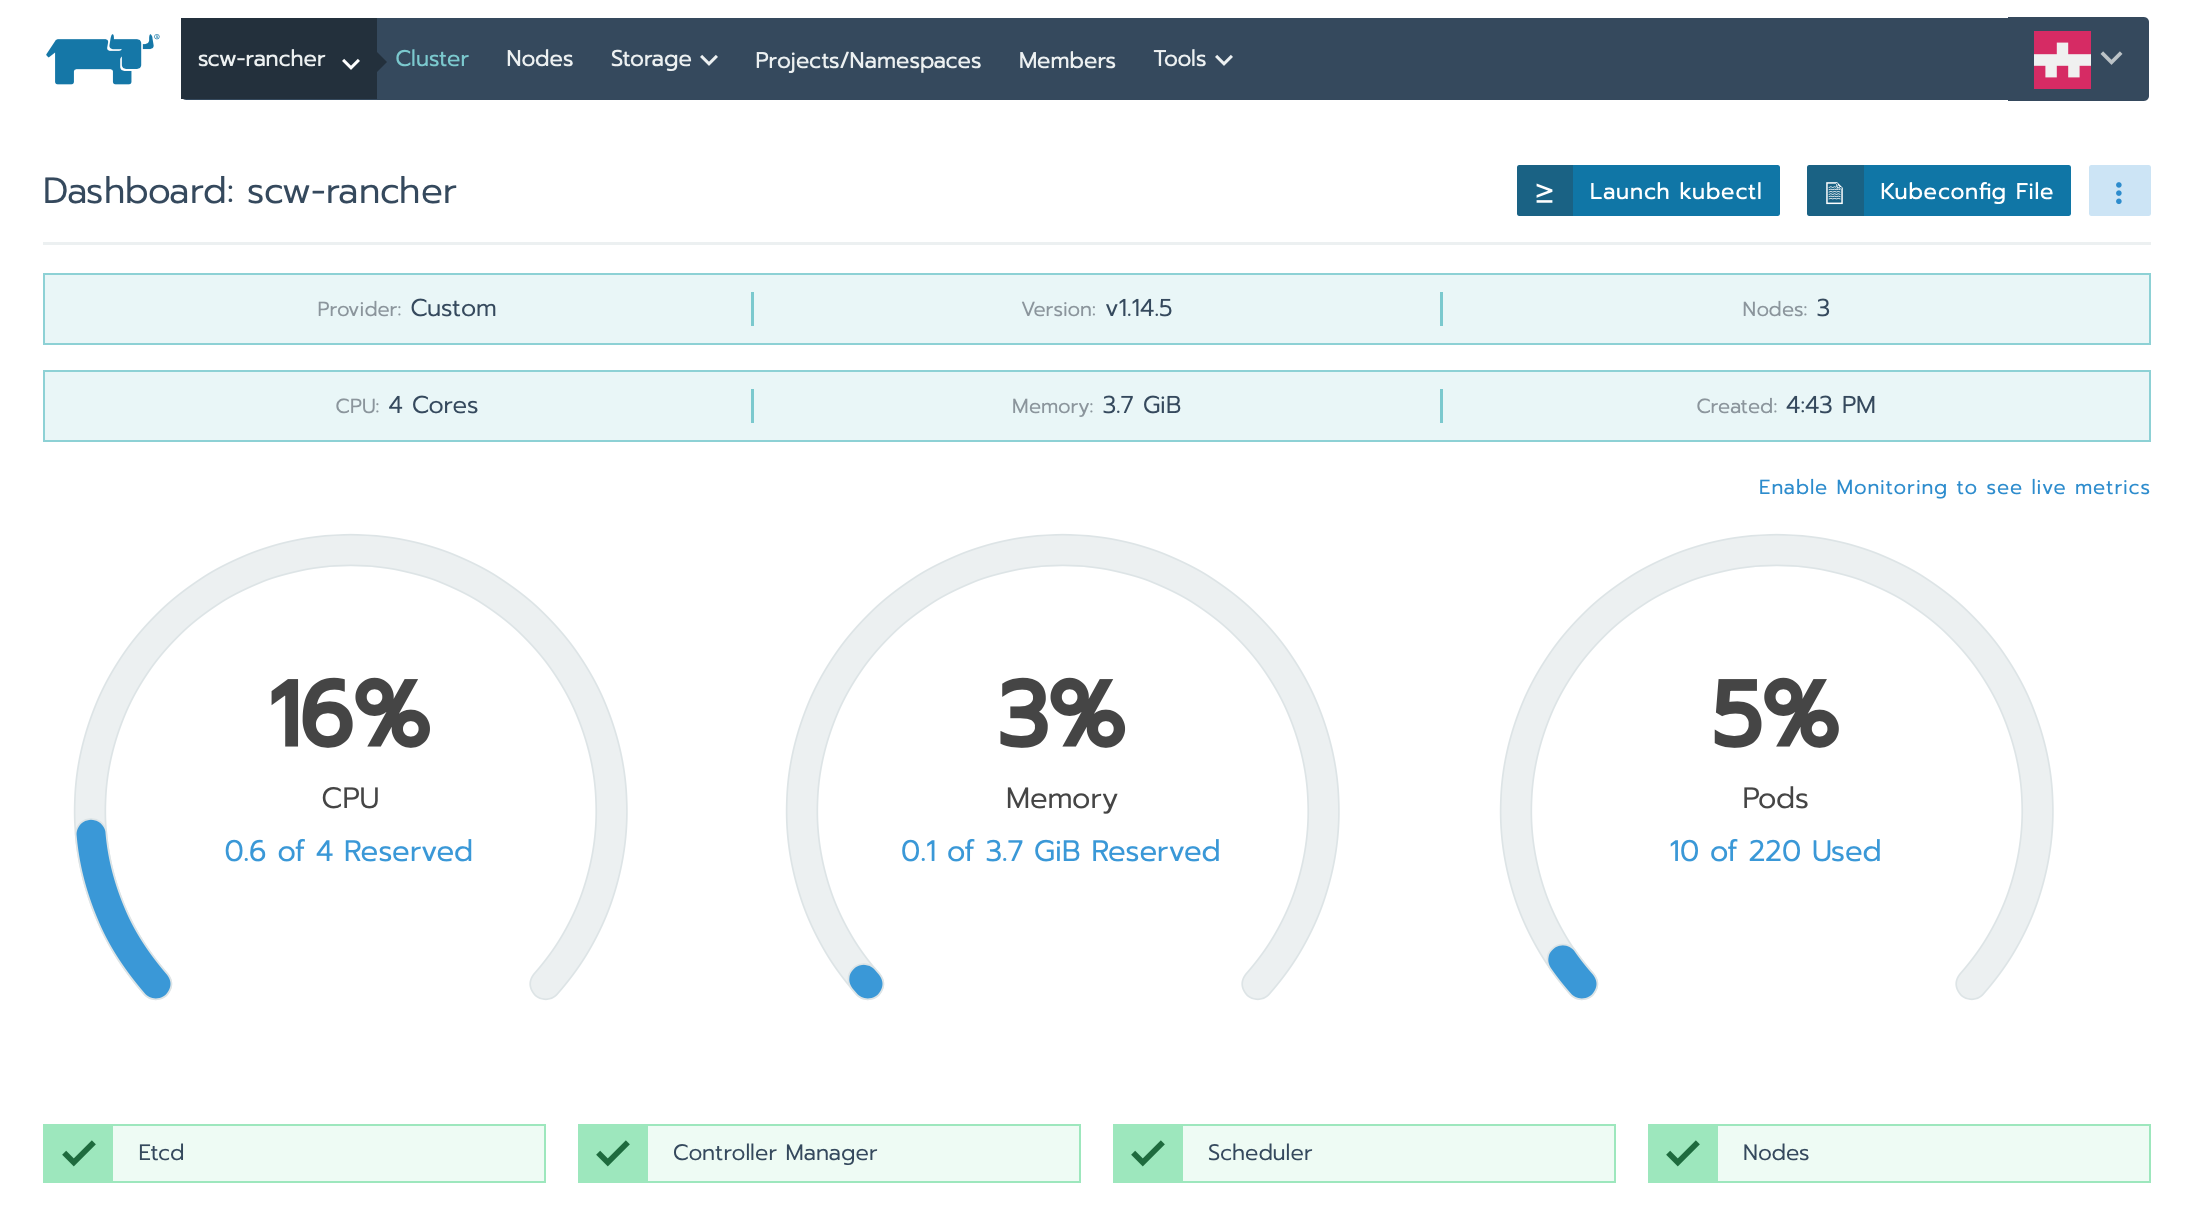
- Once all Instances are ready, click Done to initialize the cluster.
- When the cluster is initialized, the dashboard will display:
Deploying a cluster workload
Now that the cluster is set up, let us deploy your first Pod. A Pod is the smallest deployable unit in Kubernetes.
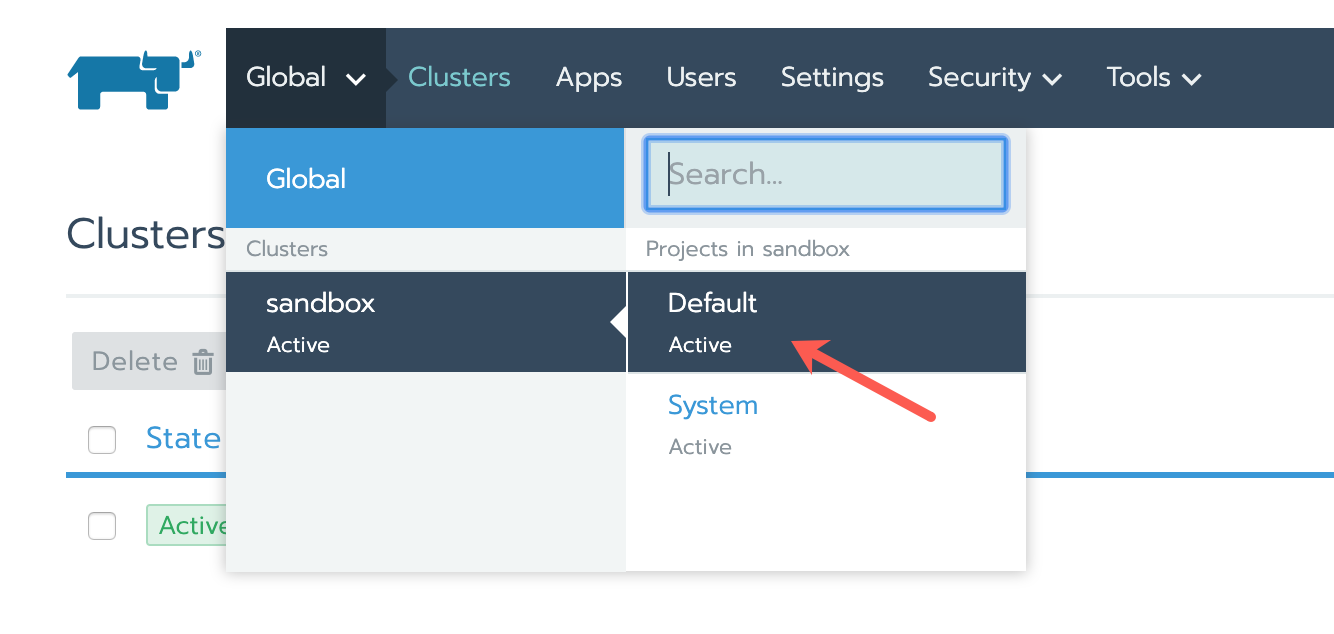
- In the top navigation bar, click Global, select your cluster, then choose Default from the drop-down menu:
- On the clusters dashboard, click Deploy:
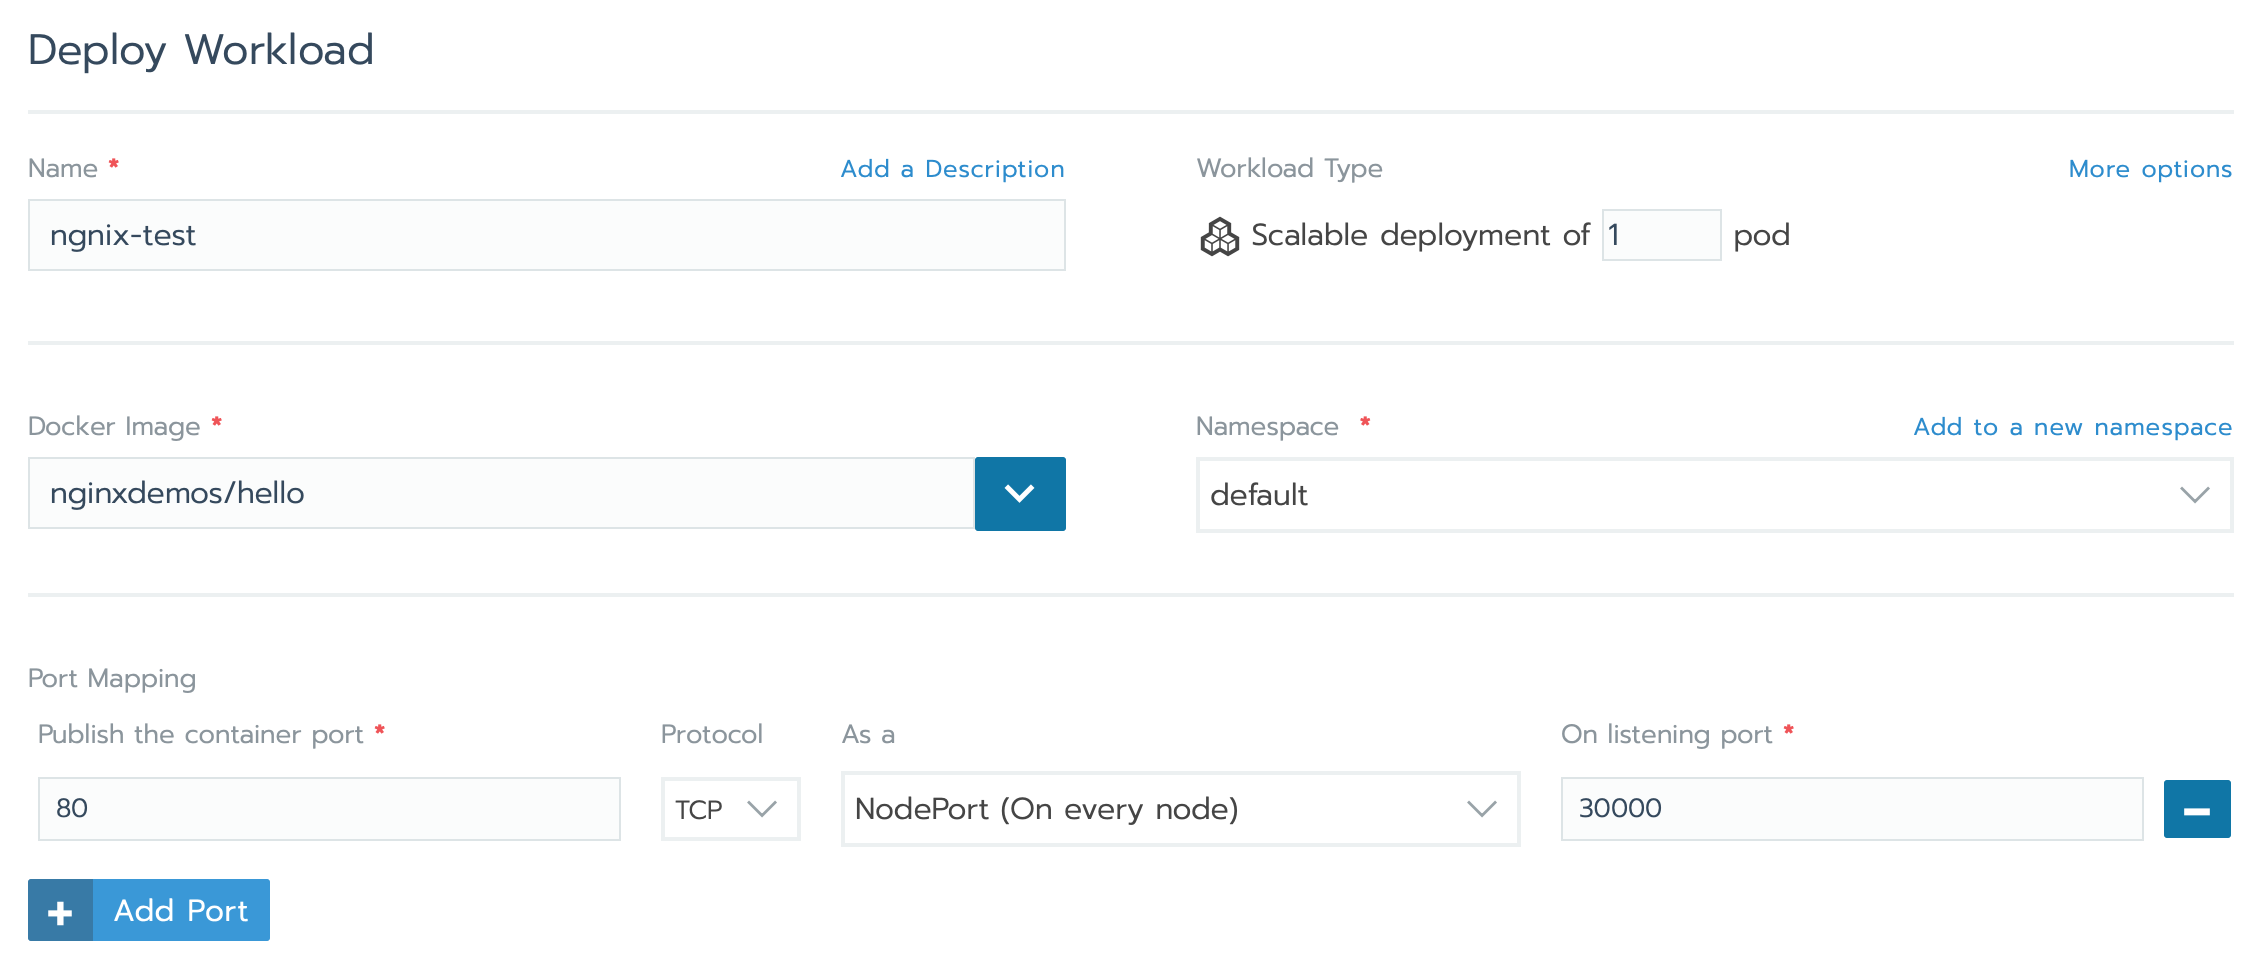
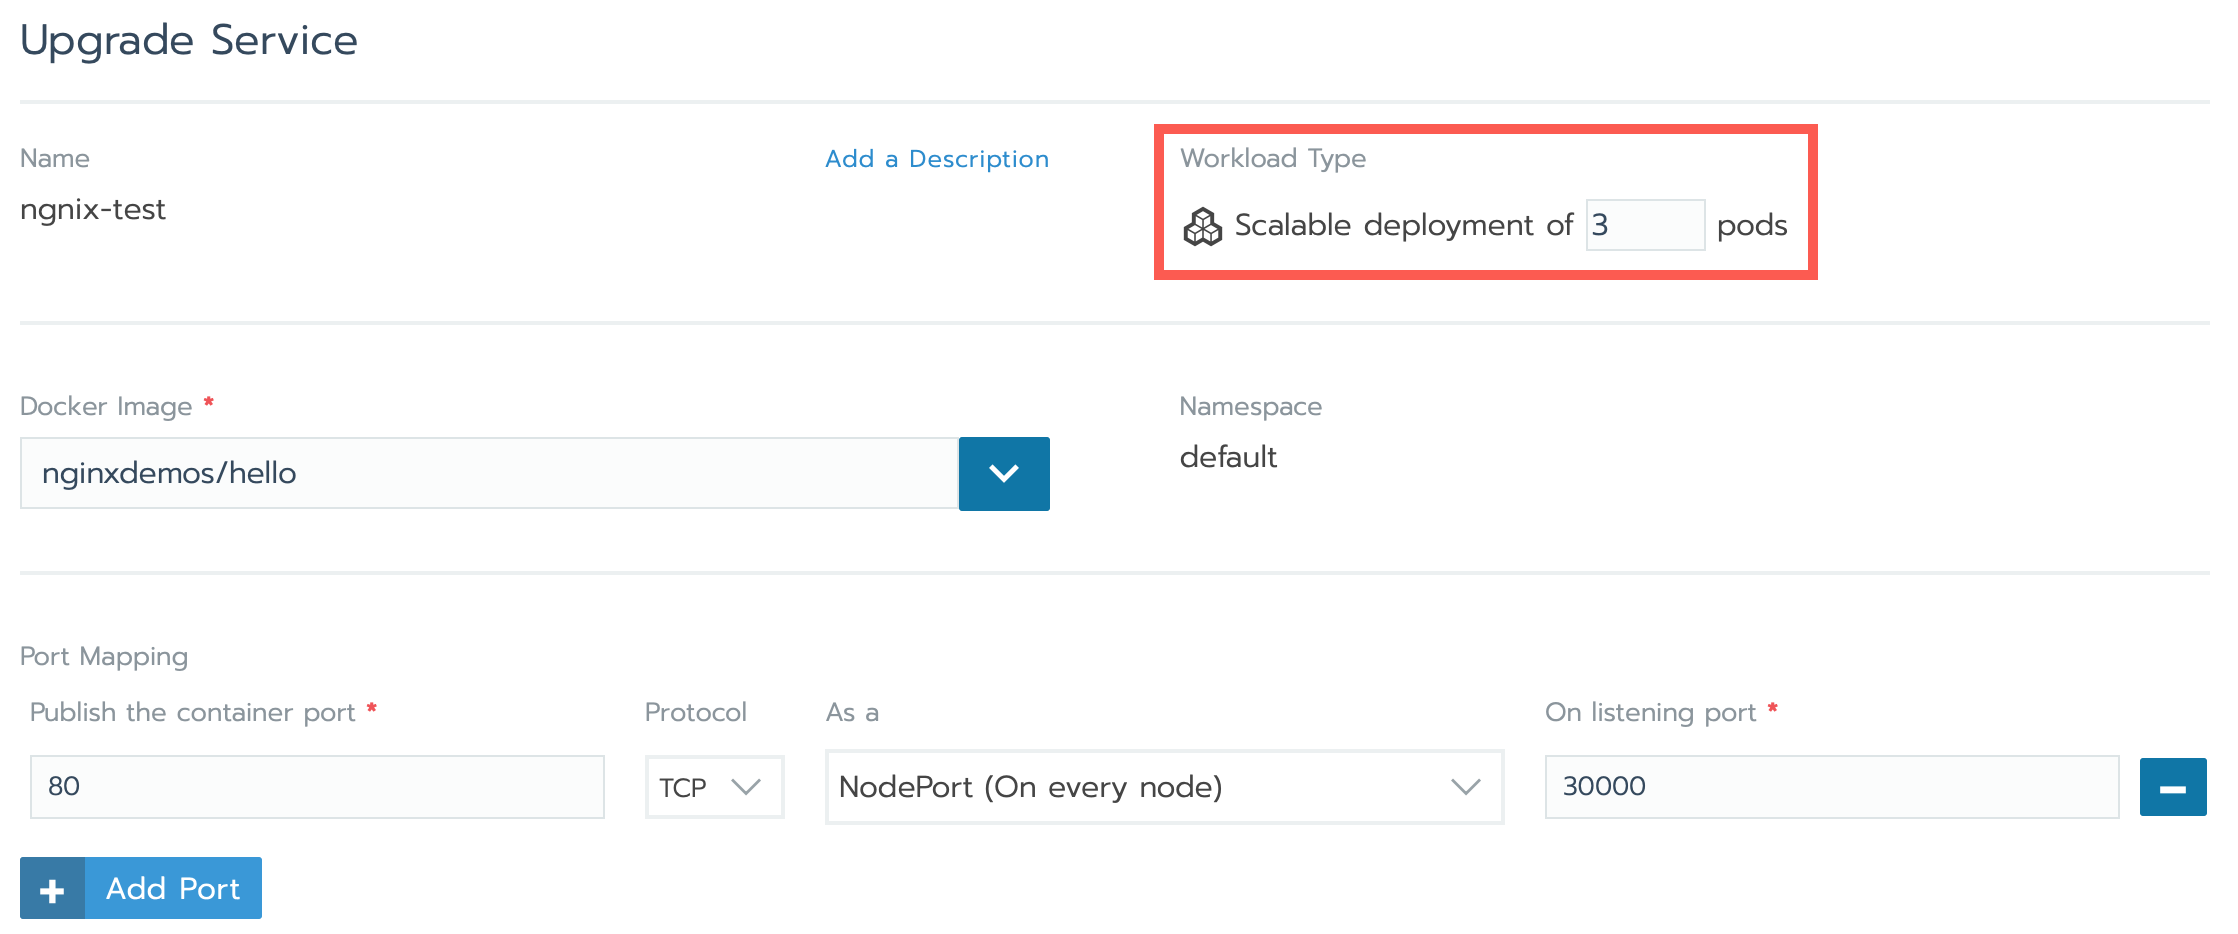
- Enter the details for the workload:
- Name: A friendly name for your workload.
- Docker Image: Enter
nginxdemos/helloto deploy a demo Nginx application. - Under Port Mapping, click Add port and set the following:
- Publish the container port:
80 - Protocol:
TCP - As a:
NodePort - Listening port:
30000
- Publish the container port:
- Click Launch to create the workload.
- After deployment, you can access the Nginx demo application by visiting
http://<rancher.example.com>:30000/in your web browser: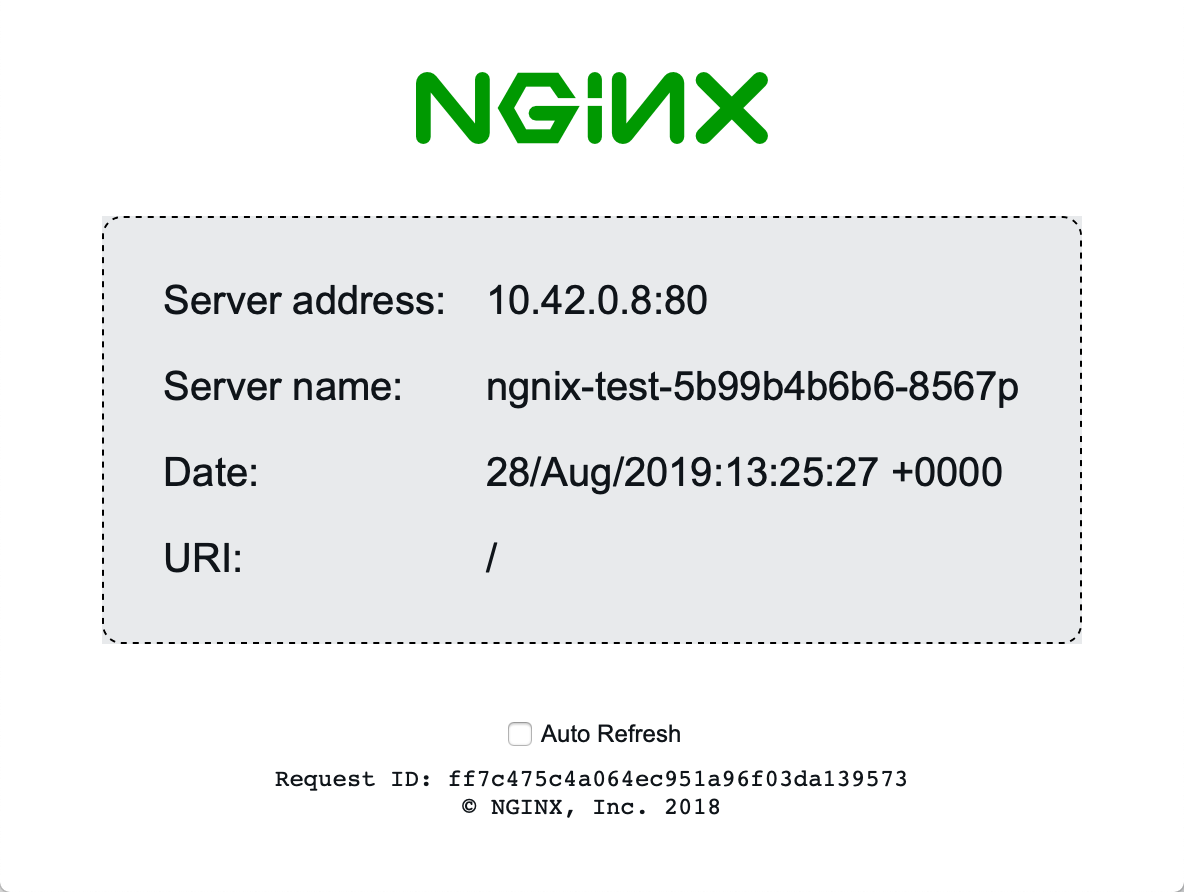
Scaling the cluster workload
Currently, the Nginx demo app is running on a single Pod. Let’s scale it to multiple Pods.
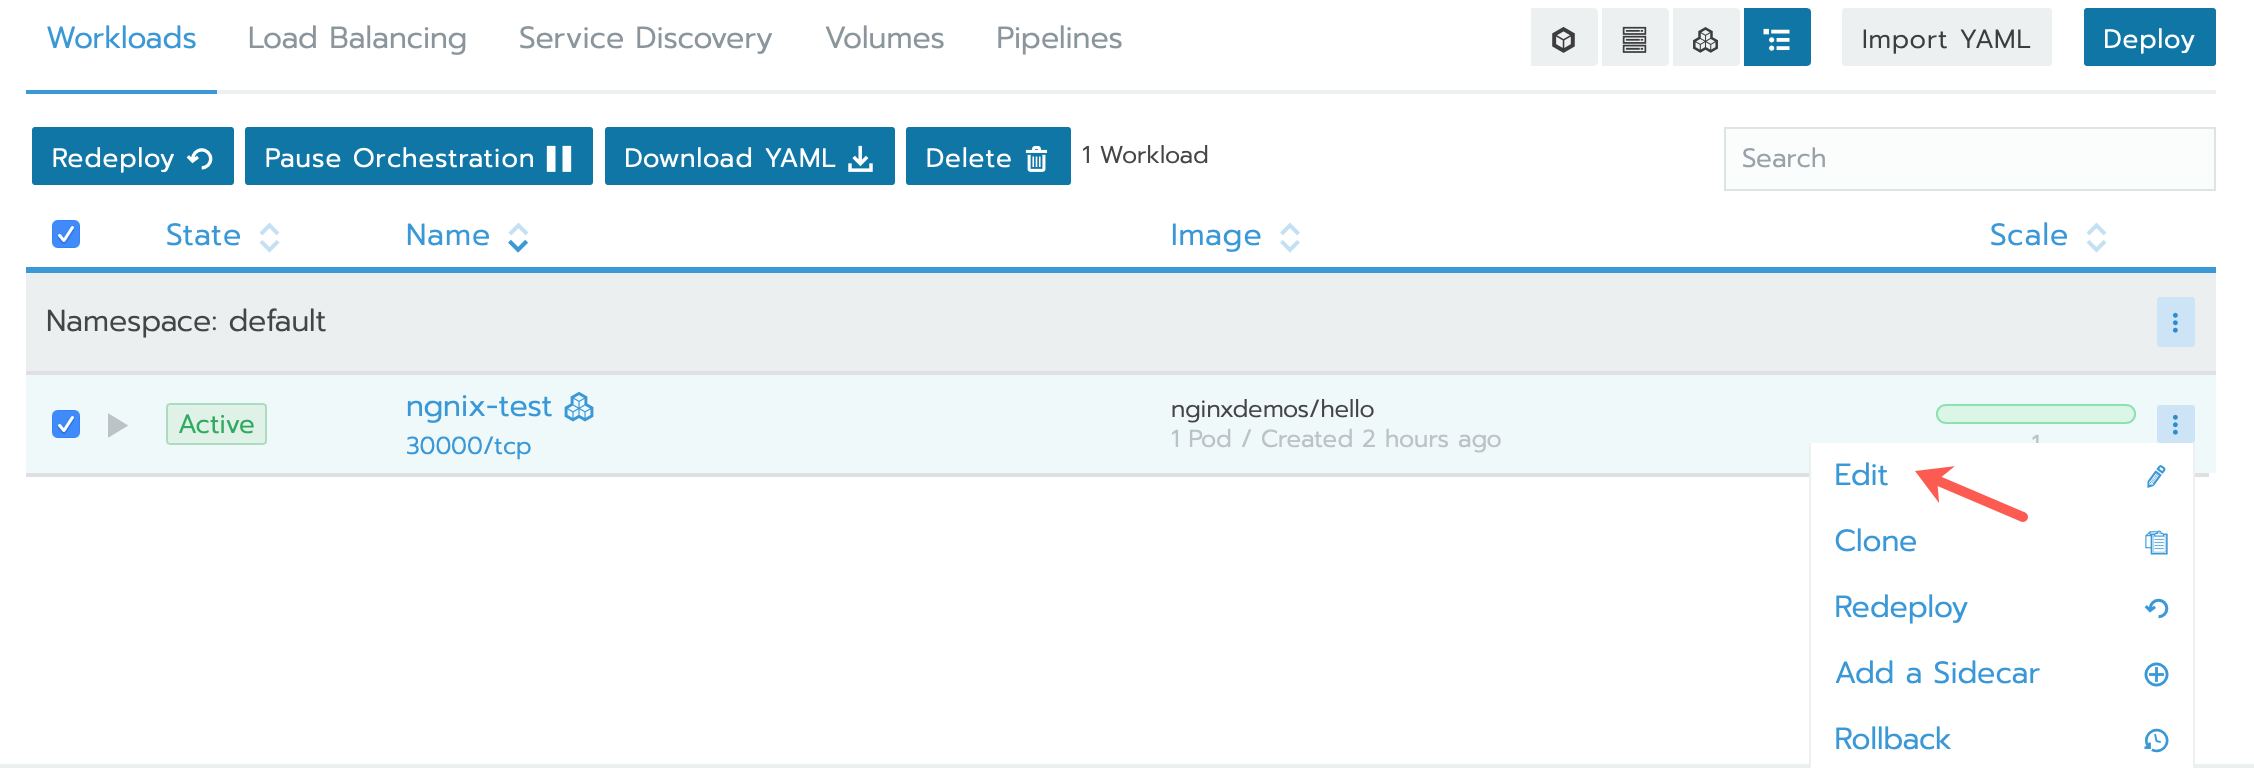
- From the cluster dashboard, click the ellipsis (…) next to your deployment and select Edit:
- Set the number of replicas for the workload to 3 to scale to 3 Pods:
- Click Save. Rancher will update the Kubernetes deployment to create 3 replicas of the Pod.

- To access the application running on the second Instance, visit
http://<second_instance_ip>:30000/in your browser. The Nginx demo application should display.
Security considerations and best practices
- SSL/TLS: Ensure your Rancher domain is configured with a valid SSL certificate for secure communication. The
--acme-domainoption in the Rancher Docker command automatically handles Let's Encrypt certificates. - Cluster security: It is a good practice to follow Kubernetes security guidelines for RBAC (Role-Based Access Control) and network policies when deploying to a production environment. For example, configure namespaces, enforce least-privilege access, and use network policies to control traffic between Pods.
- Backup & recovery: Regularly backup your Rancher configurations and Kubernetes data (e.g., etcd) to ensure you can restore your cluster in case of failure.
Going further
For more detailed documentation on Rancher and Kubernetes, check out the official docs:
Visit our Help Center and find the answers to your most frequent questions.
Visit Help Center