Configuring an InterLink
Once your InterLink has been created, you must complete a number of configuration steps to enable traffic to flow across the InterLink.
This document explains the process in full, and gives tips for troubleshooting any potential issues.
Configuration overview
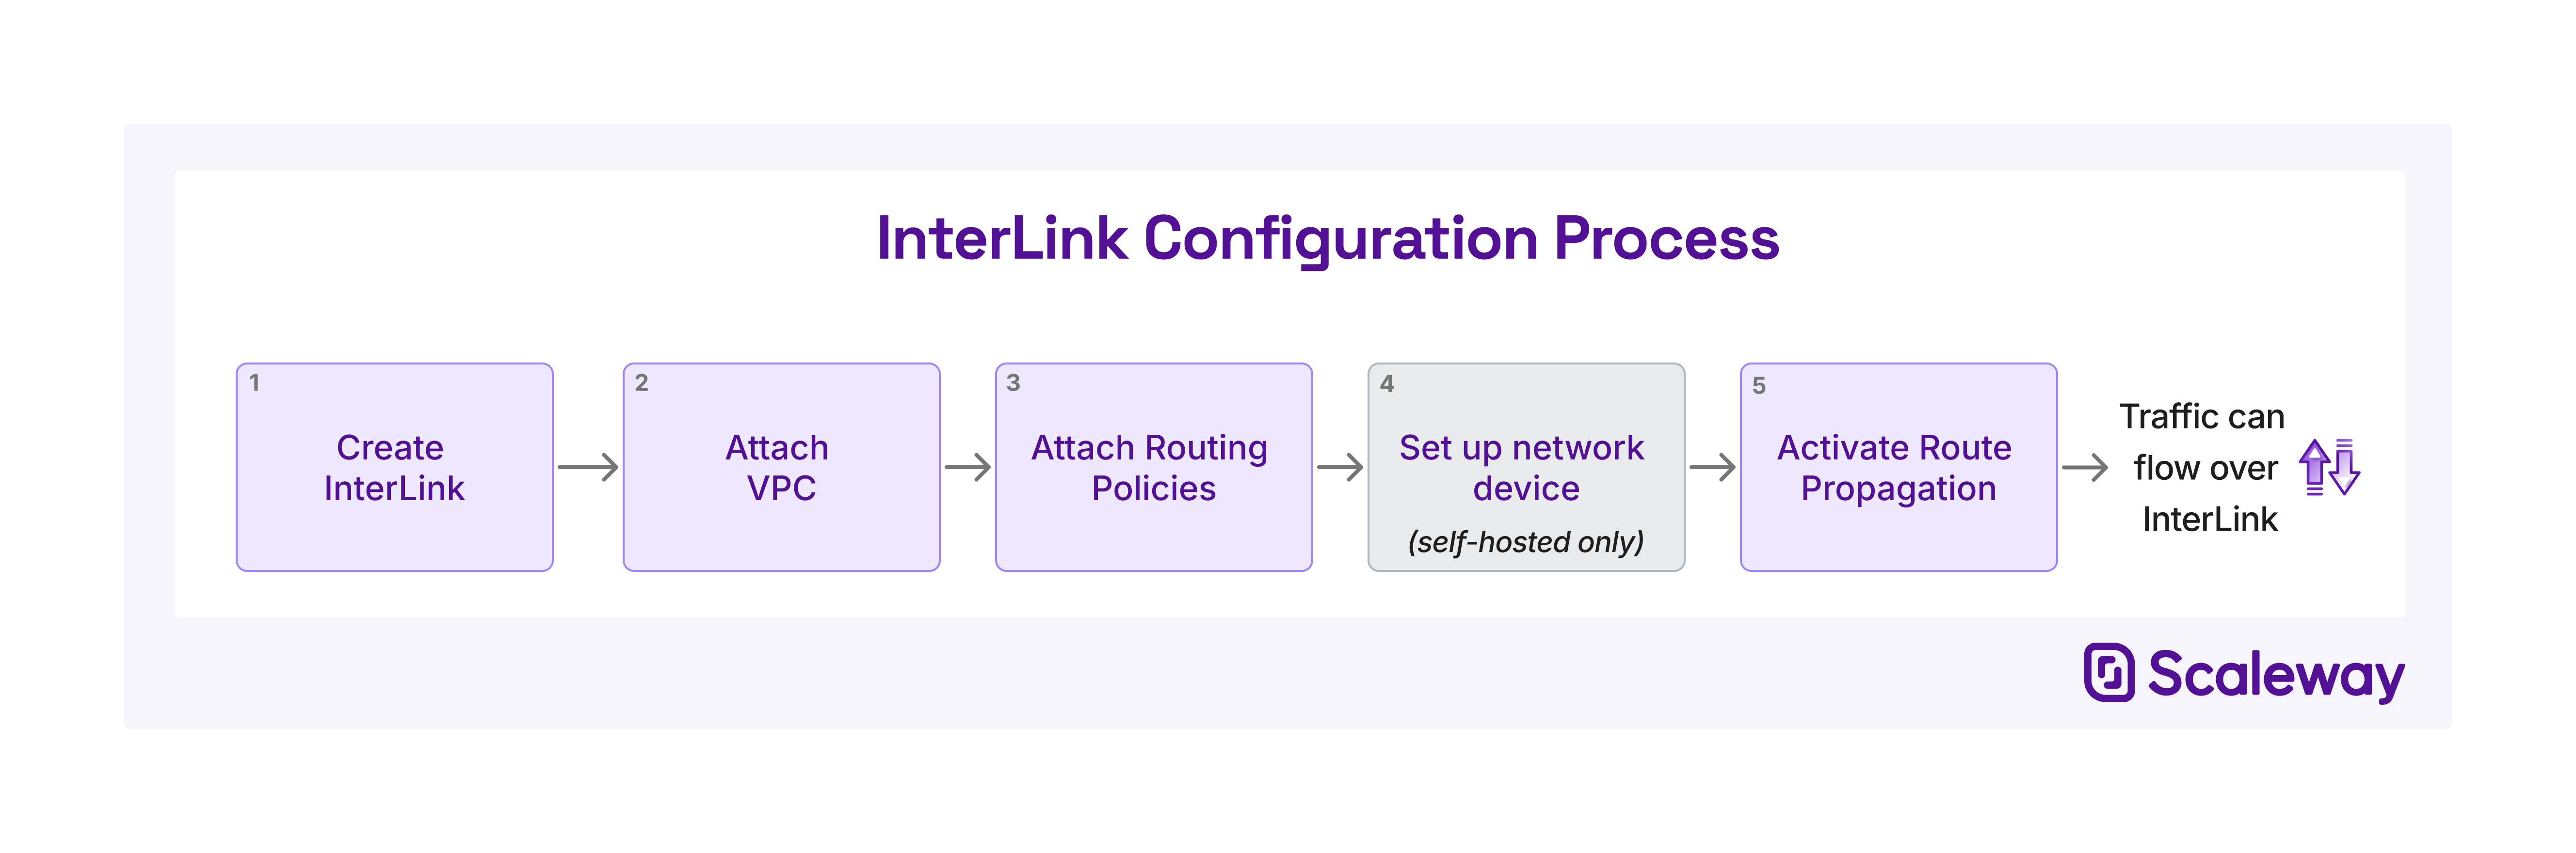
The diagram above shows the configuration steps necessary for an InterLink. Only when all steps have been completed can traffic flow across the InterLink, connecting the Scaleway VPC to the external (on-premises) infrastructure.
Read more about each step, and possible errors at each stage, in the following sections.
1. Create the InterLink
Creating an InterLink is itself a multi-step process:
- Hosted InterLinks: Order the dedicated physical connection from the Scaleway sales team, then create the InterLink via the Scaleway console or developer tools, specifying the dedicated physical connection to use.
- Self hosted InterLink: Create the InterLink via the Scaleway console or developer tools, then follow the multi-step process that requires action on both the Scaleway side, and on the partner side. This process is explained in full in Provisioning an InterLink.
You can carry out the following configuration steps even while the InterLink is in Requested or Provisioning state, although traffic will not flow across your InterLink until it is in Active state.
2. Attach VPC
Attaching an InterLink to a VPC allows you to complete the connection from your external infrastructure, across the InterLink, to the Scaleway resources in the selected VPC.
The VPC must be in the same region as the InterLink. An InterLink can only be attached to one VPC at a time, but you are free to detach the VPC and attach a different one whenever you like.
Follow the instructions for attaching a VPC via the console, or use the Attach a VPC endpoint of the API.
3. Attach routing policy
InterLink uses Border Gateway Protocol to exchange routing information between the customer’s infrastructure and the Scaleway VPC. Each side advertises IP prefixes for its own internal subnets and resources, to allow the other side to dynamically learn and update its internal routes, facilitating efficient traffic flow. However, by default, all routes across an InterLink are blocked. You must create and attach a routing policy for each IP traffic type (IPv4 and/or IPv6), to set IP prefix filters for the route advertisements you want to allow. This facilitates traffic flow across the InterLink.
Follow the instructions and tips for creating a routing policy, via the console. Alternatively, you can create and attach routing policies via the API.
See our dedicated documentation on using BGP communities to influence route priority for InterLink traffic.
4. Activate route propagation
Once you have attached a VPC and attached the routing policy(ies), you must activate route propagation to allow traffic to flow over the InterLink. This launches the BGP session between the two routers, so that all prefixes allowed in your routing policy can be announced and traffic can flow along these routes. See the documentation for activating route propagation via the API or the console
You can deactivate route propagation at any time. When you do this, all routes are blocked and removed from the VPC's route table. No traffic can flow across the InterLink until route propagation is reactivated.