How to use the preinstalled environment
GPU Instances have different types of preinstalled environments, depending on the OS image you chose during creation of the Instance:
| OS image | Image release type | Preinstalled on image | Working environment |
|---|---|---|---|
| Ubuntu Focal GPU OS 12 | Legacy | NVIDIA drivers, NVIDIA Docker environment (launch Docker container to access working environment) | Pipenv virtual environment accessed via Docker |
| Ubuntu Noble GPU OS 13 (NVIDIA) | Latest | NVIDIA drivers, Nvidia Docker environment (launch Docker container to access working environment) | Pipenv virtual environment accessed via Docker |
The Ubuntu Noble GPU OS 13 (NVIDIA) contains the latest version of the NVIDIA open-source drivers required for Blackwell GPU architecture.
Using the latest Ubuntu Noble GPU OS13 image gives you a minimal OS installation on which you can launch one of our ready-made Docker images. This gives you access to a preinstalled Python environment managed with pipenv. Several useful AI core packages and tools are installed, including scipy, numpy, scikit-learn, jupyter, tensorflow, and the Scaleway SDK. Depending on the Docker image you choose, other packages and tools will also be preinstalled, providing a convenient framework for you to begin work immediately.
Before you start
To complete the actions presented below, you must have:
- A Scaleway account logged into the console
- Owner status or IAM permissions allowing you to perform actions in the intended Organization
- A GPU Instance
- An SSH key added to your account
Working with the preinstalled environment on Ubuntu Bionic ML legacy images
-
Connect to your Instance via SSH.
You are now directly within the conda
aipreinstalled environment. -
Use the official conda documentation if you need any help managing your conda environment.
As Docker is also preinstalled, you could choose to launch one of Scaleway's ready-made Docker images to access our latest working environments, if you wish.
-
Type
exitto disconnect from your GPU Instance when you have finished your work.
Working with the preinstalled environment on Ubuntu Focal GPU OS 12
-
Connect to your Instance via SSH.
You are now connected to your Instance, and see your OS. A minimum of packages, including Docker, are installed. Pipenv is not preinstalled here. You must launch a Scaleway AI Docker container to access the preinstalled Pipenv environment.
-
Launch one of our ready-made Docker images.
You are now in the
aidirectory of the Docker container, in the activated Pipenv virtual environment, and can get right to work!
Launching an application in your local browser
Some applications, such as Jupyter Lab, Tensorboard and Code Server, require a browser to run. You can launch these from the ai virtual environment of your Docker container, and view them in the browser of your local machine. This is thanks to the possibility of adding port mapping arguments when launching a container with the docker run command. In our example, we added the port mapping arguments -p 8888:8888 -p 6006:6006 when we launched our container, mapping 8888:8888 for Jupyter Lab and 6006:6006 for Tensorboard.
-
Launch an application. Here, we launch Jupyter Lab:
jupyter-labWithin the output, you should see something similar to the following:
[I 2022-04-06 11:38:40.554 ServerApp] Serving notebooks from local directory: /home/jovyan/ai [I 2022-04-06 11:38:40.554 ServerApp] Jupyter Server 1.15.6 is running at: [I 2022-04-06 11:38:40.554 ServerApp] http://7d783f7cf615:8888/lab?token=e0c21db2665ac58c3cf124abf43927a9d27a811449cb356b [I 2022-04-06 11:38:40.555 ServerApp] or http://127.0.0.1:8888/lab?token=e0c21db2665ac58c3cf124abf43927a9d27a811449cb356b [I 2022-04-06 11:38:40.555 ServerApp] Use Control-C to stop this server and shut down all kernels (twice to skip confirmation). -
Open a browser window on your local computer, and enter the following URL. Replace
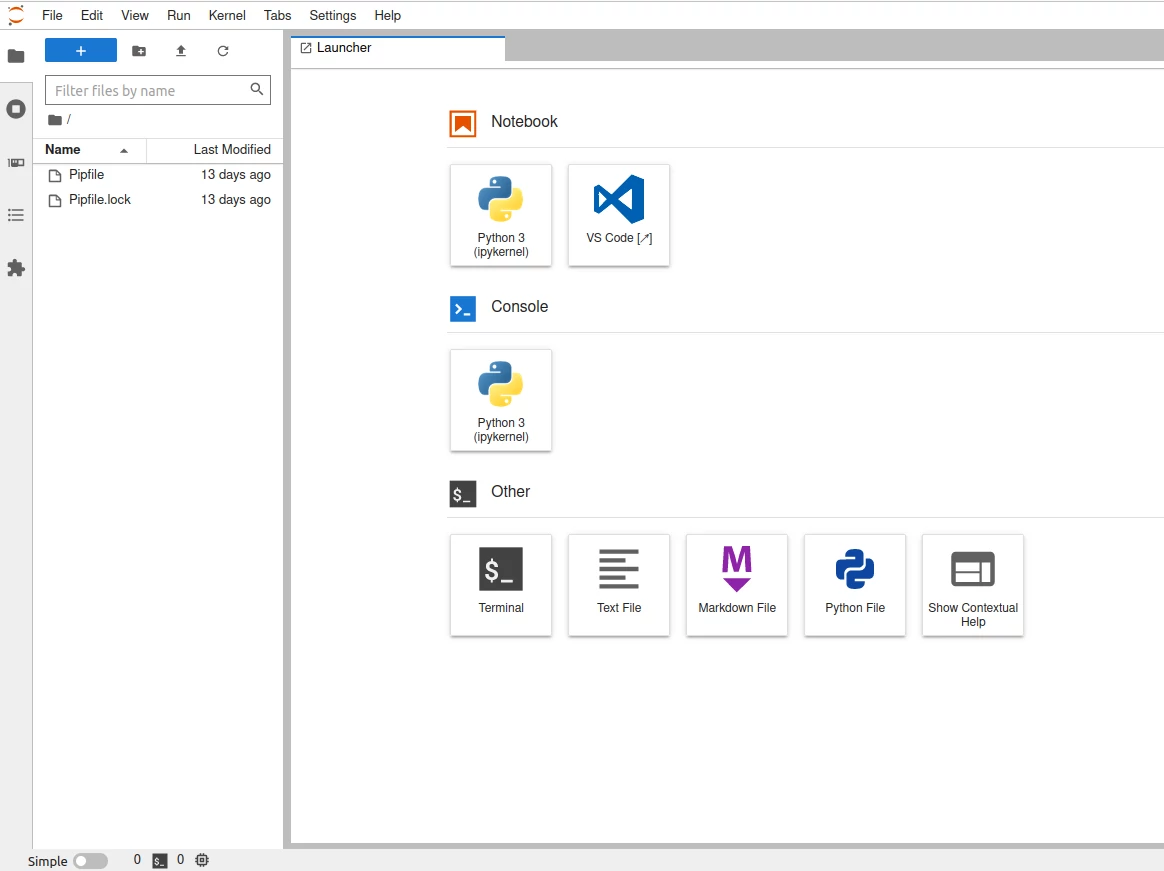
<ip-address>with the IP address of your Scaleway GPU Instance, and<my-token>with the token shown in the last lines of terminal output after thejupyter-labcommand.<ip-address>:8888/lab?token=<my-token>Jupyter Lab now displays in your browser. You can use the Notebook, Console, or other features as required:

You can display the GPU Dashboard in Jupyter Lab to view information about CPU and GPU resource usage. This is accessed via the System Dashboards icon on the left side menu (the third icon from the top).
-
Use CTRL+C in the terminal window of your GPU Instance / Docker container to close the Jupyter server when you have finished.
Exiting the preinstalled environment and the container
When you are in the activated Pipenv virtual environment, your command line prompt will normally be prefixed by the name of the environment. Here, for example, from (ai) jovyan@d73f1fa6bf4d:~/ai we see that we are in the activated ai environment, and from jovyan@d73f1fa6bf4d:~/ai that we are in the ~/ai directory of our container:
-
Type
exitto leave the preinstalledaienvironment.You are now outside the preinstalled virtual environment.
-
Type
exitagain to exit the Docker container.Your prompt should now look similar to the following. You are still connected to your GPU Instance, but you have left the Docker container:
root@scw-name-of-instance:~# -
Type
exitonce more to disconnect from your GPU Instance.