How to create frontends and backends
When you create a Load Balancer, you can either add frontends and backends during the initial creation process, or you can create your Load Balancer without any frontends or backends and add them later. This page explains how to create and configure frontends and backends for your Load Balancer at any stage.
Before you start
To complete the actions presented below, you must have:
- A Scaleway account logged into the console
- Owner status or IAM permissions allowing you to perform actions in the intended Organization
How to create a frontend during creation of your Load Balancer
-
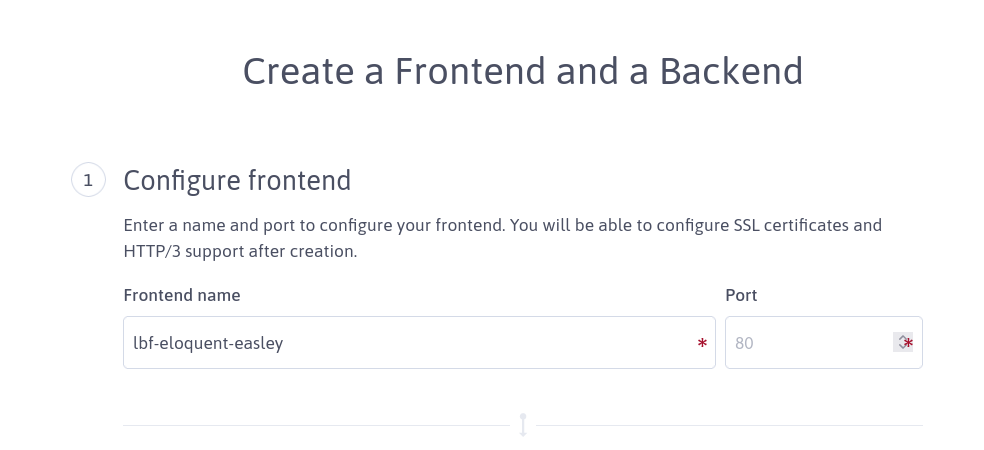
Follow the steps for creating a Load Balancer. At the last stage, click Add frontend and backend. The following screen displays, the first step inviting you to configure a frontend:

-
Enter a name for your frontend.
-
Enter a port number. The frontend will listen on this port, and forward the requests it receives from clients to the backend(s). Note that you cannot add an SSL certificate at this stage, but you can add one after the creation of the Load Balancer. Similarly, you will be able to enable HTTP/3 after adding a certificate.
Continue to the next section for configuring a backend. You will finalize creation of your frontend and backend at the same time, at the end of this section.
How to create a backend during creation of your Load Balancer
Follow the steps for creating a Load Balancer and creating a frontend. After configuring your frontend, the next section of the screen displays as shown below, inviting you to configure a backend.
Configuring basic settings
-
Enter a name for your backend.
-
Enter a protocol and port for your backend. The Load Balancer initiates connections to its backend servers using the protocol and port you define here. Available protocols are HTTP or TCP.
-
Choose whether to activate TLS encryption (default setting is deactivated), to encrypt connections between the Load Balancer and its backend servers.
-
Choose whether to activate proxy protocol (default setting is deactivated), to transfer connection information from the client through the Load Balancer and on to the destination backend server. If you choose to activate proxy protocol, you are prompted to select the version to use.
Continue to the next section for configuring traffic management.
Configuring traffic management
Traffic management configuration lets you define how your Load Balancer's backend forwards traffic to its final destination backend servers.
-
Select a balancing method. This determines how the backend distributes requests between its backend servers. The following methods are available:
- Round-robin (default): Requests are sent to each backend server in turn.
- Least connections: Requests are forwarded to the backend server with the fewest current connections.
- First available: Requests are forwarded to the first backend server with available connection slots.
-
Add the Server IP addresses of the servers the Load Balancer will forward requests/connections to. These will be your backend servers. They must be Scaleway resources (Instances, Elastic Metal or Dedibox servers) unless you have a Multi-Cloud Load Balancer, in which case this restriction does not apply. Scaleway backend servers can be in any AZ, and are not restricted to the same AZ as the Load Balancer.
-
Choose whether to activate sticky sessions (default setting is deactivated). Sticky sessions enable the Load Balancer to bind a given user's sessions to a specific backend server. If you choose to activate sticky sessions, you are prompted to select either IP-based (clients' IPs are used to bind sessions) or cookie-based (an HTTP cookie is used to bind sessions, and you must choose a name for the cookie).
Continue to the next section for configuring advanced settings.
Configuring advanced settings
Advanced settings are already configured for you at recommended default values. However, if you wish to modify these values you can do so by clicking the Advanced settings button, to access parameters for timeout values, backend protection, connection retries and a customized error page.
Continue to the next section for configuring health checks.
Configuring health checks
Health checks are regular, automized attempts by the Load Balancer to communicate with backend servers. This ensures that servers are listening and healthy.
-
Select a health check type. Various protocols are available, including HTTP, TCP, MYSQL, and more. Depending on the health check type you choose, you may be prompted to enter additional information.
-
Choose whether to use proxy protocol during health checks. Proxy protocol enables the original client IP address to be passed to the backend server in a standardized way during health checks. The proxy protocol setting for health checks is inherited from the backend configuration but you can choose to override it. For more information, click the link in the green tip box below.
-
Choose whether to edit more settings for health checks by clicking the Advanced settings button. Otherwise, these settings will be left at the recommended default values.
Confirming creation of your frontend and backend
When you have finished configuring your frontend and backend, click Create frontend and backend at the bottom of the page. The frontend and backend are created and attached to the Load Balancer.
How to create a frontend after creation of your Load Balancer
You can add one or many frontends to your Load Balancer after its creation. Follow the steps below.
-
Click Load Balancers in the Network section of the Scaleway console side menu. A listing of your Load Balancers displays.
-
Use the region selector at the top of the page to filter for the region of the Load Balancer you want to configure, then click the Load Balancer in the listing. The Load Balancer's Overview page displays.
-
Click the Frontends tab.
-
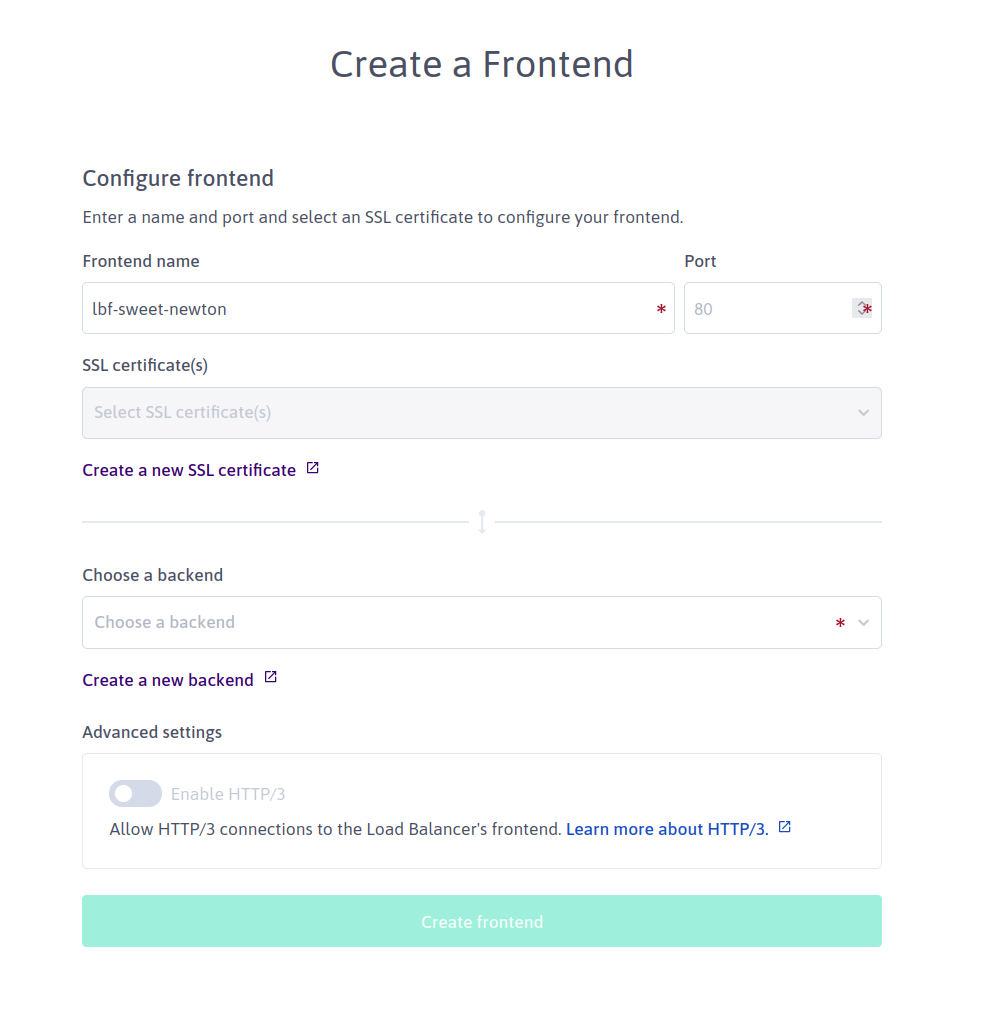
Click the + Add frontend button. The frontend creation wizard displays.

-
Enter a name, port and (if necessary) SSL certificate(s) for your new frontend. Note that each frontend must listen on a different port.
-
Choose a backend to attach the frontend to, from the drop-down list provided. Alternatively, you can click the link to create a new backend, which opens the backend creation wizard in a new screen.
-
Under Advanced Settings, optionally use the toggle icon to enable HTTP/3. The availability of this setting depends on your Load Balancer's configuration.
-
Click Create frontend.
How to create a backend after creation of your Load Balancer
You can add one or many backends to your Load Balancer after its creation. Follow the steps below.
-
Click Load Balancers in the Network section of the Scaleway console side menu. A listing of your Load Balancers displays.
-
Use the region selector at the top of the page to filter for the region of the Load Balancer you want to configure, then click the Load Balancer in the listing. The Load Balancer's Overview page displays.
-
Click the Backends tab.
-
Click the + Add backend button. The backend creation wizard displays.
-
Follow the steps above for configuring basic settings, configuring traffic management, configuring advanced settings and configuring health checks
-
Click Create backend at the bottom of the page to finish.