How to add a custom domain to a container
Each container comes with an automatically generated domain, on which it is available. However, it is possible to use your own domain name to address your containers to facilitate their use.
Before you start
To complete the actions presented below, you must have:
- A Scaleway account logged into the console
- Owner status or IAM permissions allowing you to perform actions in the intended Organization
- A running Serverless Container
- Registered a domain name with the provider of your choice and have access to the domain name's DNS zone file
-
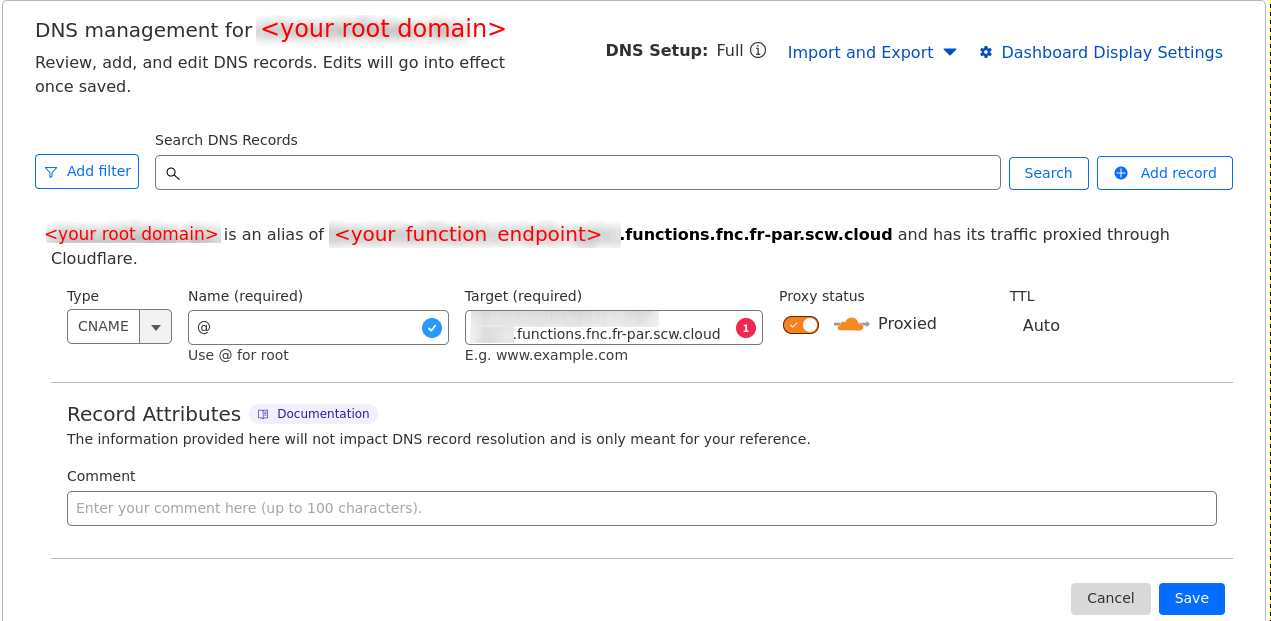
On your domain provider's platform (for example, Scaleway domains), add a CNAME record pointing to your container default URL in the domain's DNS zone file.
-
Before continuing, make sure the DNS entry is available. If not, the custom domain will likely end up in
erroron step 6. You can check this by:- running
dig,drillornslookupcommands on your domain using common DNS resolvers1.1.1.1and8.8.8.8:
dig <your_custom_domain> @1.1.1.1 dig <your_custom_domain> @8.8.8.8- using a DNS check tool of your choice (some are available online)
- running
-
Click the Endpoints tab on your containers' page.
-
Click + Add endpoint.
-
Enter your custom domain name and validate the form.
-
Connect to your container through that custom domain once the custom domain status is
ready.
Technical details
Read this section if you want more details about how custom domains are handled.
When adding a custom domain, the following tasks are performed on Scaleway's side:
-
Configure the custom domain on our gateways, so that they can handle traffic for that custom domain.
-
Ensure that the custom domain points to one of the Serverless Container existing endpoints: either the default one
....functions.fnc.<region>.scw.cloud, or an existing custom domain. -
If step 2 is OK, generate a dedicated TLS certificate for that custom domain so it can answer to HTTPS requests.
During the configuration of a custom domain (pending status), callers will likely receive HTTP 404 errors, while our gateways are reconfiguring themselves.
The last 2 steps above are done simultaneously with a HTTP-01 challenge. If that challenge does not succeed after 3 minutes:
- The custom domain will be put in
errorstatus. - The custom domain will not be reachable (in HTTP or HTTPS).
- No TLS certificate will be generated.
If the HTTP-01 challenge fails and the custom domain is in error status, see the dedicated troubleshooting page.
Migrating an active domain
Read this section if you are trying to migrate a domain that is already serving a live website/API/web application, but not yet hosted on a Serverless Container.
To clarify, let's take a concrete example:
- your website is hosted on a Scaleway Instance, with the IP
51.15.x.x - you own a domain
mydomain.com - an
Arecord is configured onwebsite.mydomain.comand points to51.15.x.x - when a client accesses
http://website.mydomain.com, the request hits your Instance IP51.15.x.x:80 - you also have a running version of your website hosted as a Serverless Container (only accessible using
example-website.functions.fnc.fr-par.scw.cloud), and now you want your users to access this version fromhttp://website.mydomain.com
Before adding the custom domain on your Serverless Container, you must change the DNS record to point to the Serverless Container endpoint:
- before:
website.mydomain.comis an A record to51.15.x.x - after:
website.mydomain.comis a CNAME record toexample-website.functions.fnc.fr-par.scw.cloud
By doing this, clients that already have the website.mydomain.com DNS record cached locally will continue to hit 51.15.x.x, until the TTL expires. New clients (or those whose cache has expired) will start to hit example-website.functions.fnc.fr-par.scw.cloud. However, as long as the custom domain is not configured on the Serverless Container, these requests will end up in 404, because website.mydomain.com is not (yet) known in our infrastructure. Depending on your downtime tolerance (clients receiving 404) for a few minutes, there are 2 cases:
- downtime is acceptable or can be planned (e.g. during the night or when there is less traffic on your website). In that case, after creating the CNAME record, and once you are sure DNS is available everywhere, create the custom domain on the Serverless Container. Once ready, requests to
http://website.mydomain.comwill hit your Serverless Container (no more 404). - downtime is not acceptable. Unfortunately, this is not possible right now out-of-the-box. To serve requests from
website.mydomain.com, our infrastructure must know it, so a custom domain has to be configured. However, for the custom domain to be configured, the DNS record must point to the Serverless Container endpoint, resulting in a chicken-and-egg problem. To handle such scenarios, a CDN can be configured to serve a cached version of your website while the domain is being reconfigured (for example withstale-if-erroroption). If you choose this solution, be sure to disable caching on routes starting with/.well-known/acme-challengeto avoid issues described in the "Technical details" section.